Introduction
This guide demonstrates how to safely remove and replace a damaged or malfunctioning keyboard. Following these steps should ensure a simple replacement for a keyboard that has experienced a spill, is missing keys, or otherwise does not function correctly.
What you need
-
-
-
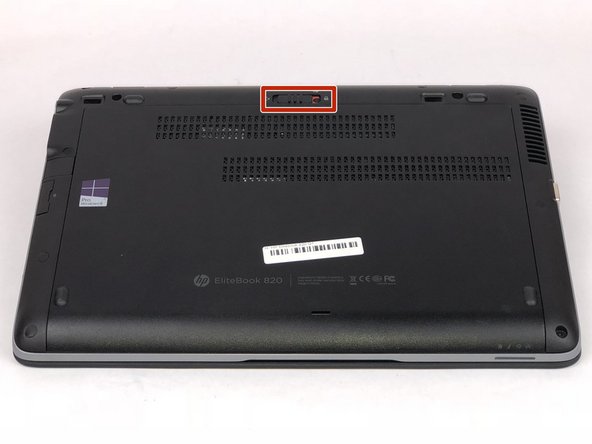
Remove the two Phillips #0 screws securing the keyboard to the laptop.
-
Turn the laptop over and lift the display to reveal the keyboard.
-
-
-
Insert the plastic spudger between the keyboard and the housing.
Bei mir ging es am Besten mit einem dünnen Plektrum. Außerdem war es am oberen Rand so eng, dass ich überhaupt nicht dazwischen kam. An der oberen rechten Ecke seitlich ging es dann gut.
-
-
-
Flip up the connecting flap on each of the three ribbon cables.
This is all very helpful, thank you.
Just a query. When I took my keyboard off I appeared to have only two ribbons in the existing keyboard, the broadest one and the one of the back light (towards the middle) that didn’t work. The third right next to the broadest ribbon was absent altogether. Why? What was it for? Thanks
-


To reassemble your device, follow these instructions in reverse order.
To reassemble your device, follow these instructions in reverse order.
Cancel: I did not complete this guide.
4 other people completed this guide.
Team

IUPUI, Team S1-G2, Harley Fall 2018 Member of IUPUI, Team S1-G2, Harley Fall 2018
IUPUI-HARLEY-F18S1G2
2 Members
4 Guides authored
One Comment
Good guide. Thanks!
But you missed step 1. Remove two screws that hold the keyboard in place