
HP Chromebook 11-v019wm Battery Replacement

What you need

  1. HP Chromebook 11-v019wm Battery Replacement, Keyboard: step 1, image 1 of 1
    • Disconnect the power adapter from the charging port and remove all external media devices from the Chromebook.

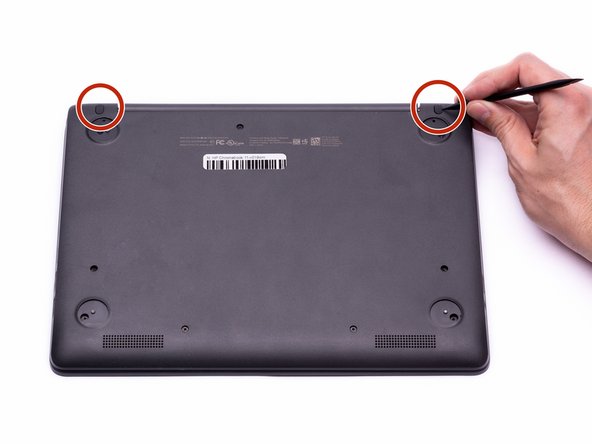
    • Turn the Chromebook over so the bottom of the computer is facing upwards with the hinge facing away.

  2. HP Chromebook 11-v019wm Battery Replacement: step 2, image 1 of 2 HP Chromebook 11-v019wm Battery Replacement: step 2, image 2 of 2
    • Remove the (4) rubber feet with the plastic spudger to reveal the screws underneath.

    • The rubber feet are secured with adhesive and may take time to remove.

  3. HP Chromebook 11-v019wm Battery Replacement: step 3, image 1 of 2 HP Chromebook 11-v019wm Battery Replacement: step 3, image 2 of 2
    • Remove the (2), oval shaped, rubber screw protectors near the hinge of the Chromebook.

    • The rubber screw protectors are secured with adhesive and may take time to remove.

  4. HP Chromebook 11-v019wm Battery Replacement: step 4, image 1 of 2 HP Chromebook 11-v019wm Battery Replacement: step 4, image 2 of 2
    • Remove the (11) 5.2 mm screws using a Phillips #00 Screwdriver.

  5. HP Chromebook 11-v019wm Battery Replacement: step 5, image 1 of 2 HP Chromebook 11-v019wm Battery Replacement: step 5, image 2 of 2
    • Place the Chromebook upright and open the screen all the way.

    • Starting towards the hinge, insert the spudger between the silver keyboard decking and the charcoal colored casing.

    • Pry upwards to release the tabs that are securing the keyboard to the casing.

    • Repeat this process around the perimeter of the keyboard to ensure all tabs are released.

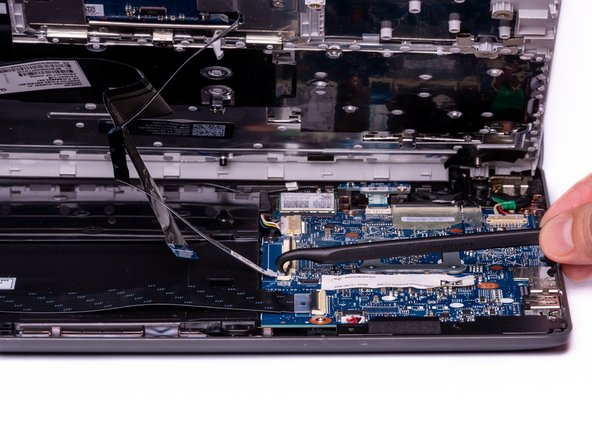
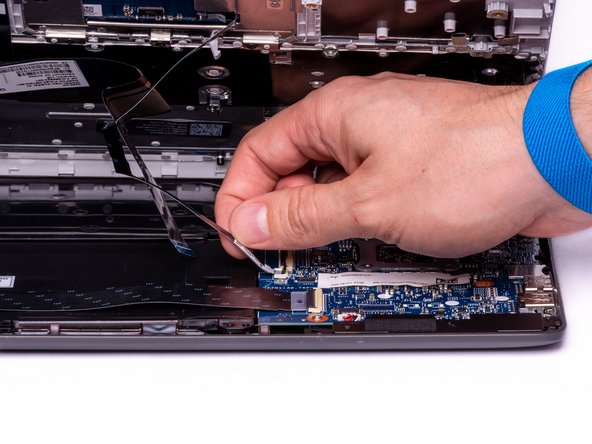
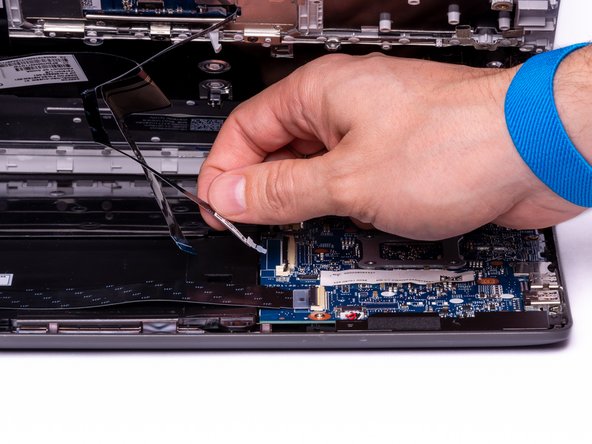
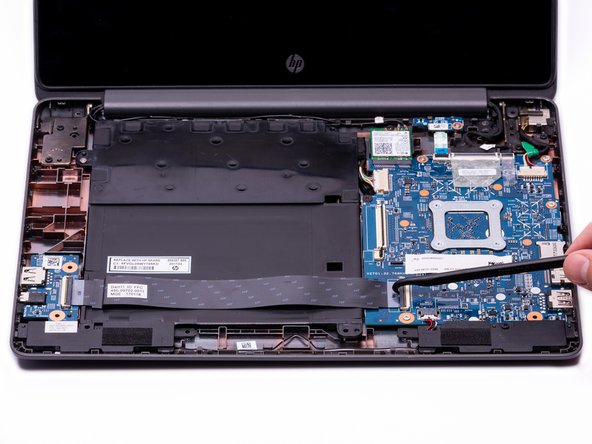
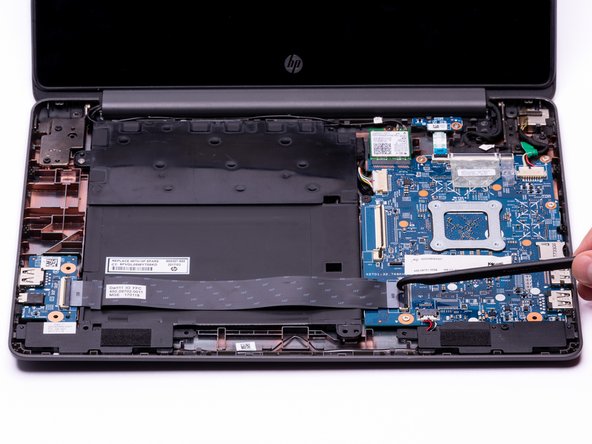
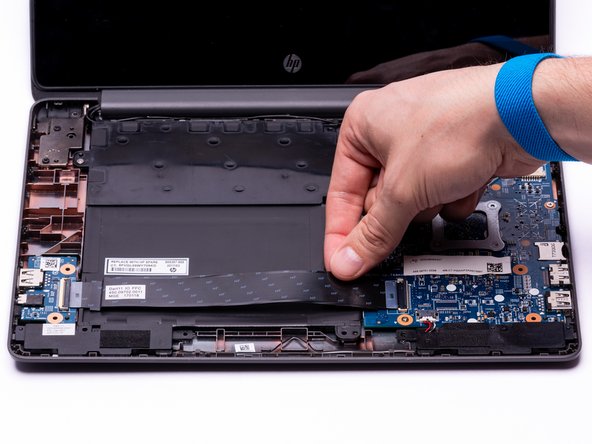
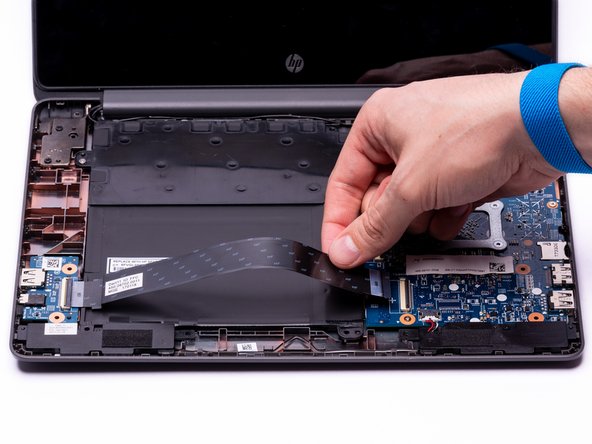
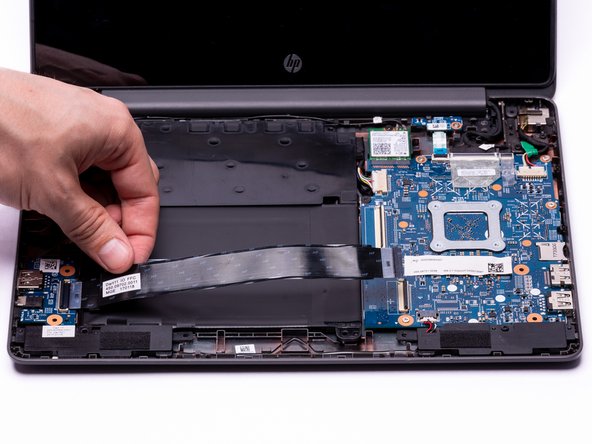
    • Once all the tabs are released, gently lift the keyboard to gain access to the (2) Zero Insertion Force (ZIF) ribbon cables.

  6. HP Chromebook 11-v019wm Battery Replacement: step 6, image 1 of 3 HP Chromebook 11-v019wm Battery Replacement: step 6, image 2 of 3 HP Chromebook 11-v019wm Battery Replacement: step 6, image 3 of 3
    Tool used on this step:
    Anti-Static Wrist Strap
    $7.95
    Buy
    • Using the hook on the Halberd Spudger, lift up the ZIF connector tab for the keyboard ribbon cable. They keyboard ribbon cable is the larger of the two ribbon cables.

    • The remaining steps should be completed with the anti-static wrist strap to prevent damage to electrostatic discharge (ESD) sensitive components.

  7. HP Chromebook 11-v019wm Battery Replacement: step 7, image 1 of 3 HP Chromebook 11-v019wm Battery Replacement: step 7, image 2 of 3 HP Chromebook 11-v019wm Battery Replacement: step 7, image 3 of 3
    • With the ZIF connector tab in the upright position, use your fingers to gently pull the keyboard ribbon cable out of the ZIF connector.

  8. HP Chromebook 11-v019wm Battery Replacement: step 8, image 1 of 3 HP Chromebook 11-v019wm Battery Replacement: step 8, image 2 of 3 HP Chromebook 11-v019wm Battery Replacement: step 8, image 3 of 3
    • With the hook on the Halberd Spudger, lift the ZIF connector that is holding the Touchpad ribbon cable. The Touchpad ribbon cable is the smaller of the two ribbon cables.

  9. HP Chromebook 11-v019wm Battery Replacement: step 9, image 1 of 3 HP Chromebook 11-v019wm Battery Replacement: step 9, image 2 of 3 HP Chromebook 11-v019wm Battery Replacement: step 9, image 3 of 3
    • With the ZIF connector tab in the upright position, use your fingers to gently pull the Touchpad ribbon cable out of the ZIF connector.

  10. HP Chromebook 11-v019wm Battery Replacement: step 10, image 1 of 1
    • With both ribbon cables disconnected, the keyboard can now be safely removed from the Chromebook.

  11. HP Chromebook 11-v019wm Battery Replacement, Battery: step 11, image 1 of 3 HP Chromebook 11-v019wm Battery Replacement, Battery: step 11, image 2 of 3 HP Chromebook 11-v019wm Battery Replacement, Battery: step 11, image 3 of 3
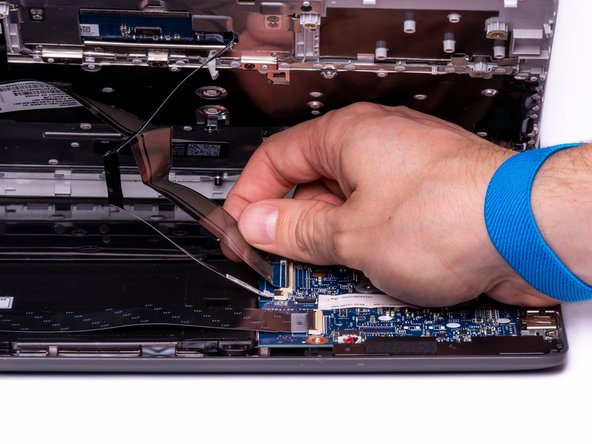
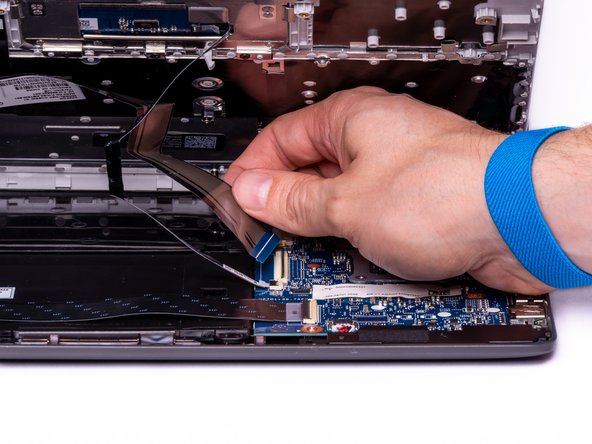
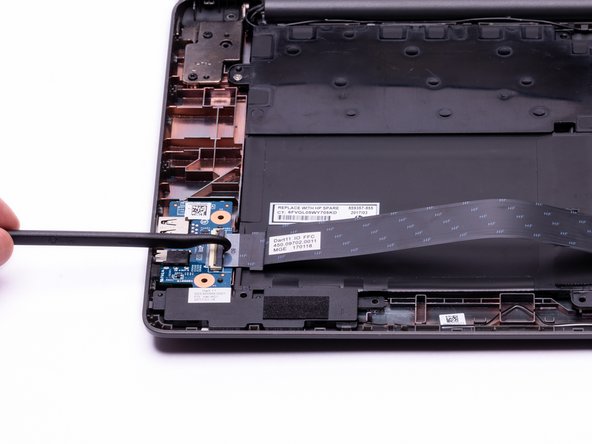
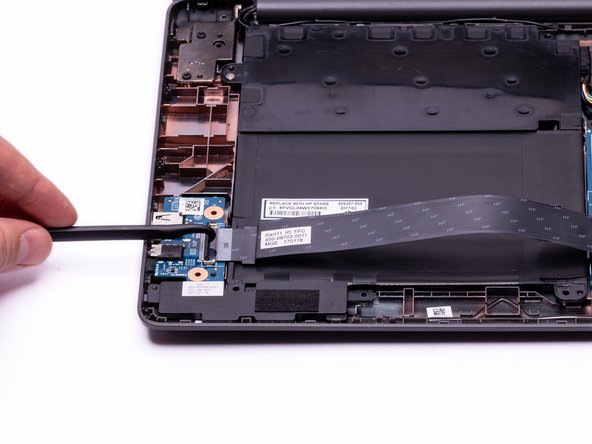
    • Using the hook on the halberd spudger, lift the external media board ZIF connector attached to the motherboard.

    • The external media ribbon cable spans across the battery and is connected to the external media board on the left, and motherboard on the right.

  12. HP Chromebook 11-v019wm Battery Replacement: step 12, image 1 of 3 HP Chromebook 11-v019wm Battery Replacement: step 12, image 2 of 3 HP Chromebook 11-v019wm Battery Replacement: step 12, image 3 of 3
    • With the external media board ZIF connector lifted, using your fingers, gently remove the media cable from the motherboard.

  13. HP Chromebook 11-v019wm Battery Replacement: step 13, image 1 of 3 HP Chromebook 11-v019wm Battery Replacement: step 13, image 2 of 3 HP Chromebook 11-v019wm Battery Replacement: step 13, image 3 of 3
    • Using the hook on the halberd spudger lift the ZIF connector on the External Media Board.

  14. HP Chromebook 11-v019wm Battery Replacement: step 14, image 1 of 3 HP Chromebook 11-v019wm Battery Replacement: step 14, image 2 of 3 HP Chromebook 11-v019wm Battery Replacement: step 14, image 3 of 3
    • With the ZIF connector in the upright position, use your fingers to gently remove the media cable completely from the computer assembly.

  15. HP Chromebook 11-v019wm Battery Replacement: step 15, image 1 of 3 HP Chromebook 11-v019wm Battery Replacement: step 15, image 2 of 3 HP Chromebook 11-v019wm Battery Replacement: step 15, image 3 of 3
    • Use either end of the spudger to remove the battery bundled cable connector from the motherboard.

  16. HP Chromebook 11-v019wm Battery Replacement: step 16, image 1 of 2 HP Chromebook 11-v019wm Battery Replacement: step 16, image 2 of 2
    • Using a Phillips #00 Screwdriver, remove the two silver 3.4 mm screws from the battery.

    • Using a Phillips #00 Screwdriver, remove the black 4.8 mm screw from the battery. This screw also secures the left speaker to the casing.

  17. HP Chromebook 11-v019wm Battery Replacement: step 17, image 1 of 2 HP Chromebook 11-v019wm Battery Replacement: step 17, image 2 of 2
    • Gently lift the battery out of the casing.

    • The WLAN Antenna cables run through a tab in the top left corner of the battery. To avoid damaging the cable, ensure the WLAN Antenna cables are out of the way before removing the battery.

Conclusion

To reassemble your device, follow these instructions in reverse order.

0 Comments

Add Comment

View Statistics:

Past 24 Hours: 0

Past 7 Days: 1

Past 30 Days: 5

All Time: 526