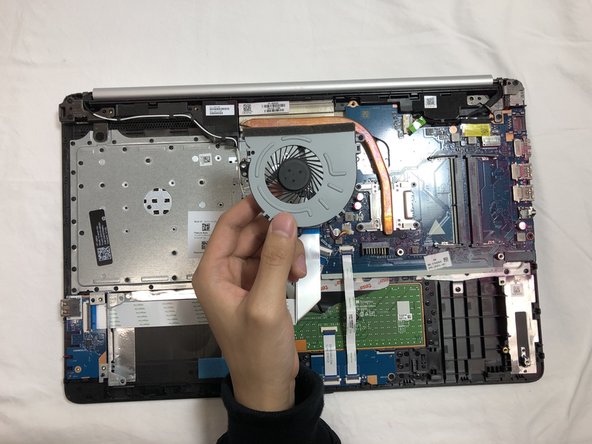
HP 15-da0012dx Fan Replacement

What you need

  1. HP 15-da0012dx Fan Replacement, Battery: step 1, image 1 of 2 HP 15-da0012dx Fan Replacement, Battery: step 1, image 2 of 2
    • Power down your laptop before proceeding.

    • Turn your laptop over so that the Laptop Identification Tag on the underside of the laptop faces the ceiling.

  2. HP 15-da0012dx Fan Replacement: step 2, image 1 of 3 HP 15-da0012dx Fan Replacement: step 2, image 2 of 3 HP 15-da0012dx Fan Replacement: step 2, image 3 of 3
    • Using the plastic opening tools, peel back the plastic feet from the underside of the laptop.

  3. HP 15-da0012dx Fan Replacement: step 3, image 1 of 2 HP 15-da0012dx Fan Replacement: step 3, image 2 of 2
    • Using a Phillips #1 screwdriver, remove the eleven 9.0 mm screws holding the back cover in place.

  4. HP 15-da0012dx Fan Replacement: step 4, image 1 of 2 HP 15-da0012dx Fan Replacement: step 4, image 2 of 2
    • Slide the optical drive out of the computer.

  5. HP 15-da0012dx Fan Replacement: step 5, image 1 of 3 HP 15-da0012dx Fan Replacement: step 5, image 2 of 3 HP 15-da0012dx Fan Replacement: step 5, image 3 of 3
    • Flip the computer over and open the screen.

    • Start from a corner and run the plastic opening tools along the edge of the back cover.

    • After the cover has been completely loosened around the entire perimeter, close the screen and flip the computer over.

    • Gently pry back the cover starting from the middle, bottom edge.

    • Make sure not to bend or crack the plastic cover.

  6. HP 15-da0012dx Fan Replacement: step 6, image 1 of 2 HP 15-da0012dx Fan Replacement: step 6, image 2 of 2
    • Using the Phillips #1 screwdriver, remove the three 8.0 mm screws holding the battery in place.

  7. HP 15-da0012dx Fan Replacement: step 7, image 1 of 2 HP 15-da0012dx Fan Replacement: step 7, image 2 of 2
    • Remove the battery by tilting the top of the battery towards you and pulling the battery away from the mounting tabs.

  8. HP 15-da0012dx Fan Replacement, Fan: step 8, image 1 of 2 HP 15-da0012dx Fan Replacement, Fan: step 8, image 2 of 2
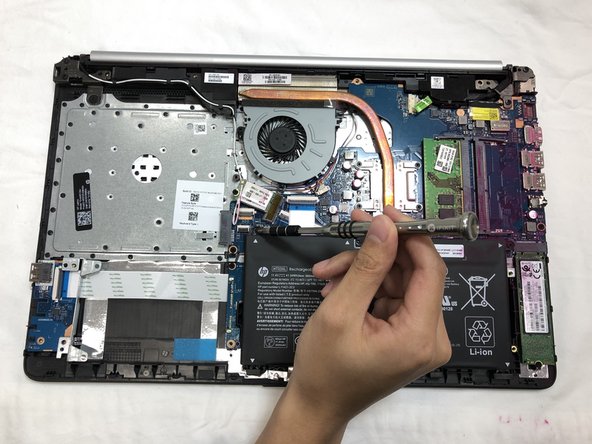
    • Using the Phillips #1 screwdriver, remove the single 6.0 mm screw holding the fan in place.

  9. HP 15-da0012dx Fan Replacement: step 9, image 1 of 1
    • Using the tip of the blue plastic opening tool or your fingernail, pull the connector for the fan cable straight out of the socket.

    • To reinstall the cable, push the connector straight into the socket.

  10. HP 15-da0012dx Fan Replacement: step 10, image 1 of 2 HP 15-da0012dx Fan Replacement: step 10, image 2 of 2
    • Lift the fan from the computer.

Conclusion

To reassemble your device, follow these instructions in reverse order.

One other person completed this guide.

Xavier Hung

Member since: 02/07/19

914 Reputation

4 Guides authored

Team

UC Davis, Team S20-G4, Lore Winter 2019 Member of UC Davis, Team S20-G4, Lore Winter 2019

UCD-LORE-W19S20G4

3 Members

7 Guides authored

One Comment

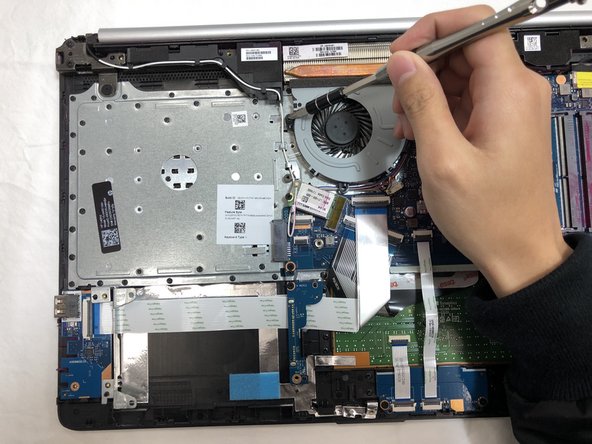
In Step 9, the instructions are not clear "Using the tip of the blue plastic opening tool or your fingernail, pull the connector for the fan cable straight out of the socket.". By straight out, that could mean straight up. However, the connector needs to be pulled straight back towards the fan body. It is difficult to see which way the connector should go. Otherwise, the instructions are excellent.

Robert Sharer - Reply

Add Comment

View Statistics:

Past 24 Hours: 0

Past 7 Days: 2

Past 30 Days: 4

All Time: 1,707