Introduction
The replacement front panel guide is primarily a first step guide to delve into the other components of the device. In the case you have a front panel from another Grace Digital MONDO, this is the guide for you.
What you need
-
-
Remove (2) screws (14 mm) with a PH1 screwdriver on the device.
-
There is one screw on the back left, and another just below it on the bottom of the device.
-
-
-
Use a plastic spudger to remove the front preset selection buttons.
-
Gently reach underneath and pull off the mesh speaker cover. It only clips in so don't worry about breaking anything.
-
-
-
-
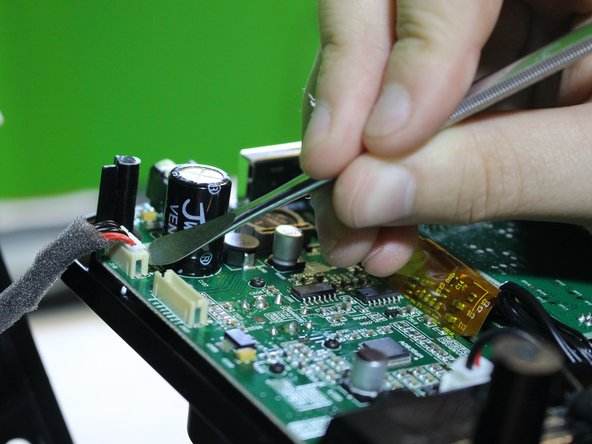
Detach a pin connector at the top of the device using a metal spudger to open up the inner components.
-
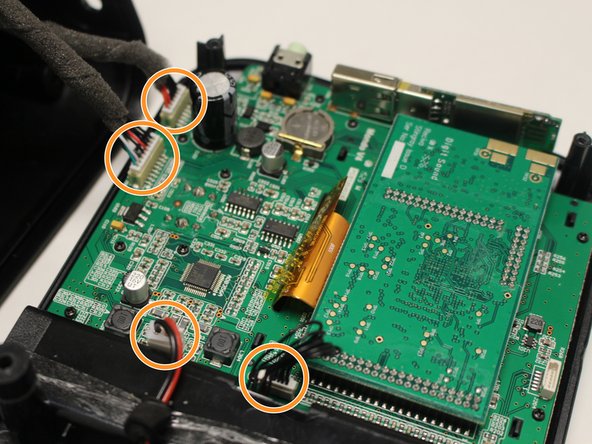
Detach (4) pin connectors inside using a metal spudger to separate the front panel from the rest of the device.
-


To reassemble your device, follow these instructions in reverse order.
To reassemble your device, follow these instructions in reverse order.
Cancel: I did not complete this guide.
3 other people completed this guide.

Team

USF Tampa, Team 6-3, Eyestone Spring 2016 Member of USF Tampa, Team 6-3, Eyestone Spring 2016
USFT-EYESTONE-S16S6G3
4 Members
8 Guides authored
3 Comments
The headphone jack opened up on one side so the speaker stopped working. Did not replace defective jack, just shorted together the offending jack pins. Works!
Thanks for showing how to open up this radio!
Excellent guide for removing the front panel. I might not have figured that out without damaging something.
The network connection keeps re-initializing and I was hoping to find maybe a loose wire or something. but alas, I found nothing suspicious and it’s still broke. The IRC6000R isn’t made anymore or serviceable so I guess it’s broke for life. Guess I’ll have to replace it, not sure about Grade Digital anymore.
BTW… My Ifixit screwdriver wouldn’t work with this as I needed a Phillips with a long skinny shaft.
did you find any fuses or motherboard resistors that looked swollen? Mine won’t light up at all
not the plug as I used it to start my other Mondo and the power supply is fine