Introduction
Follow this guide to remove the lithium-ion battery inside the Pixel 3a.
If your battery is swollen, take appropriate precautions. For your safety, discharge your battery below 25% before disassembling your phone. This reduces the risk of a dangerous thermal event if the battery is accidentally damaged during the repair.
The Pixel 3a’s unreinforced display panel is fragile. If you are reusing the screen, be sure to pay special attention to the warnings in the opening procedure.
What you need
-
-
Take note of the two seams on the phone:
-
Screen seam: This seam separates the screen from the rest of the phone. This is where you should pry.
-
Frame seam: This is where the plastic frame meets the back cover. It is held in place by screws. Do not pry at this seam.
-
Before you begin prying, note the following areas on the screen:
-
Screen flex cable: Do not pry deeper than instructed, or you risk damaging this cable.
-
Adhesive perimeter: Prying beyond the narrow perimeter without angling the pick will damage the display panel.
-
-
-
Place a suction cup near the right edge of the screen.
-
Pull on the suction cup with strong steady force.
-
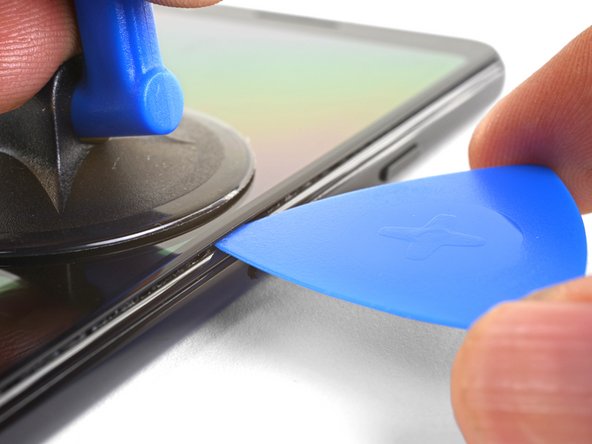
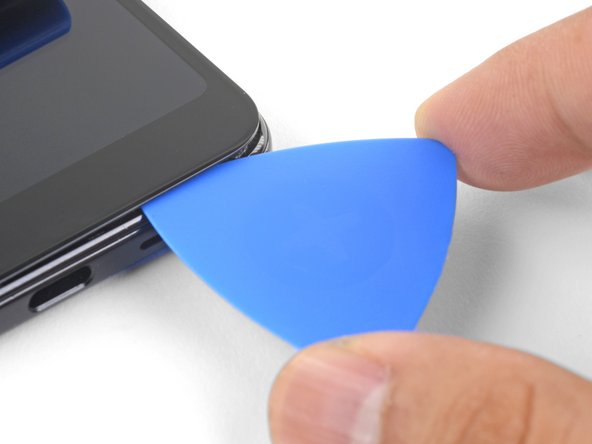
Insert the pick into the gap, no more than 1 mm.
-
-
-
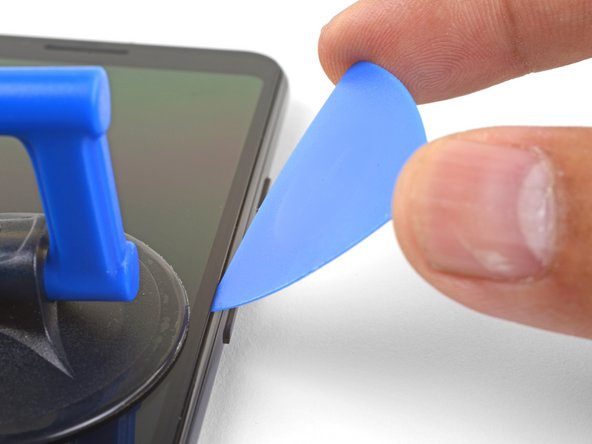
With the pick 1 mm in the gap, pivot the pick upwards to a steep angle.
-
At this angle, carefully push the pick into the gap about 1/4" (6 mm). The pick should slide in below the OLED panel.
-
-
-
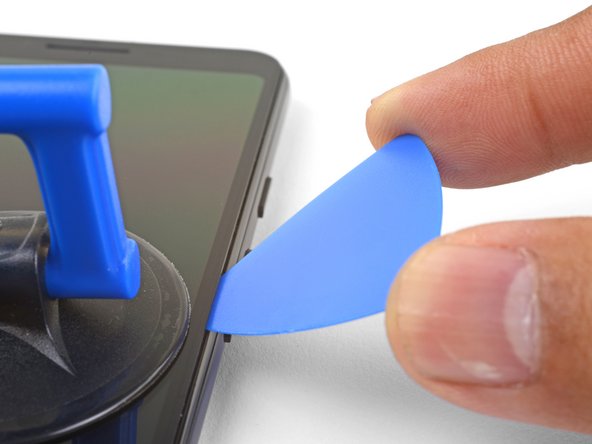
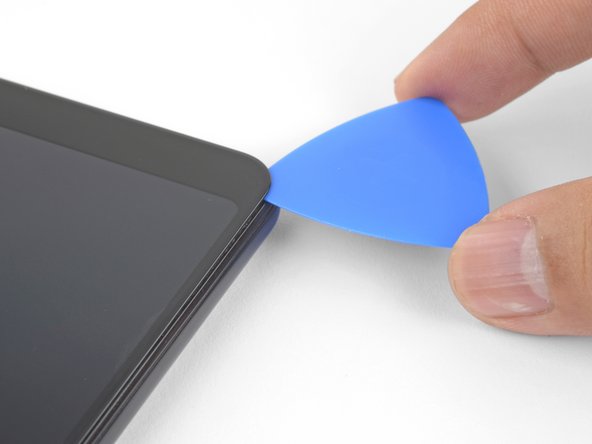
Slide the pick along the right edge, slicing through the adhesive.
-
Leave a pick in place to prevent the adhesive from resealing.
-
-
-
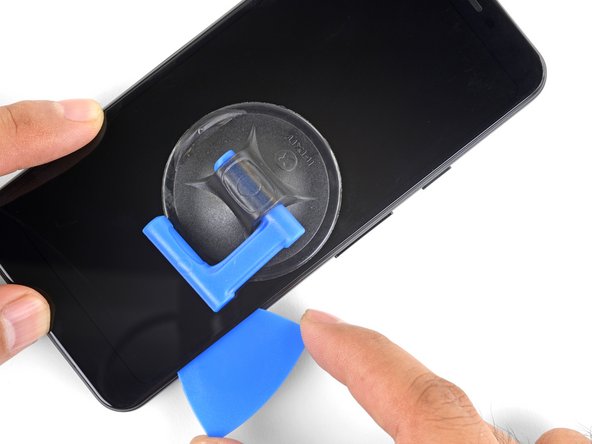
Slide the pick around the bottom right corner to slice through the adhesive.
-
Continue slicing along the bottom edge of the phone and around the left corner.
-
-
-
Slice through the left edge of the phone, making sure to properly angle the pick below the OLED panel and insert it in no more than 1/4" (6 mm).
-
To angle the pick below the OLED panel, insert the point of the pick no more than 1 mm in, angle the pick upwards, and then slowly push the pick in 1/4".
-
-
-
With all of the edges cut, carefully hinge open the right edge of the screen.
-
Use an opening pick to carefully cut through any remaining adhesive.
-
-
-
-
With all of the adhesives cut, flip the attached screen glass side down and rest it on top of the phone. The screen flex cable should be loosely arched.
-
-
-
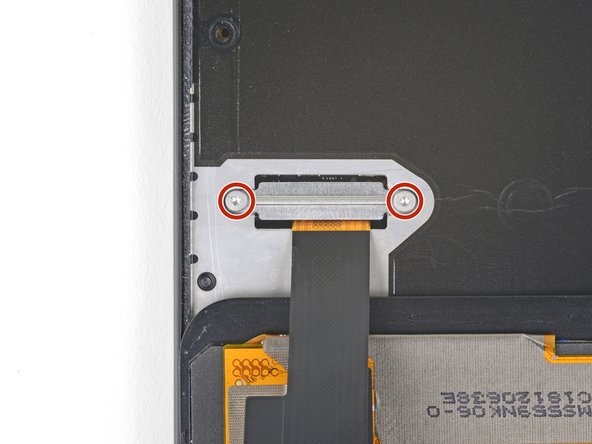
Carefully peel the black tape covering the screen connector bracket.
-
Remove the two 4.4 mm long T3 screws securing the screen connector bracket.
-
Remove the screen connector bracket.
-
-
-
Remove the screen.
-
Carefully compare your replacement screen with your original part. You may need to transfer additional components (such as the speaker mesh) to the new part.
-
Follow this guide if you are using custom-cut adhesives.
-
If you are using double-sided tape such as Tesa tape, follow this guide.
-
-
-
Remove the fourteen T3 screws of the following lengths securing the plastic midframe:
-
Twelve 4.3 mm silver T3 screws
-
Two 4.3 mm black T3 screws
-
-
-
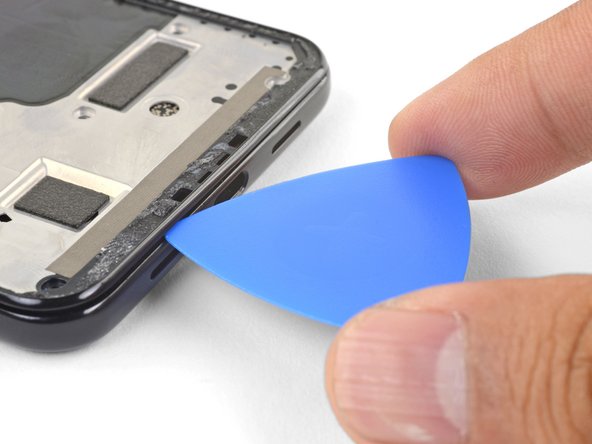
Insert an opening pick into frame seam at the bottom of the phone. This seam sits between the plastic midframe and the back cover.
-
Slide the pick along the seam to release the clips holding the plastic midframe.
-
-
-
Slide the opening pick along the left and right edges of the phone to release the midframe clips.
-
Lift the bottom edge of the plastic midframe up but do not remove the midframe. The midframe is still tethered to the phone by the fragile proximity sensor cable at the top edge.
-
-
-
Use the point of a spudger to carefully pry up and disconnect the proximity sensor connector from the motherboard.
-
Remove the plastic midframe.
-
-
-
Align the top edge of the plastic midframe with the phone.
-
Use the point of a spudger to carefully align and push the proximity sensor connector onto the motherboard socket.
-
This takes a bit of patience and finesse. Once you have the connector in place, you can also use a finger to gently press the connector onto the socket.
-
Use the point of a spudger to carefully pry the proximity sensor out of its recess on the midframe. The sensor is lightly adhered to the midframe.
-
Remove the sensor from the midframe. Attach the sensor connector onto its motherboard socket.
-
Thread the sensor cable through the midframe and reposition the sensor in the recess. Press down with your finger to adhere the sensor back onto the midframe.
-
-
-
Use the point of a spudger to pry up and disconnect the battery connector from its motherboard socket.
-
Bend the battery flex cable slightly so that it will not accidentally make contact with the socket.
-
-
-
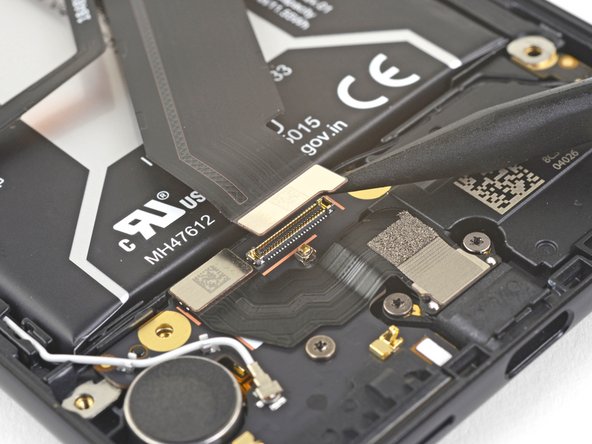
Use the point of a spudger to pry up and disconnect the interconnect cable from its motherboard socket above the battery.
-
-
-
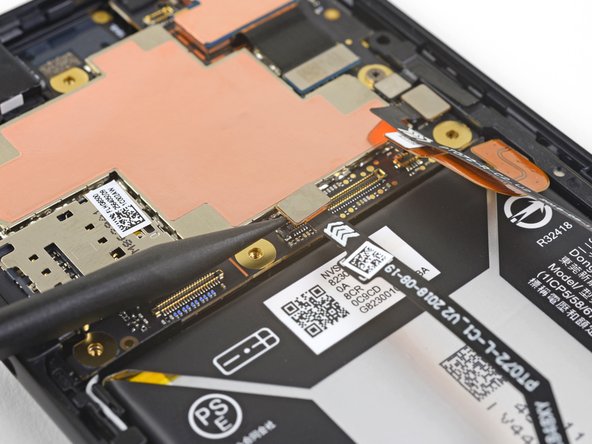
Use the point of a spudger to pry up and disconnect the interconnect cable from its daughterboard socket below the battery.
-
Remove the interconnect cable.
-
-
-
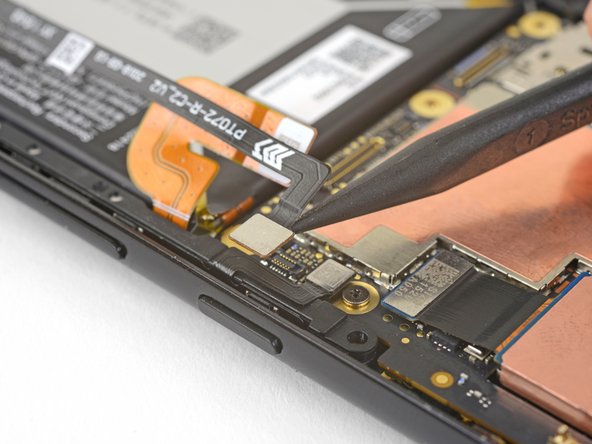
Use the point of a spudger to pry up and disconnect the left squeeze sensor connector from its socket on the motherboard above the battery.
-
Repeat the procedure for the right squeeze sensor connector near the power button.
-
-
-
The battery is held in place by two stretch-release adhesive strips.
-
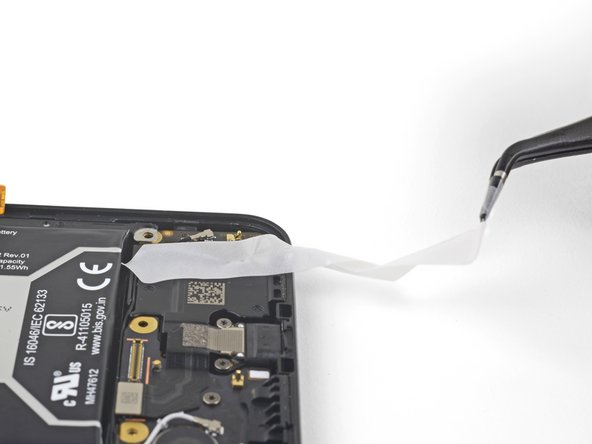
Carefully pull the right stretch-release adhesive's pull-tab from the bottom right corner of the battery.
-
-
-
Pull the tab at a shallow angle (close to parallel to the phone) with steady force. As the strip comes out, you can roll it around your tweezers.
-
Keep pulling until the entire strip comes free.
-
-
-
Find the second stretch-release adhesive's pull-tab at the upper left corner of the battery.
-
Grasp the tab carefully with your tweezers.
-
Pull the tab at a shallow angle with steady force, rolling it as it gets longer, until the entire strip comes free.
-
If needed, apply a heated iOpener to the back of the phone for a minute to loosen the battery adhesive.
-
-
-
Remove the battery.
-
Remove any battery adhesive remaining on the phone.
-
Install replacement pull-stretch adhesives, or double-sided tape such as Tesa tape, in the phone's battery well where the original adhesive used to stick.
-
Gently set the battery in place. Temporarily connect the battery's connector to the motherboard to ensure that the battery is properly positioned.
-
Press the battery firmly in place with your fingers.
-
Disconnect the battery from the motherboard and resume re-assembly.
-