Introduction
Follow this guide to remove and replace a worn battery for the Pixel 3. If your battery is swollen, take appropriate precautions.
For your safety, discharge your battery below 25% before disassembling your phone. This reduces the risk of a dangerous thermal event if the battery is accidentally damaged during the repair.
What you need
-
-
Heat an iOpener and apply it to the bottom of the phone for one minute.
-
-
-
Apply a suction cup to the heated bottom edge of the back cover.
-
Lift on the suction cup with strong, steady force to create a gap.
-
Insert an opening pick into the gap.
-
-
-
Slice the adhesive along the bottom edge of the phone and around the right corner.
-
Leave a pick in the bottom edge to prevent the adhesive from re-sealing.
-
-
-
Continue heating and slicing through the rest of the phone perimeter. Leave a pick in each edge to prevent the adhesive from resealing.
-
-
-
Once you have sliced around the perimeter of the phone, carefully lift the left edge of the back cover.
-
Flip the back cover along its long axis and rest it so that the fingerprint sensor cable is not strained.
-
-
-
-
Remove the two 4.1 mm-long Phillips screws securing the fingerprint connector bracket.
-
-
-
Use the point of a spudger to slide the fingerprint connector bracket out from under the NFC coil.
-
Remove the fingerprint connector bracket.
-
-
-
Use the point of a spudger to pry up and disconnect the fingerprint connector from its socket.
-
-
-
Remove the five Phillips screws securing the wireless charging coil:
-
Two 1.9 mm screws
-
Two 4.2 mm screws
-
One 4.3 mm screw
-
-
-
Use the point of a spudger to pry up and disconnect the battery press connector from its socket near the right edge of the phone.
-
-
-
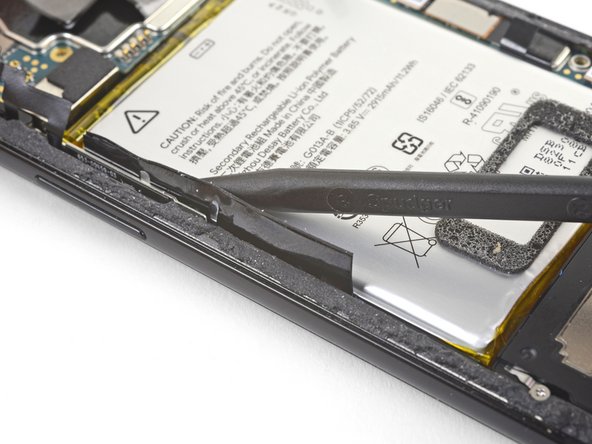
Slide the point of a spudger in the crevice underneath the black tape bridging across the battery and the motherboard.
-
Slide the spudger along the crevice to pry up the tape from the battery side.
-
Carefully peel the tape from the battery and fold it out of the way.
-
-
-
Use the point of a spudger to pry up and disconnect the buttons connector from its motherboard socket near the left edge of the phone.
-
Push the connector and its flex cable out of the way of the battery.
-
-
-
Insert the point of a spudger underneath the black battery pull tab on the left edge of the phone.
-
Slide the spudger upwards along the edge to loosen the pull tab from the battery.
-
-
-
Pull on the black pull tab at a shallow angle with steady force. When the adhesive grows long, roll it around some tweezer tips and continue pulling.
-
If the adhesive strips break, use an opening pick to help pry up and loosen the battery.
-
-
-
Remove the battery.
-
Carefully pull and remove the small foam buffer block from the left edge of the battery and transfer it to your replacement part. If it begins to tear, use the flat end of a spudger to gently pry it off the battery.
-
Lay some double-sided tape in the phone's battery well. Peel away any tape liners to expose the adhesive.
-
Temporarily re-connect the battery's connector to the motherboard socket. This ensures that the battery is properly positioned.
-
Lay the battery on the adhesive and press firmly.
-
Disconnect the battery connector from its motherboard socket and resume re-assembly.
-