Introduction
Is your Garmin Rino 700’s battery gauge inaccurate, does it dies quicker than it used to, or is not charging like it should? If so, here is the guide to fix the problem with a simple battery replacement.
This guide would be helpful when your charger or battery might be faulty. You would replace the battery after you have exhausted all possible options like screen brightness, map drawing speed, bluetooth features, etc for causing your battery to die quickly. There aren’t really any hazards you should be concerned about just be careful when disconnected the wire port from the motherboard. Going forward, you can see how to prevent these issues on our troubleshooting page: Garmin Rino 700 Troubleshooting
What you need
-
-
Flip the Garmin Rino 700 over so that the underside is facing up.
-
Using the TR6 Torx Security screwdriver, remove the six 9.5 mm screws on the backside of the device.
-
-
-
-
Using a Phillips #000 screwdriver, remove the two 4.8 mm screws holding the battery bracket in place.
-
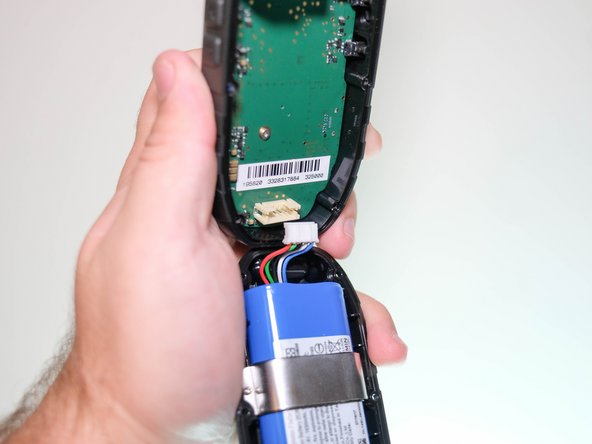
Using a plastic opening tool, remove the battery from the back case of the device.
-


To reassemble your device, follow these instructions in reverse order.
For optimal performance, after completing this guide, calibrate your newly installed battery.
Take your e-waste to an R2 or e-Stewards certified recycler.
To reassemble your device, follow these instructions in reverse order.
For optimal performance, after completing this guide, calibrate your newly installed battery.
Take your e-waste to an R2 or e-Stewards certified recycler.

Team

Clemson, Team 5-5, Hunter Fall 2021 Member of Clemson, Team 5-5, Hunter Fall 2021
CLEM-HUNTER-F21S5G5
4 Members
5 Guides authored