Introduction
Use this guide to replace the LCD Screen of your Garmin Nuvi 2595LMT GPS.
What you need
-
-
Place the device on the workspace so the screen is facing downward.
-
-
-
-
Grab a spudger from tool kit.
-
Pry open sides of Nuvi gently with spudger (do not rip apart).
-
Use plastic opening tool to pry ribbon slowly from white plastic bar.
-
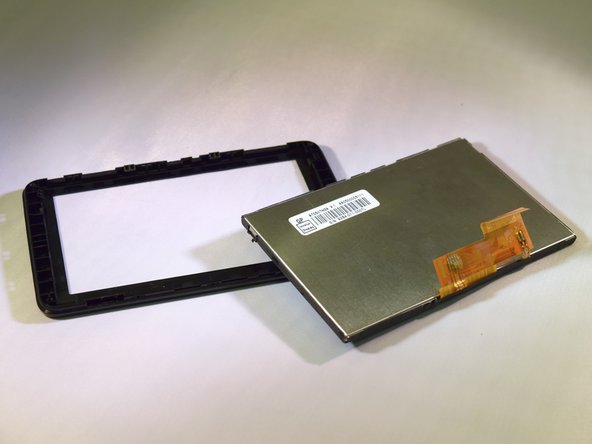
Separate the two pieces and place them on the table
The ribbon connector is held in place by a white plastic bar that snaps in place. It will pop up when lightly pried from the ribbon side as shown in the photo (the pivot action is on the connector side). Putting it back together is tricky. The ribbon cable has to lie flat in the connector as far back as possible; once this is true then snap the lever flat against the cable and lock it in place. You might feel a very subtle snap sensation.
I simply can't make this work.
daBee -
I replaced the battery in my Garmin 2595 and I couldn't get the screen to light up. I called Garmin for assistance and was told that my Garmin's battery could not be replaced and because I broke the seal in the back there was nothing that could be done to correct my problem. Meaning when this Garmin's battery goes bad, you must throw the unit away!!! I tried to explain there are all kinds of videos showing how to replace the battery, but I was told, none of them were from Garmin so there was nothing they could do for me!!!
-
-
-
Grabbing the top half of the Nuvi, remove the screen from the tabs holding it in place using thumbs.
-
Place screen on table.
-


To reassemble your device, follow these instructions in reverse order.
To reassemble your device, follow these instructions in reverse order.
Cancel: I did not complete this guide.
2 other people completed this guide.

Team

Eastern Washington University, Team 2-2, Andersen Winter 2016 Member of Eastern Washington University, Team 2-2, Andersen Winter 2016
EWU-ANDERSEN-W16S2G2
5 Members
6 Guides authored
3 Comments
cannot prise open the connector to replace ribbon
My screen is cracked. The screen opens, but I can't use the key board.
Thank You For any Help You Can Give Me,
Cookie
cookiecaafato1@yahoo.com nuvi 2595 LMT