Introduction
The battery on the Garmin Nuvi 200W is prone to losing charge over time. It can also fail due to unknown causes, which will require a replacement.
This repair is best done in a clean, dust-free environment. The sensitive electronics inside the Nuvi 200W will not respond will to sand and other small particles. It is also important to leave yourself ample time to effectively navigate the battery removal process.
What you need
-
-
Remove the two 4mm T5 Torx screws.
-
-
-
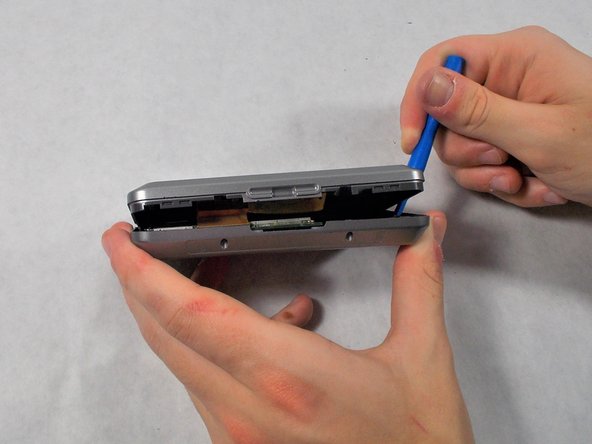
Carefully, using your plastic opening tools find the crease which separates the front and rear covers.
-
Once you have a little gap, work it around the whole device with the tool to get separation.
No connecting cable in the picture. Perhaps include a photo or direct the reader to one in a future step.
-
-
-
-
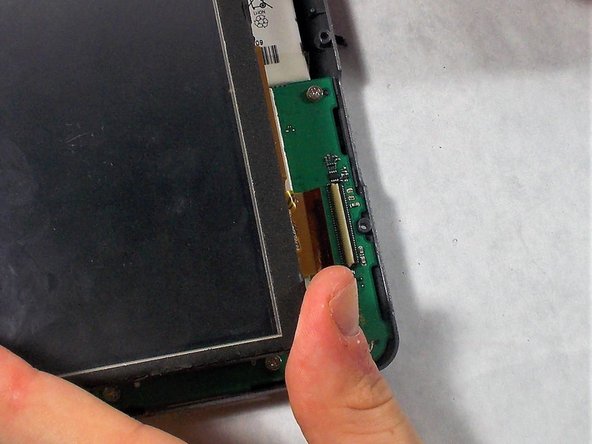
Carefully use the black spudger to lift the white retaining clamp on the display cable ZIF connector.
-
Slide the orange ribbon cable away from the ZIF connector.
My 200W had a different connector arrangement. I couldn’t disconnect the display cable which connected into the middle of the motherboard not the edge as shown, nor the other two cables either side, but if I was careful I could get enough clearance to undo the screws holding the motherboard (one of which was under a metal screen which was stuck down but could be peeled back).
-
-
-
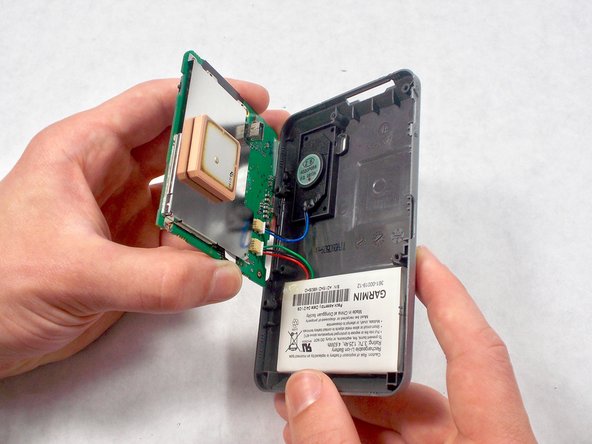
Using a screw driver, unscrew the four 2mm screws holding the motherboard in place.
-
-
-
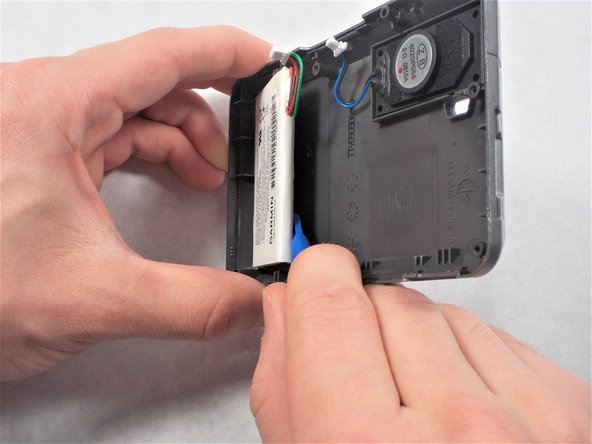
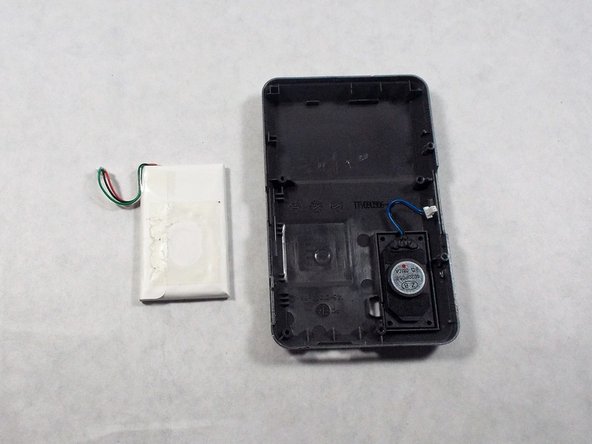
Using your opening tools, separate the battery from the top side. Very slowly push your tool down into the crevice.
-
Once you have a gap big enough, pull the battery off the cover.
-


To reassemble your device, follow these instructions in reverse order.
To reassemble your device, follow these instructions in reverse order.
Team

UMass Dartmouth, Team S5-G4, Botvin Spring 2017 Member of UMass Dartmouth, Team S5-G4, Botvin Spring 2017
UMASSD-BOTVIN-S17S5G4
3 Members
6 Guides authored