Introduction
Use this guide to replace the freezer thermistor on your GE side-by-side refrigerator.
The thermistor enables the refrigerator control to monitor air temperature inside the freezer compartment.
If the freezer thermistor fails, the refrigerator will not maintain a proper temperature in the freezer compartment. It may also affect the fresh food compartment temperature.
This guide was created using a GE model GSH25KGMB BB side-by-side refrigerator. Other GE side-by-side units should be similar.
What you need
-
-
Unplug your refrigerator before you begin your repair.
-
Condenser fan motor
-
Compressor motor and thermal overload device
-
Water supply valve assembly
-
-
-
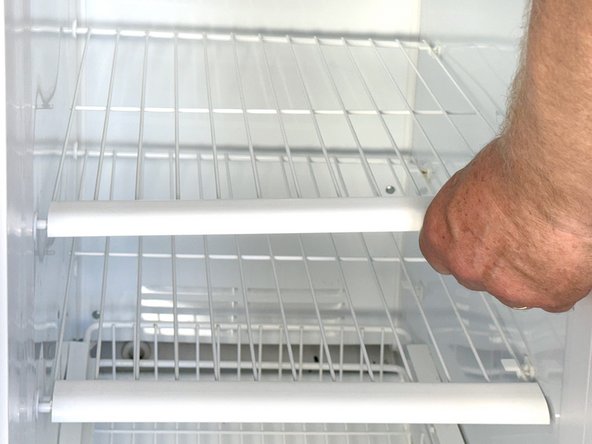
Lift the right edge of the shelf to free it from the clips which secure it.
-
Once the shelf is lifted, move it to the right and free the tabs on the left edge.
-
Remove the shelf.
-
Repeat this for each of the freezer shelves.
-
-
-
-
Use a #2 Phillips screwdriver to remove the retaining screws securing the lower evaporator cover.
-
-
-
Thermistor holder location.
-
With your fingers, pull to slide the thermistor out of its holder.
-


To reassemble your device, follow these instructions in reverse order.
Take your e-waste to an R2 or e-Stewards certified recycler.
Repair didn’t go as planned? Try some basic troubleshooting, or ask our Answers community for help.


2 Guide Comments
In step 6 how do you test the thermistor ?
Where do the wires go ?
Thanks in advance
There is no easy way to test the thermistor except to find the wires leading to it at the control board. You can disconnect it there and then test it. The best value I can find is a value of 10,000Ω (10kΩ) at room temperature (77°F, 20°C). You might be able to use piercing probes on the wires at the thermistor, but you would be safer disconnecting it and testing at the control board.