GBC Creative Laminator Motor Replacement

What you need

  1. GBC Creative Laminator Motor Replacement, Motor: step 1, image 1 of 2 GBC Creative Laminator Motor Replacement, Motor: step 1, image 2 of 2
    • Using the Phillips #2 screwdriver, remove ten 12 mm long screws on the bottom of the device.

  2. GBC Creative Laminator Motor Replacement: step 2, image 1 of 1
    • Open the top of the device, and the inside of the Laminator will be exposed as shown.

  3. GBC Creative Laminator Motor Replacement: step 3, image 1 of 2 GBC Creative Laminator Motor Replacement: step 3, image 2 of 2
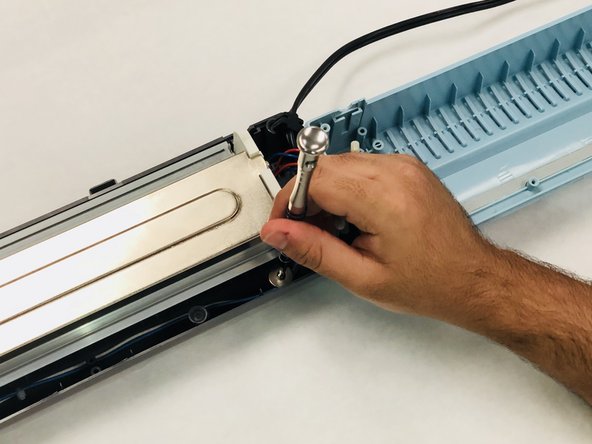
    • Using the Phillips #2 screwdriver, remove two 9 mm long screws on the side of the main component that keep the motor in place.

  4. GBC Creative Laminator Motor Replacement: step 4, image 1 of 2 GBC Creative Laminator Motor Replacement: step 4, image 2 of 2
    • Using the Phillips #2 screwdriver, remove three 8.5 mm long screws and washers on the front edge of the plastic casing.

  5. GBC Creative Laminator Motor Replacement: step 5, image 1 of 1
    • Lift the motor out of the plastic casing.

Conclusion

To reassemble your device, follow these instructions in reverse order.

One other person completed this guide.

Yujia Tang

Member since: 07/11/18

384 Reputation

2 Guides authored

Team

IUPUI, Team S1-G1, Wilson Summer 2018 Member of IUPUI, Team S1-G1, Wilson Summer 2018

IUPUI-WILSON-SU18S1G1

5 Members

4 Guides authored

0 Comments

Add Comment

View Statistics:

Past 24 Hours: 0

Past 7 Days: 2

Past 30 Days: 15

All Time: 815