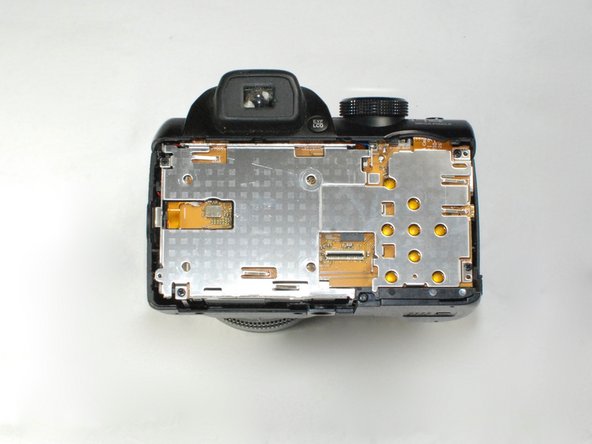
FujiFilm FinePix S4500 LCD Replacement

What you need

  1. FujiFilm FinePix S4500 LCD Replacement, LCD: step 1, image 1 of 1
    • Remove the two 3.5 mm Phillips #1 screws in these positions on the left side of the camera with a screwdriver.

  2. FujiFilm FinePix S4500 LCD Replacement: step 2, image 1 of 1
    • Remove the three 3.5 mm Phillips #1 screws in these locations on the bottom of the camera with a screwdriver.

  3. FujiFilm FinePix S4500 LCD Replacement: step 3, image 1 of 1
    • Remove the four 3.5 mm Phillips #1 screws in these positions on the right side of the camera with a screwdriver.

  4. FujiFilm FinePix S4500 LCD Replacement: step 4, image 1 of 1
    • Use a plastic opening tool to separate the back panel from the camera on the left side.

  5. FujiFilm FinePix S4500 LCD Replacement: step 5, image 1 of 1
    • Use a plastic opening tool to separate the back panel from the camera on the bottom.

  6. FujiFilm FinePix S4500 LCD Replacement: step 6, image 1 of 2 FujiFilm FinePix S4500 LCD Replacement: step 6, image 2 of 2
    • Use a plastic opening tool to separate the back panel from the camera on the left side, then remove the back panel from the camera.

  7. FujiFilm FinePix S4500 LCD Replacement: step 7, image 1 of 1
    • Use a plastic opening tool to separate the LCD screen from the camera.

  8. FujiFilm FinePix S4500 LCD Replacement: step 8, image 1 of 2 FujiFilm FinePix S4500 LCD Replacement: step 8, image 2 of 2
    • Flip up the black tab holding the LCD ribbon wire in place and remove wire.

Conclusion

To reassemble your device, follow these instructions in reverse order.

One other person completed this guide.

Vicente Rios

Member since: 01/25/17

708 Reputation

6 Guides authored

Team

Cal Poly, Team 9-4, Banghart Winter 2017 Member of Cal Poly, Team 9-4, Banghart Winter 2017

CPSU-BANGHART-W17S9G4

4 Members

11 Guides authored

0 Comments

Add Comment

View Statistics:

Past 24 Hours: 0

Past 7 Days: 0

Past 30 Days: 1

All Time: 588