Introduction
Hammond invented the spring reverb for their first electric organ in 1935. Since then, the spring reverb has produced an iconic effect heavily used in guitar amplifiers. If yours has stopped working it can be easily replaced or upgraded for a more desired tone.
What you need
-
-
Remove 6 Phillips screws securing the back plate.
-
Lift the back panel out of the amp.
-
-
-
Saw the adhesive from in between the reverb tank and the cabinet until the reverb tank is released.
-
-
-
Use wire cutters to remove the zip tie fastening the wires to the speaker.
-
-
-
-
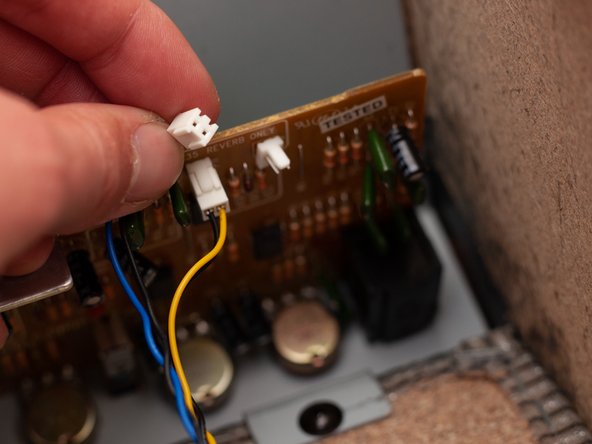
Unplug the wires leading from the reverb tank to the motherboard.
-
Notice they are plugged in where the motherboard is labeled "reverb only."
What are these plug ends or leads called? Is there an RCA adapter/converter for them?
-
-
-
Remove the reverb tank.
what if I wanted to upgrade to gen 1 replacement like this one
-
-
-
Glue the new reverb tank into place following the directions provided with the glue or epoxy of your choice.
-
-
-
Reconnect the wires and test the new reverb tank ensuring the effect properly matches the knob setting.
-


To reassemble your device, follow these instructions in reverse order.
To reassemble your device, follow these instructions in reverse order.

2 Comments
I guess there is 2 versions of this amp the one in this video this version of the tank has 3 springs; this looks like 2…
Wonder which one was the newer version?
Interesting! I wouldn’t know which is the newer version, but the one in the YouTube video does look like it has higher quality parts…