
Eureka SuctionSeal 2.0 Pet Brush Roll Belt Replacement

What you need

  1. Eureka SuctionSeal 2.0 Pet Brush Roll Belt Replacement, Dust Cup: step 1, image 1 of 2 Eureka SuctionSeal 2.0 Pet Brush Roll Belt Replacement, Dust Cup: step 1, image 2 of 2
    • Place the device upright with the brush roller closest to you.

    • Pull up on the latch at the top of the dust cup.

    • Tilt the top of the dust cup forward and pull towards yourself, removing the container from the device.

  2. Eureka SuctionSeal 2.0 Pet Brush Roll Belt Replacement, Brush Roll Cover: step 2, image 1 of 2 Eureka SuctionSeal 2.0 Pet Brush Roll Belt Replacement, Brush Roll Cover: step 2, image 2 of 2
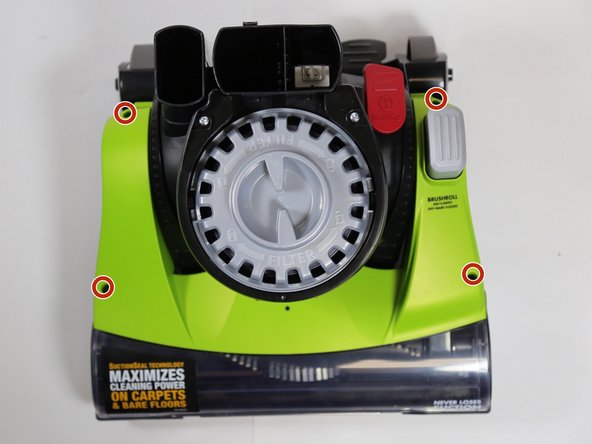
    • Locate the gray exhaust filter cover at the top of the vacuum's base.

    • Grip the two tabs in the middle of the filter cover and rotate counter-clockwise.

    • Lift the cover away from the vacuum.

  3. Eureka SuctionSeal 2.0 Pet Brush Roll Belt Replacement: step 3, image 1 of 3 Eureka SuctionSeal 2.0 Pet Brush Roll Belt Replacement: step 3, image 2 of 3 Eureka SuctionSeal 2.0 Pet Brush Roll Belt Replacement: step 3, image 3 of 3
    • Pull up and unhook the two front tower latches using two fingers. These are located at the base of the tower.

    • Pull up and unhook the latch on the back of the tower.

    • Firmly lift the vacuum tower up and out of its stand.

    • The exhaust filter cover can be replaced once the tower is removed. It will not affect the steps.

  4. Eureka SuctionSeal 2.0 Pet Brush Roll Belt Replacement: step 4, image 1 of 2 Eureka SuctionSeal 2.0 Pet Brush Roll Belt Replacement: step 4, image 2 of 2
    • Remove the four 20mm screws on the top of the vacuum head's cover using a JIS 1 screwdriver.

  5. Eureka SuctionSeal 2.0 Pet Brush Roll Belt Replacement: step 5, image 1 of 2 Eureka SuctionSeal 2.0 Pet Brush Roll Belt Replacement: step 5, image 2 of 2
    • Turn the vacuum head so that the back is facing you.

    • Press the handle release pedal.

    • Rotate the top of the motor cover down while pressing on the pedal release.

    • The motor cover should rotate from an upright position back towards the ground, as it would if the handle were still attached.

  6. Eureka SuctionSeal 2.0 Pet Brush Roll Belt Replacement: step 6, image 1 of 3 Eureka SuctionSeal 2.0 Pet Brush Roll Belt Replacement: step 6, image 2 of 3 Eureka SuctionSeal 2.0 Pet Brush Roll Belt Replacement: step 6, image 3 of 3
    • Locate the two tabs on the back of the cover.

    • Pull up on the tabs and lift the cover away from the device.

  7. Eureka SuctionSeal 2.0 Pet Brush Roll Belt Replacement, Belt Latch Assembly: step 7, image 1 of 2 Eureka SuctionSeal 2.0 Pet Brush Roll Belt Replacement, Belt Latch Assembly: step 7, image 2 of 2
    • Locate the belt latch assembly. It will be on your right when the brush roll is facing you.

    • Remove the two 20mm screws using a JIS 1 screwdriver.

  8. Eureka SuctionSeal 2.0 Pet Brush Roll Belt Replacement: step 8, image 1 of 1
    • Lift up on the belt latch assembly and remove it from the vacuum.

  9. Eureka SuctionSeal 2.0 Pet Brush Roll Belt Replacement, Brush Roll: step 9, image 1 of 3 Eureka SuctionSeal 2.0 Pet Brush Roll Belt Replacement, Brush Roll: step 9, image 2 of 3 Eureka SuctionSeal 2.0 Pet Brush Roll Belt Replacement, Brush Roll: step 9, image 3 of 3
    • Grab the brush roll on both ends.

    • Lift up on the right side of the brush roll.

    • Lift up on the left side of the brush roll, completely removing it from its frame.

    • Separate the brush roll from the belt and remove the brush roll from the vacuum.

  10. Eureka SuctionSeal 2.0 Pet Brush Roll Belt Replacement, Brush Roll Belt: step 10, image 1 of 3 Eureka SuctionSeal 2.0 Pet Brush Roll Belt Replacement, Brush Roll Belt: step 10, image 2 of 3 Eureka SuctionSeal 2.0 Pet Brush Roll Belt Replacement, Brush Roll Belt: step 10, image 3 of 3
    • Rotate the belt until the front is above the motor shaft.

    • Twist the belt away from you, allowing the narrow side of the belt to slip between the motor shaft and the vertical rod.

    • Separate the belt from the motor shaft.

Grayson Clendenon

Member since: 10/02/17

571 Reputation

5 Guides authored

Team

Cal Poly, Team S4-G5, Livingston Fall 2017 Member of Cal Poly, Team S4-G5, Livingston Fall 2017

CPSU-LIVINGSTON-F17S4G5

3 Members

16 Guides authored

View Statistics:

Past 24 Hours: 0

Past 7 Days: 7

Past 30 Days: 17

All Time: 3,233