
DualShock 4 Battery Replacement

What you need

  1. DualShock 4 Battery Replacement, Controller: step 1, image 1 of 1
    • Using the Phillips #00 Screwdriver, remove the four 6.0 mm screws securing the rear cover to the controller.

    • Be careful loosening the screws, using the wrong sized screwdriver, or letting the screwdriver slip can permanently damage the screw heads, making removal extremely difficult.

  2. DualShock 4 Battery Replacement: step 2, image 1 of 3 DualShock 4 Battery Replacement: step 2, image 2 of 3 DualShock 4 Battery Replacement: step 2, image 3 of 3
    • Four fragile plastic clips hold the casing together. You can see their locations more clearly in this guide.

    • The clips help hold the seams together. If you break these clips, the controller will still work.

    • Beginning with the left handle:

    • Pinch the left handle of the controller to introduce an opening.

    • Wedge a plastic opening tool into the opening and slide it up towards the joystick.

    • Pull down on tool to pry open the casing.

    • Repeat these steps for the right handle.

  3. DualShock 4 Battery Replacement: step 3, image 1 of 3 DualShock 4 Battery Replacement: step 3, image 2 of 3 DualShock 4 Battery Replacement: step 3, image 3 of 3
    • Wedge a plastic opening tool into the case-splittings and pull down to crack open the casing near the following buttons:

    • Share button

    • Options button

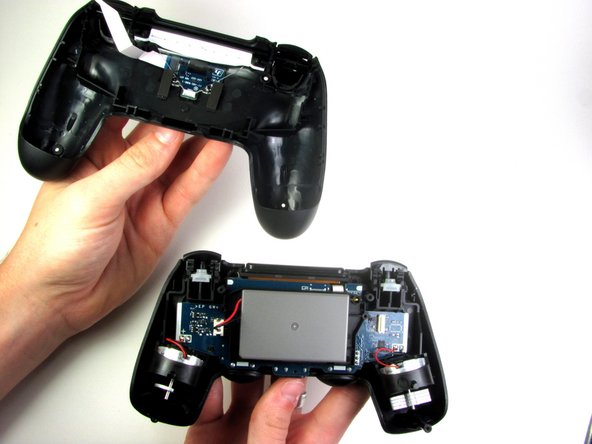
    • Split the plastic covers of the controller apart, taking note that they will still be attached by circuit board ribbons.

    • Three small pieces are often released from the framework. To prevent loss, maintain a controlled work field.

    • 2 Trigger Springs

    • 1 Grey Reset Button Extension

  4. DualShock 4 Battery Replacement, Battery: step 4, image 1 of 3 DualShock 4 Battery Replacement, Battery: step 4, image 2 of 3 DualShock 4 Battery Replacement, Battery: step 4, image 3 of 3
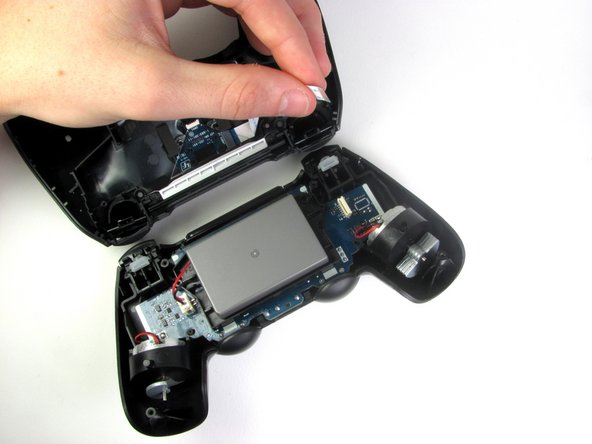
    • Detach the motherboard ribbon connecting the two sides of the controller by pulling it straight out with your fingers.

    • Note the orientation of the cable and make sure it faces the right way when you reconnect it.

    • After the two halves are separated, place the top of the controller off to the side.

  5. DualShock 4 Battery Replacement: step 5, image 1 of 3 DualShock 4 Battery Replacement: step 5, image 2 of 3 DualShock 4 Battery Replacement: step 5, image 3 of 3
    • Using the blunt forceps, remove the battery plug by gently rocking the forceps side-by-side to loosen the plug.

    • After removal of the plug from the motherboard, the battery can be lifted off of the controller.

    • Hasty removal of the battery plug could warp the plastic grips of the plug.

Mark

Member since: 01/21/14

7,719 Reputation

7 Guides authored

Team

Cal Poly, Team 6-21, Maness Winter 2014 Member of Cal Poly, Team 6-21, Maness Winter 2014

CPSU-MANESS-W14S6G21

4 Members

40 Guides authored

View Statistics:

Past 24 Hours: 71

Past 7 Days: 675

Past 30 Days: 3,130

All Time: 371,725