
Disassembling Western Digital Essentials HD SATA/USB Bridge Motherboard

What you need

  1. Disassembling Western Digital Essentials HD SATA/USB Bridge Motherboard, Case: step 1, image 1 of 3 Disassembling Western Digital Essentials HD SATA/USB Bridge Motherboard, Case: step 1, image 2 of 3 Disassembling Western Digital Essentials HD SATA/USB Bridge Motherboard, Case: step 1, image 3 of 3
    • Use a large plastic opening tool along the rear panel:

    • There are 4 clips to release.

  2. Disassembling Western Digital Essentials HD SATA/USB Bridge Motherboard: step 2, image 1 of 2 Disassembling Western Digital Essentials HD SATA/USB Bridge Motherboard: step 2, image 2 of 2
    • Slide the cover along the plastic frame.

  3. Disassembling Western Digital Essentials HD SATA/USB Bridge Motherboard, LED Light conducting plastic pieces: step 3, image 1 of 1
    • Slide off the largest plastic pieces.

  4. Disassembling Western Digital Essentials HD SATA/USB Bridge Motherboard: step 4, image 1 of 3 Disassembling Western Digital Essentials HD SATA/USB Bridge Motherboard: step 4, image 2 of 3 Disassembling Western Digital Essentials HD SATA/USB Bridge Motherboard: step 4, image 3 of 3
    • Bend the second small plastic piece to release it from the rubber piece.

    • Now you can slide it out.

  5. Disassembling Western Digital Essentials HD SATA/USB Bridge Motherboard, Disassembling Western Digital Essentials HD Hard Drive: step 5, image 1 of 2 Disassembling Western Digital Essentials HD SATA/USB Bridge Motherboard, Disassembling Western Digital Essentials HD Hard Drive: step 5, image 2 of 2
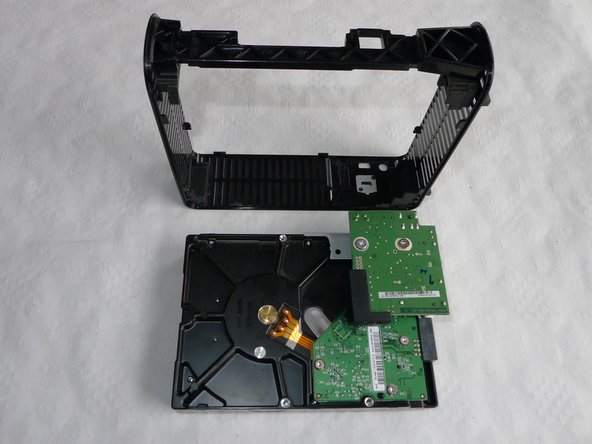
    • Slide out the hard drive as shown in the picture

    • Make sure to slide as shown or you may damage the USB bridge logic board.

  6. Disassembling Western Digital Essentials HD SATA/USB Bridge Motherboard, Disassembling Western Digital Essentials HD Anti-vibration rubber pieces: step 6, image 1 of 2 Disassembling Western Digital Essentials HD SATA/USB Bridge Motherboard, Disassembling Western Digital Essentials HD Anti-vibration rubber pieces: step 6, image 2 of 2
    • Remove the 4 rubber piece from the plastic frame at each corner.

  7. Disassembling Western Digital Essentials HD SATA/USB Bridge Motherboard: step 7, image 1 of 1
    • Remove the rubber piece from the SATA/USB bridge logic board.

  8. Disassembling Western Digital Essentials HD SATA/USB Bridge Motherboard, SATA/USB Bridge Motherboard: step 8, image 1 of 2 Disassembling Western Digital Essentials HD SATA/USB Bridge Motherboard, SATA/USB Bridge Motherboard: step 8, image 2 of 2
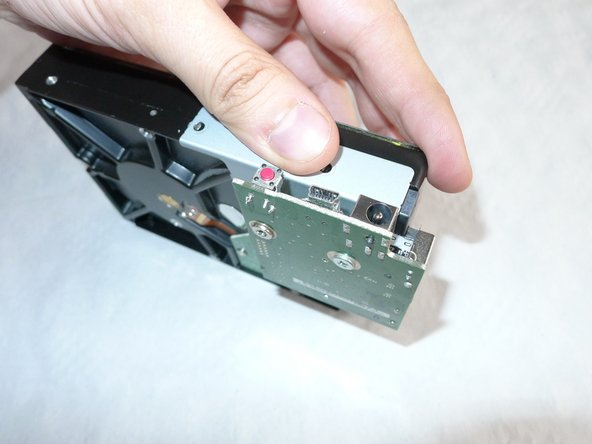
    • Remove both screws holding the retaining plate and the hard drive.

    • Slide the retaining plate in order to disconnect the SATA connector.

  9. Disassembling Western Digital Essentials HD SATA/USB Bridge Motherboard: step 9, image 1 of 1
    • Remove both screws holding the retaining plate with the logic board.

Conclusion

To reassemble your device, follow these instructions in reverse order.

Gaetan

Member since: 12/26/12

9,574 Reputation

18 Guides authored

0 Comments

Add Comment

View Statistics:

Past 24 Hours: 0

Past 7 Days: 1

Past 30 Days: 15

All Time: 1,995