Introduction
This guide will help users replace damaged or malfunctioning internal dual speakers on the Digitech XC-5206 Bluetooth speaker. Please refer to troubleshooting page before beginning replacement guide steps.
What you need
-
-
Remove the front panel by forcefully placing the flat edge of the spudger in between the panel and the plastic housing.
-
Angle the spudger and use your fingers to pry the panel off.
-
-
-
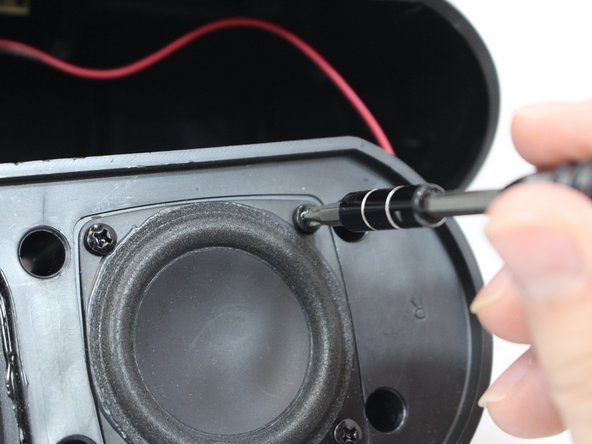
Unscrew all eight 14mm screws closest to the edges of the speaker by spinning a size PH2 screwdriver in a counterclockwise motion.
-
Dislodge face by holding speaker face down. Gently shake or tap front against table to fully remove face.
-
OR grab ahold of the silver tab to pull the speaker face out. This may require force.
-
-
-
-
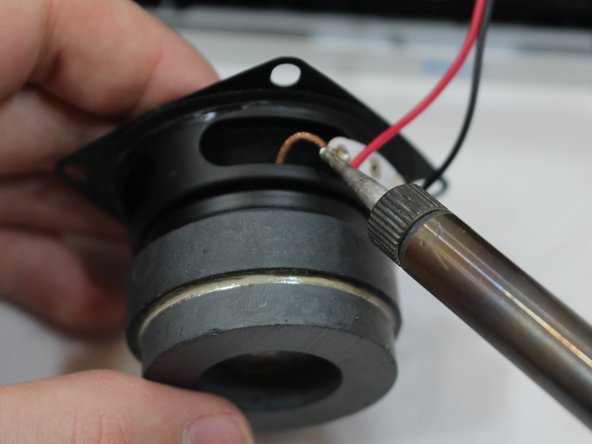
Remove green (left) and red (right) wired connection to speaker bulb using a soldering station.
-


To reassemble your device, follow these instructions in reverse order.
To reassemble your device, follow these instructions in reverse order.
Cancel: I did not complete this guide.
One other person completed this guide.

Team

Eastern Washington University, Team S2-G4, Munoz Fall 2018 Member of Eastern Washington University, Team S2-G4, Munoz Fall 2018
EWU-MUNOZ-F18S2G4
4 Members
4 Guides authored