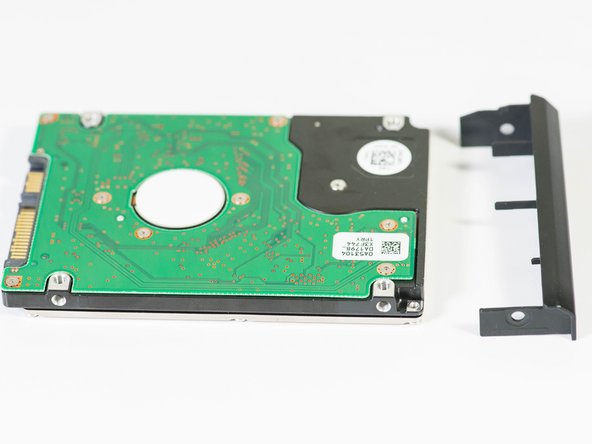
Dell XPS M1530 Hard Drive Replacement

What you need

  1. Dell XPS M1530 Hard Drive Replacement, Battery: step 1, image 1 of 1
    • Turn the computer upside down with the battery facing you.

    • Turn the computer off and disconnect the charging cable from the computer.

    • Failure to unplug the charging cable may result in electric shock.

  2. Dell XPS M1530 Hard Drive Replacement: step 2, image 1 of 1
    • Push the switch as far to the right as possible to unlock the battery.

  3. Dell XPS M1530 Hard Drive Replacement: step 3, image 1 of 2 Dell XPS M1530 Hard Drive Replacement: step 3, image 2 of 2
    • Remove the battery using two hands and pull it away from the computer.

  4. Dell XPS M1530 Hard Drive Replacement, Hard Drive: step 4, image 1 of 2 Dell XPS M1530 Hard Drive Replacement, Hard Drive: step 4, image 2 of 2
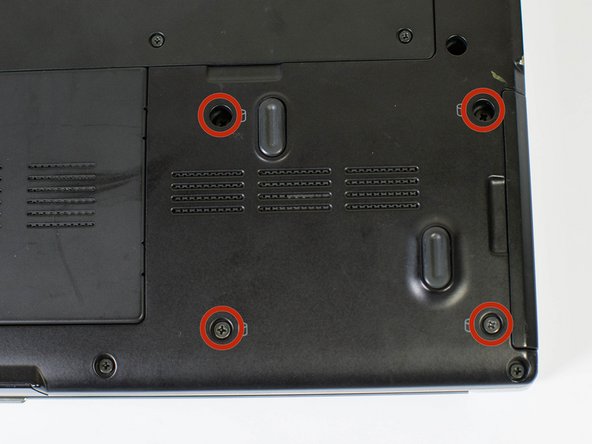
    • Remove the four Phillips #1 screws holding the Hard Drive in place.

    • Four 3.5mm Phillips #1 screws

  5. Dell XPS M1530 Hard Drive Replacement: step 5, image 1 of 2 Dell XPS M1530 Hard Drive Replacement: step 5, image 2 of 2
    • Pull the Hard Drive out gently using the tab. It should provide enough leverage to pull the drive out smoothly.

  6. Dell XPS M1530 Hard Drive Replacement: step 6, image 1 of 2 Dell XPS M1530 Hard Drive Replacement: step 6, image 2 of 2
    • Remove both 3.5mm Phillips #1 screws on either side of the plastic casing.

    • There is a second screw on the other side of the casing.

    • Then gently separate the drive from its casing.

Conclusion

To reassemble your device, follow these instructions in reverse order.

One other person completed this guide.

Tyler Scholz

Member since: 01/22/15

479 Reputation

3 Guides authored

Team

Cal Poly, Team 18-4, Maness Winter 2015 Member of Cal Poly, Team 18-4, Maness Winter 2015

CPSU-MANESS-W15S18G4

4 Members

8 Guides authored

0 Comments

Add Comment

View Statistics:

Past 24 Hours: 0

Past 7 Days: 3

Past 30 Days: 8

All Time: 2,004