
Dell Latitude 7390 Wi-Fi Card Replacement

What you need

  1. Dell Latitude 7390 Wi-Fi Card Replacement, Bottom Panel: step 1, image 1 of 1
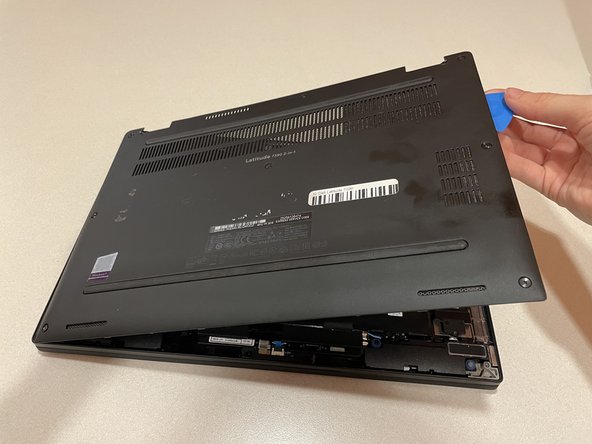
    • Orient your Dell Latitude 7390 laptop so that it is facing towards you as if you're going to open it.

  2. Dell Latitude 7390 Wi-Fi Card Replacement: step 2, image 1 of 3 Dell Latitude 7390 Wi-Fi Card Replacement: step 2, image 2 of 3 Dell Latitude 7390 Wi-Fi Card Replacement: step 2, image 3 of 3
    • Flip your laptop over so that the bottom is facing up.

  3. Dell Latitude 7390 Wi-Fi Card Replacement: step 3, image 1 of 1
    • Using your Phillips #1 screwdriver, remove the eight 6 mm screws around the border of the bottom panel.

  4. Dell Latitude 7390 Wi-Fi Card Replacement: step 4, image 1 of 2 Dell Latitude 7390 Wi-Fi Card Replacement: step 4, image 2 of 2
    • Using an opening tool or picks, work your way around the periphery and pry the back case off.

  5. Dell Latitude 7390 Wi-Fi Card Replacement: step 5, image 1 of 1
    • Finally, lift the back panel off to uncover the inside of your Dell Latitude 7390.

  6. Dell Latitude 7390 Wi-Fi Card Replacement, Battery: step 6, image 1 of 1
    • Make sure the laptop is turned OFF and unplugged from the power adapter before taking the battery out.

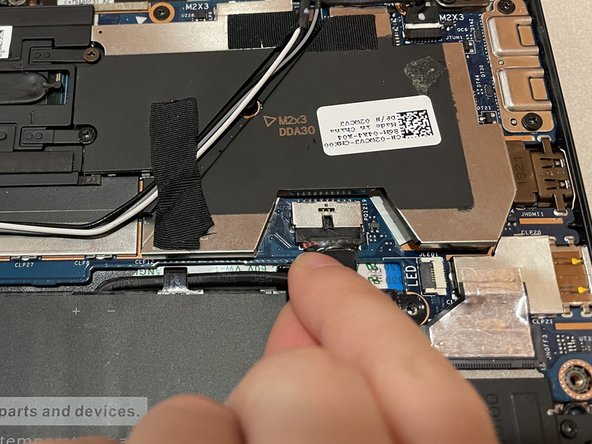
    • Use the Phillips #1 screwdriver to remove the five 6 mm screws holding the battery in place along the edges of the battery.

  7. Dell Latitude 7390 Wi-Fi Card Replacement: step 7, image 1 of 3 Dell Latitude 7390 Wi-Fi Card Replacement: step 7, image 2 of 3 Dell Latitude 7390 Wi-Fi Card Replacement: step 7, image 3 of 3
    • Be careful not to break the connector by pulling too hard on the black tab.

    • Pull the black tab on the top of the connector to unplug the battery from the motherboard.

  8. Dell Latitude 7390 Wi-Fi Card Replacement: step 8, image 1 of 1
    • Carefully lift the battery out of the laptop.

  9. Dell Latitude 7390 Wi-Fi Card Replacement, Wi-Fi Card: step 9, image 1 of 2 Dell Latitude 7390 Wi-Fi Card Replacement, Wi-Fi Card: step 9, image 2 of 2
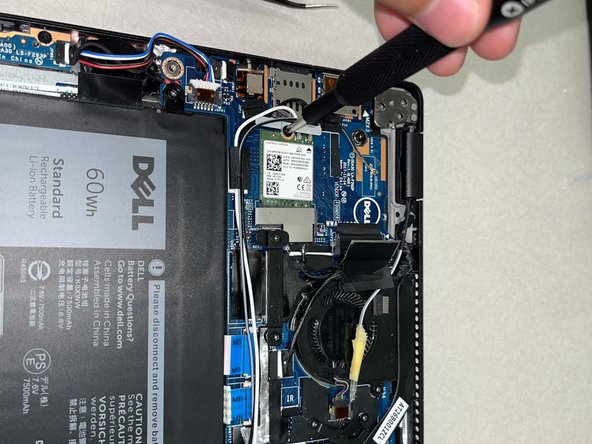
    • Using a Phillips #1 screwdriver, remove the 3 mm screw securing the Wi-Fi card.

  10. Dell Latitude 7390 Wi-Fi Card Replacement: step 10, image 1 of 1
    • Detach the coaxial connectors from the Wi-Fi card with tweezers.

    • Before removing the wires, it is important to note the location of the corresponding connectors. When it comes to reconnecting the wires they will need to be placed in the correct port in order to function correctly.

  11. Dell Latitude 7390 Wi-Fi Card Replacement: step 11, image 1 of 1
    • After the wires have been disconnected, pull the chip out of the connector and place the part aside.

Conclusion

To reassemble your device, follow these instructions in reverse order.

Glennjay Elayda

Member since: 02/22/22

246 Reputation

2 Guides authored

Team

Clemson, Team 1-4, Hunter Spring 2022 Member of Clemson, Team 1-4, Hunter Spring 2022

CLEM-HUNTER-S22S1G4

5 Members

5 Guides authored

0 Comments

Add Comment

View Statistics:

Past 24 Hours: 3

Past 7 Days: 11

Past 30 Days: 42

All Time: 1,075