Dell Inspiron 6000 Fan Replacement

What you need

  1. Dell Inspiron 6000 Fan Replacement, Battery: step 1, image 1 of 1
    • To prevent injury, make sure the laptop is unplugged before removing the battery.

    • Flip the laptop over, bottom-side up.

  2. Dell Inspiron 6000 Fan Replacement: step 2, image 1 of 1
    • Push the switch next to the battery.

    • At the same time, lift the battery away from the laptop.

  3. Dell Inspiron 6000 Fan Replacement, Keyboard: step 3, image 1 of 3 Dell Inspiron 6000 Fan Replacement, Keyboard: step 3, image 2 of 3 Dell Inspiron 6000 Fan Replacement, Keyboard: step 3, image 3 of 3
    • Place the laptop on flat surface.

    • Carefully open the laptop at far as it will go so that the back of screen is touching the flat surface.

    • Carefully take a spudger and separate part of the cover at the red circle.

  4. Dell Inspiron 6000 Fan Replacement: step 4, image 1 of 2 Dell Inspiron 6000 Fan Replacement: step 4, image 2 of 2
    • Remove two 4 mm Philips #00 screws.

  5. Dell Inspiron 6000 Fan Replacement: step 5, image 1 of 1
    • Gently lift the keyboard away from the laptop without harming the cord that is located at the bottom of the keyboard.

  6. Dell Inspiron 6000 Fan Replacement: step 6, image 1 of 3 Dell Inspiron 6000 Fan Replacement: step 6, image 2 of 3 Dell Inspiron 6000 Fan Replacement: step 6, image 3 of 3
    • Gently pull the blue tab up until it comes away from computer.

  7. Dell Inspiron 6000 Fan Replacement, Fan: step 7, image 1 of 1
    • Unscrew the 4 mm Phillips #00 screw.

    • The screw will remain attached to the cord when fully removed.

  8. Dell Inspiron 6000 Fan Replacement: step 8, image 1 of 2 Dell Inspiron 6000 Fan Replacement: step 8, image 2 of 2
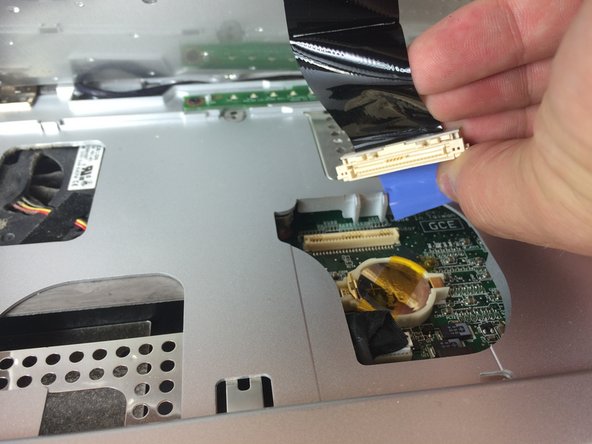
    • Gently pull the blue tab to separate the screen connection from the laptop.

    • Gently pull and disconnect the white and black cords from the power source.

  9. Dell Inspiron 6000 Fan Replacement: step 9, image 1 of 2 Dell Inspiron 6000 Fan Replacement: step 9, image 2 of 2
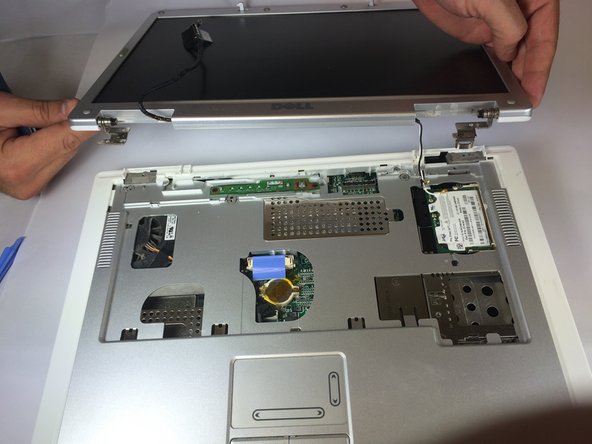
    • Remove four 4mm #00 Philips screws from the screen hinges.

    • Lift the screen away from the laptop.

  10. Dell Inspiron 6000 Fan Replacement: step 10, image 1 of 2 Dell Inspiron 6000 Fan Replacement: step 10, image 2 of 2
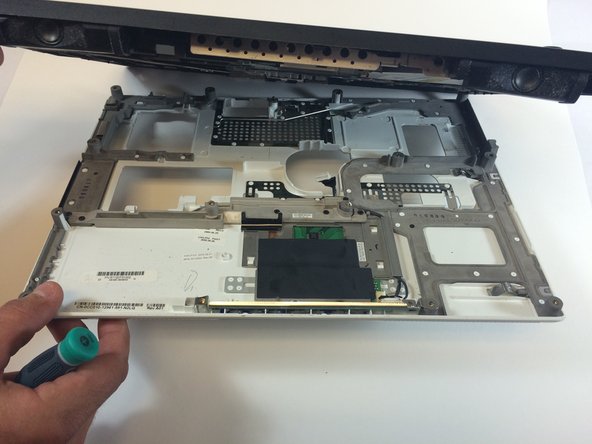
    • Remove two 4 mm Philips #00 screws that connect top of laptop to base..

  11. Dell Inspiron 6000 Fan Replacement: step 11, image 1 of 1
    • Flip laptop the over and remove thirteen 6mm Philips #00 screws.

  12. Dell Inspiron 6000 Fan Replacement: step 12, image 1 of 2 Dell Inspiron 6000 Fan Replacement: step 12, image 2 of 2
    • Insert the plastic opening tool in between the back and front plates of the laptop

  13. Dell Inspiron 6000 Fan Replacement: step 13, image 1 of 1
    • Remove two 4 mm Philips #00 screws.

  14. Dell Inspiron 6000 Fan Replacement: step 14, image 1 of 1
    • Remove the fan power cord

  15. Dell Inspiron 6000 Fan Replacement: step 15, image 1 of 2 Dell Inspiron 6000 Fan Replacement: step 15, image 2 of 2
    • Using your hand, lift the fan from the laptop.

Jacob DeWar

Member since: 09/23/14

533 Reputation

3 Guides authored

Team

USF Tampa, Team 11-1, Blackwell Fall 2014 Member of USF Tampa, Team 11-1, Blackwell Fall 2014

USFT-BLACKWELL-F14S11G1

5 Members

7 Guides authored

View Statistics:

Past 24 Hours: 0

Past 7 Days: 11

Past 30 Days: 38

All Time: 2,166