
Dell Inspiron 3520 Optical Drive Replacement

What you need

  1. Dell Inspiron 3520 Optical Drive Replacement, Battery: step 1, image 1 of 2 Dell Inspiron 3520 Optical Drive Replacement, Battery: step 1, image 2 of 2
    • Turn off notebook

    • Set the notebook upside down with the battery facing away from you.

    • Locate the unlock and release sliding tabs on the bottom right and left hand corners of the battery respectively.

  2. Dell Inspiron 3520 Optical Drive Replacement: step 2, image 1 of 3 Dell Inspiron 3520 Optical Drive Replacement: step 2, image 2 of 3 Dell Inspiron 3520 Optical Drive Replacement: step 2, image 3 of 3
    • Slide the right tab to the right to unlock the battery.

    • Slide and hold the the left tab to the left to release the battery from the unit.

    • Finally, remove the battery by sliding it away from the unit and yourself.

  3. Dell Inspiron 3520 Optical Drive Replacement, Keyboard: step 3, image 1 of 2 Dell Inspiron 3520 Optical Drive Replacement, Keyboard: step 3, image 2 of 2
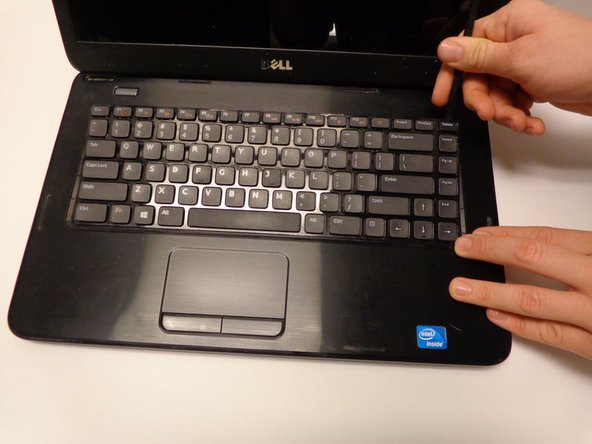
    • Locate the four tabs along the top edge of the keyboard.

    • Using the spudger, push the tabs away from the keyboard and pull the keyboard up away from the laptop.

  4. Dell Inspiron 3520 Optical Drive Replacement: step 4, image 1 of 1
    • Slide the keyboard forward towards the screen to release the bottom tabs.

  5. Dell Inspiron 3520 Optical Drive Replacement: step 5, image 1 of 2 Dell Inspiron 3520 Optical Drive Replacement: step 5, image 2 of 2
    • Carefully lift the board up and locate the connecting cable.

    • Gently pull the end of the cable free from the port on the laptop.

  6. Dell Inspiron 3520 Optical Drive Replacement, Optical Drive: step 6, image 1 of 2 Dell Inspiron 3520 Optical Drive Replacement, Optical Drive: step 6, image 2 of 2
    • Locate and remove the 4mm Phillips #00 mounting screw.

  7. Dell Inspiron 3520 Optical Drive Replacement: step 7, image 1 of 2 Dell Inspiron 3520 Optical Drive Replacement: step 7, image 2 of 2
    • Push the optical drive from the inside a little bit to dislodge it.

    • Grab the drive with your hand from the outside and slide it free.

Conclusion

To reassemble your device, follow these instructions in reverse order.

5 other people completed this guide.

Ian

Member since: 01/30/15

1,557 Reputation

5 Guides authored

Team

USF Tampa, Team 16-2, Watkins Winter 2015 Member of USF Tampa, Team 16-2, Watkins Winter 2015

USFT-WATKINS-W15S16G2

3 Members

5 Guides authored

One Comment

...screaming.....i love my dell 3520 it is awesome, it is still holding up.."hooray!!!!

Madeline Jones - Reply

Add Comment

View Statistics:

Past 24 Hours: 1

Past 7 Days: 4

Past 30 Days: 12

All Time: 2,476