Dell Inspiron 13-7353 Palmrest Keyboard Replacement

What you need

  1. Dell Inspiron 13-7353 Palmrest Keyboard Replacement, Palmrest Keyboard and Touchpad: step 1, image 1 of 3 Dell Inspiron 13-7353 Palmrest Keyboard Replacement, Palmrest Keyboard and Touchpad: step 1, image 2 of 3 Dell Inspiron 13-7353 Palmrest Keyboard Replacement, Palmrest Keyboard and Touchpad: step 1, image 3 of 3
    • Remove the 10 - M2.5 x 8mm screws located on the bottom of the device.

    • Detach and remove the Bottom Base Cover using an opening tool to pry it off.

  2. Dell Inspiron 13-7353 Palmrest Keyboard Replacement: step 2, image 1 of 3 Dell Inspiron 13-7353 Palmrest Keyboard Replacement: step 2, image 2 of 3 Dell Inspiron 13-7353 Palmrest Keyboard Replacement: step 2, image 3 of 3
    • Unplug and gently pull the hard drive cable to loosen it.

    • Remove the 2 - M2 x 3mm screws.

    • Remove the Battery.

  3. Dell Inspiron 13-7353 Palmrest Keyboard Replacement: step 3, image 1 of 3 Dell Inspiron 13-7353 Palmrest Keyboard Replacement: step 3, image 2 of 3 Dell Inspiron 13-7353 Palmrest Keyboard Replacement: step 3, image 3 of 3
    • Remove the 2 - M2 x 3mm hard drive screws.

    • Remove the Hard Drive.

  4. Dell Inspiron 13-7353 Palmrest Keyboard Replacement: step 4, image 1 of 2 Dell Inspiron 13-7353 Palmrest Keyboard Replacement: step 4, image 2 of 2
    • Unplug the speaker cable.

    • Remove the Speakers.

  5. Dell Inspiron 13-7353 Palmrest Keyboard Replacement: step 5, image 1 of 2 Dell Inspiron 13-7353 Palmrest Keyboard Replacement: step 5, image 2 of 2
    • Unplug the fan cable.

    • Unplug and remove the daughter board cable.

  6. Dell Inspiron 13-7353 Palmrest Keyboard Replacement: step 6, image 1 of 3 Dell Inspiron 13-7353 Palmrest Keyboard Replacement: step 6, image 2 of 3 Dell Inspiron 13-7353 Palmrest Keyboard Replacement: step 6, image 3 of 3
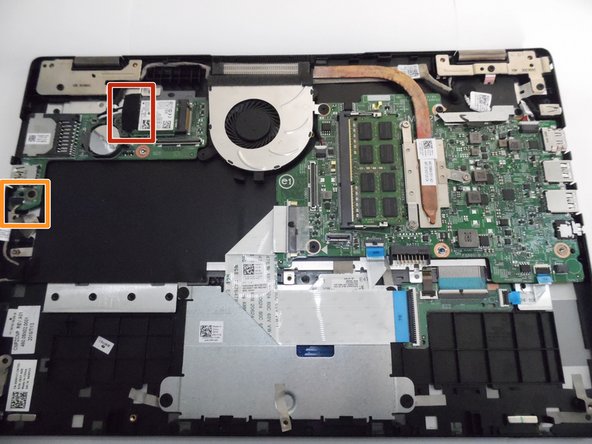
    • Unplug the antenna cables.

    • Unplug the power button cable.

  7. Dell Inspiron 13-7353 Palmrest Keyboard Replacement: step 7, image 1 of 2 Dell Inspiron 13-7353 Palmrest Keyboard Replacement: step 7, image 2 of 2
    • Remove the 1 - M2 x 3mm screw.

    • Remove the USB / SD Card Circuit Board.

  8. Dell Inspiron 13-7353 Palmrest Keyboard Replacement: step 8, image 1 of 3 Dell Inspiron 13-7353 Palmrest Keyboard Replacement: step 8, image 2 of 3 Dell Inspiron 13-7353 Palmrest Keyboard Replacement: step 8, image 3 of 3
    • Remove the 1 - M2 x 3mm and 1 - M2 x 2mm Wafer screw.

    • Remove the Cooling Fan.

  9. Dell Inspiron 13-7353 Palmrest Keyboard Replacement: step 9, image 1 of 3 Dell Inspiron 13-7353 Palmrest Keyboard Replacement: step 9, image 2 of 3 Dell Inspiron 13-7353 Palmrest Keyboard Replacement: step 9, image 3 of 3
    • Loosen the screws.

    • Remove the Heatsink.

  10. Dell Inspiron 13-7353 Palmrest Keyboard Replacement: step 10, image 1 of 2 Dell Inspiron 13-7353 Palmrest Keyboard Replacement: step 10, image 2 of 2
    • Remove the 2 - M2 x 3mm bracket screws.

    • Remove the LCD cable bracket.

  11. Dell Inspiron 13-7353 Palmrest Keyboard Replacement: step 11, image 1 of 2 Dell Inspiron 13-7353 Palmrest Keyboard Replacement: step 11, image 2 of 2
    • Unplug the LCD cable.

    • Unplug the touchscreen cable.

  12. Dell Inspiron 13-7353 Palmrest Keyboard Replacement: step 12, image 1 of 3 Dell Inspiron 13-7353 Palmrest Keyboard Replacement: step 12, image 2 of 3 Dell Inspiron 13-7353 Palmrest Keyboard Replacement: step 12, image 3 of 3
    • Open the screen.

    • Loosen the LCD cable and peel it off of the base (highlighted with arrow).

    • Remove the 3 - M2.5 x 8mm hinge screws.

  13. Dell Inspiron 13-7353 Palmrest Keyboard Replacement: step 13, image 1 of 2 Dell Inspiron 13-7353 Palmrest Keyboard Replacement: step 13, image 2 of 2
    • Remove the screen assembly.

    • You may need to pull the hinges up.

  14. Dell Inspiron 13-7353 Palmrest Keyboard Replacement: step 14, image 1 of 3 Dell Inspiron 13-7353 Palmrest Keyboard Replacement: step 14, image 2 of 3 Dell Inspiron 13-7353 Palmrest Keyboard Replacement: step 14, image 3 of 3
    • Unplug the cable.

    • Remove the 1 - M2 x 3mm screw.

    • Remove the DC Jack.

  15. Dell Inspiron 13-7353 Palmrest Keyboard Replacement: step 15, image 1 of 2 Dell Inspiron 13-7353 Palmrest Keyboard Replacement: step 15, image 2 of 2
    • Loosen the keyboard cable tape.

    • Loosen the keyboard cable latches.

    • Unplug the keyboard cable.

  16. Dell Inspiron 13-7353 Palmrest Keyboard Replacement: step 16, image 1 of 1
    • Unplug the keyboard backlight cable.

    • Unplug the touchpad cable.

  17. Dell Inspiron 13-7353 Palmrest Keyboard Replacement: step 17, image 1 of 2 Dell Inspiron 13-7353 Palmrest Keyboard Replacement: step 17, image 2 of 2
    • Remove the 1 - M2 x 2mm Wafer screw.

    • Remove the Motherboard.

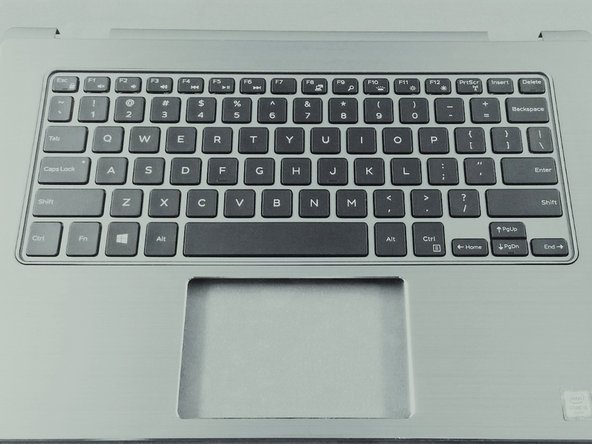
    • The piece remaining is the Palmrest Keyboard.

  18. Dell Inspiron 13-7353 Palmrest Keyboard Replacement: step 18, image 1 of 1
    • You can further disassemble by removing the touchpad.

    • Unplug the touchpad cable.

  19. Dell Inspiron 13-7353 Palmrest Keyboard Replacement: step 19, image 1 of 3 Dell Inspiron 13-7353 Palmrest Keyboard Replacement: step 19, image 2 of 3 Dell Inspiron 13-7353 Palmrest Keyboard Replacement: step 19, image 3 of 3
    • Unscrew the 4 - 2x2mm wafer screws.

    • Peel back any tape holding the back plate on.

    • Lift and remove back plate.

  20. Dell Inspiron 13-7353 Palmrest Keyboard Replacement: step 20, image 1 of 3 Dell Inspiron 13-7353 Palmrest Keyboard Replacement: step 20, image 2 of 3 Dell Inspiron 13-7353 Palmrest Keyboard Replacement: step 20, image 3 of 3
    • Peel back under-button tape.

    • Remove touchpad.

    • You have now stripped the keyboard! It is ready to be replaced.

Conclusion

To reassemble your device, follow these instructions in reverse order.

5 other people completed this guide.

Attached Documents

0 Comments

Add Comment

View Statistics:

Past 24 Hours: 0

Past 7 Days: 3

Past 30 Days: 29

All Time: 7,106