Dell Alienware M11x R3 2.5" Hard Drive Replacement

What you need

  1. Dell Alienware M11x R3  2.5" Hard Drive Replacement, Lower Case: step 1, image 1 of 3 Dell Alienware M11x R3  2.5" Hard Drive Replacement, Lower Case: step 1, image 2 of 3 Dell Alienware M11x R3  2.5" Hard Drive Replacement, Lower Case: step 1, image 3 of 3
    • Loosen the eight retaining screws on the base of the computer with a small Phillips screwdriver.

    • The screws have retaining washers to hold them in place, so you don't have to remove them from the base plate.

    • Remove the bottom cover from the laptop.

  2. Dell Alienware M11x R3  2.5" Hard Drive Replacement, Hard Drive: step 2, image 1 of 1
    • Remove the three screws attaching the hard drive tray to the laptop.

  3. Dell Alienware M11x R3  2.5" Hard Drive Replacement: step 3, image 1 of 1
    • Grasp the plastic tab provided, and gently pull up. This will unplug the drive from the laptop.

  4. Dell Alienware M11x R3  2.5" Hard Drive Replacement: step 4, image 1 of 2 Dell Alienware M11x R3  2.5" Hard Drive Replacement: step 4, image 2 of 2
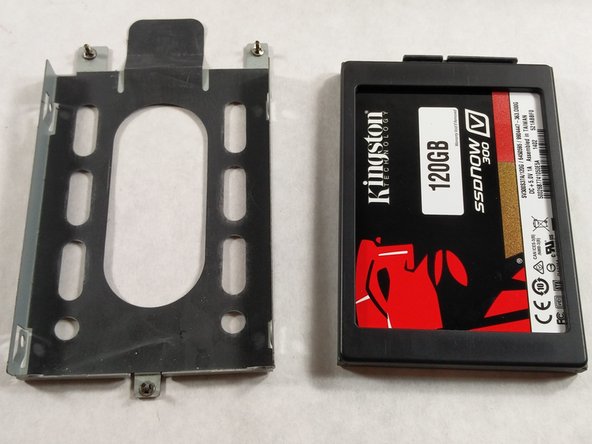
    • On both sides of the cage, there are two screws you have to unscrew to be able to remove the SSD.

  5. Dell Alienware M11x R3  2.5" Hard Drive Replacement: step 5, image 1 of 2 Dell Alienware M11x R3  2.5" Hard Drive Replacement: step 5, image 2 of 2
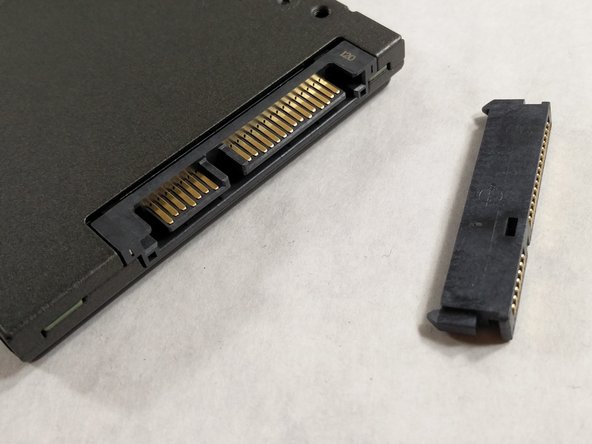
    • Finally, remove the L connector for the hard drive. You will need to put this on your new hard drive.

    • Make sure that the SSD you bought to replace this one has the same connections. I.e. able to connect to a SATA cord.

Conclusion

To reassemble your device, follow these instructions in reverse order.

One other person completed this guide.

Richard Maurice

Member since: 03/08/17

534 Reputation

6 Guides authored

Team

0 Comments

Add Comment

View Statistics:

Past 24 Hours: 0

Past 7 Days: 4

Past 30 Days: 9

All Time: 1,529