
DYMO LabelPOINT 100 Rubber Transport Roller Replacement

What you need

  1. DYMO LabelPOINT 100 Rubber Transport Roller Replacement, Rear Panel: step 1, image 1 of 3 DYMO LabelPOINT 100 Rubber Transport Roller Replacement, Rear Panel: step 1, image 2 of 3 DYMO LabelPOINT 100 Rubber Transport Roller Replacement, Rear Panel: step 1, image 3 of 3
    • Slide the panel release button.

    • Lift the panel.

  2. DYMO LabelPOINT 100 Rubber Transport Roller Replacement, Remove Label Tape Cassette: step 2, image 1 of 2 DYMO LabelPOINT 100 Rubber Transport Roller Replacement, Remove Label Tape Cassette: step 2, image 2 of 2
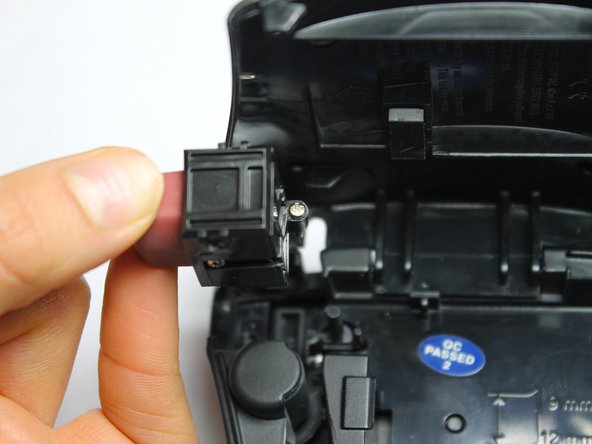
    • Firmly press the cartridge release button with your finger.

    • You may need to hold the cassette and/or entire device still while pressing the button.

    • Lift the label tape cassette out of the device.

  3. DYMO LabelPOINT 100 Rubber Transport Roller Replacement, Remove Screws To the Acess Panel: step 3, image 1 of 3 DYMO LabelPOINT 100 Rubber Transport Roller Replacement, Remove Screws To the Acess Panel: step 3, image 2 of 3 DYMO LabelPOINT 100 Rubber Transport Roller Replacement, Remove Screws To the Acess Panel: step 3, image 3 of 3
    • Use Phillips #00 screwdriver to remove three screws

    • Remove blade cutter

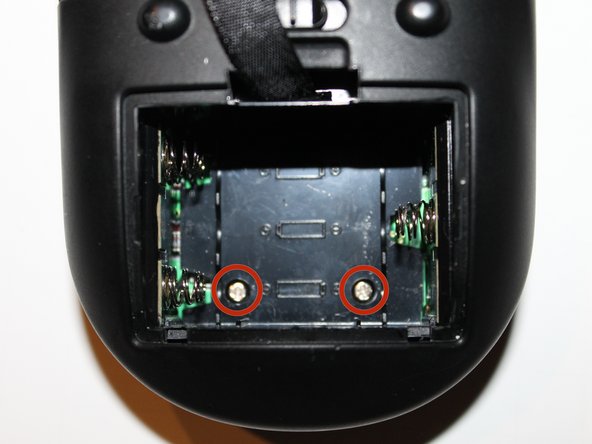
    • Use Phillips #00 screwdriver to remove remaining two screws from the battery compartment

  4. DYMO LabelPOINT 100 Rubber Transport Roller Replacement: step 4, image 1 of 2 DYMO LabelPOINT 100 Rubber Transport Roller Replacement: step 4, image 2 of 2
    • Gently pull the access panel up to separate from the device

    • Some electrical wiring will be exposed and will not detach. Be careful not to damage any electrical wiring when removing access panel.

  5. DYMO LabelPOINT 100 Rubber Transport Roller Replacement, Remove Back Panel: step 5, image 1 of 3 DYMO LabelPOINT 100 Rubber Transport Roller Replacement, Remove Back Panel: step 5, image 2 of 3 DYMO LabelPOINT 100 Rubber Transport Roller Replacement, Remove Back Panel: step 5, image 3 of 3
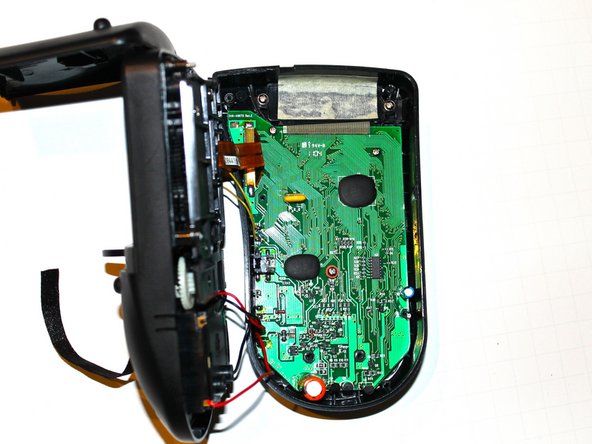
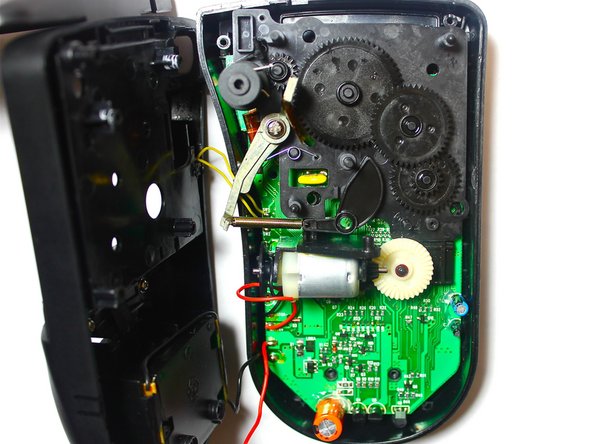
    • Use Phillips #00 screwdriver to remove six screws

    • Slowly separate back panel

    • Gears attached to the back panel are not secured and have a tendency to fall out. This will cause difficulty when reassembling

  6. DYMO LabelPOINT 100 Rubber Transport Roller Replacement, Remove Rubber Transport Roller: step 6, image 1 of 2 DYMO LabelPOINT 100 Rubber Transport Roller Replacement, Remove Rubber Transport Roller: step 6, image 2 of 2
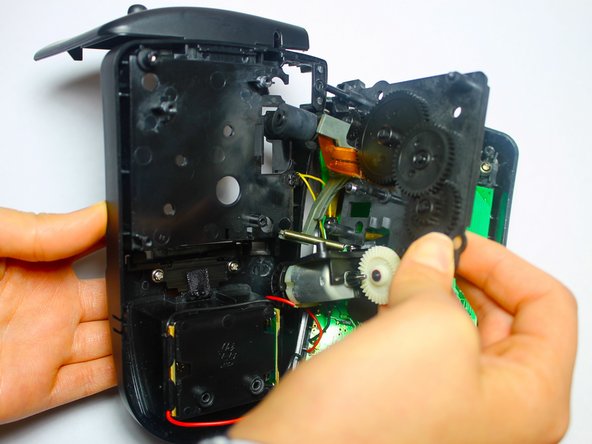
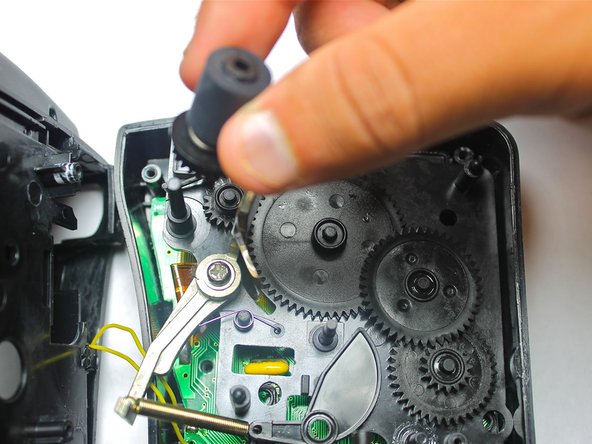
    • Gently pull rubber transport roller up to remove

    • Replace rubber transport roller

Conclusion

To reassemble your device, follow these instructions in reverse order.

Deborah Canas

Member since: 09/25/14

122 Reputation

1 Guide authored

Team

USF Tampa, Team 5-2, Mcgee Fall 2014 Member of USF Tampa, Team 5-2, Mcgee Fall 2014

USFT-MCGEE-F14S5G2

4 Members

6 Guides authored

0 Comments

Add Comment

View Statistics:

Past 24 Hours: 0

Past 7 Days: 1

Past 30 Days: 10

All Time: 1,241