
Chromo Inc. T2 Battery Replacement

What you need

  1. Chromo Inc. T2 Battery Replacement, Removing the Casing: step 1, image 1 of 3 Chromo Inc. T2 Battery Replacement, Removing the Casing: step 1, image 2 of 3 Chromo Inc. T2 Battery Replacement, Removing the Casing: step 1, image 3 of 3
    • Place your Plastic Opening Tool between the screen and the case. Slowly move it around the casing while prying in a downward motion to undo the hinges holding the two together and separate the two parts.

  2. Chromo Inc. T2 Battery Replacement, Turn it around: step 2, image 1 of 1
    • After separating the case and screen, turn your screen face down so you can see the internal parts!

  3. Chromo Inc. T2 Battery Replacement, Freeing the Battery: step 3, image 1 of 3 Chromo Inc. T2 Battery Replacement, Freeing the Battery: step 3, image 2 of 3 Chromo Inc. T2 Battery Replacement, Freeing the Battery: step 3, image 3 of 3
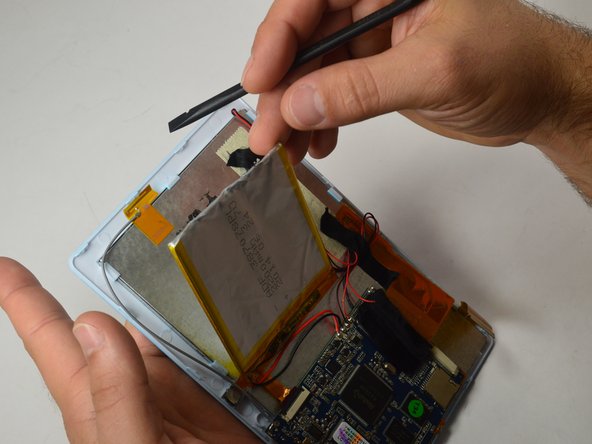
    • Using the Spudger, going between the battery and screen, pry the battery off from the tablet.

    • Note: This will require a little extra force due to the tape holding down the battery!

  4. Chromo Inc. T2 Battery Replacement, Desoldering the Battery Wires: step 4, image 1 of 1
    • Using a Soldering Iron, desolder both Battery wires.

    • Soldering Iron gets very hot, take care to not touch anywhere on the soldering iron except for the handle!

  5. Chromo Inc. T2 Battery Replacement, Finished!: step 5, image 1 of 1
    • Your battery is now ready to be replaced!

Ismael DeLuna

Member since: 01/21/15

637 Reputation

5 Guides authored

Team

USF Tampa, Team 15-1, Watkins Winter 2015 Member of USF Tampa, Team 15-1, Watkins Winter 2015

USFT-WATKINS-W15S15G1

4 Members

6 Guides authored

View Statistics:

Past 24 Hours: 0

Past 7 Days: 0

Past 30 Days: 3

All Time: 1,558