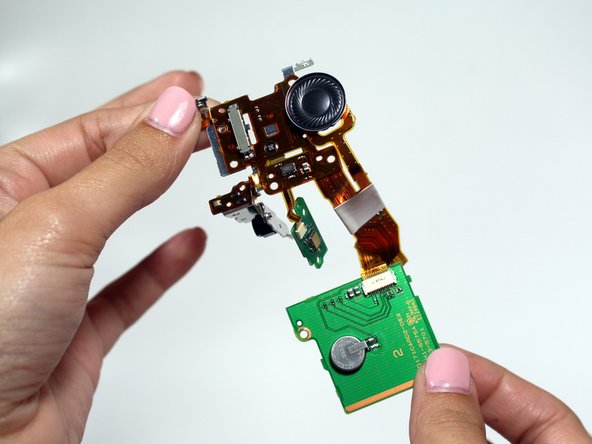
Canon Vixia HF R600 Speaker Replacement

What you need

  1. Canon Vixia HF R600 Speaker Replacement, Handstrap: step 1, image 1 of 2 Canon Vixia HF R600 Speaker Replacement, Handstrap: step 1, image 2 of 2
    • Pull up the Velcro strap starting from the front of the camera and working your way towards the back.

    • If you are adjusting the hand-strap, tighten or loosen the Velcro strap accordingly and reattach it.

    • To remove the hand-strap, pull the Velcro strip through the leather pad.

  2. Canon Vixia HF R600 Speaker Replacement: step 2, image 1 of 2 Canon Vixia HF R600 Speaker Replacement: step 2, image 2 of 2
    • Remove the strap from the camera body.

  3. Canon Vixia HF R600 Speaker Replacement, Battery: step 3, image 1 of 2 Canon Vixia HF R600 Speaker Replacement, Battery: step 3, image 2 of 2
    • Press in the battery release tab located on the bottom of the camera.

    • Slide the battery out from the body.

  4. Canon Vixia HF R600 Speaker Replacement, Casing: step 4, image 1 of 2 Canon Vixia HF R600 Speaker Replacement, Casing: step 4, image 2 of 2
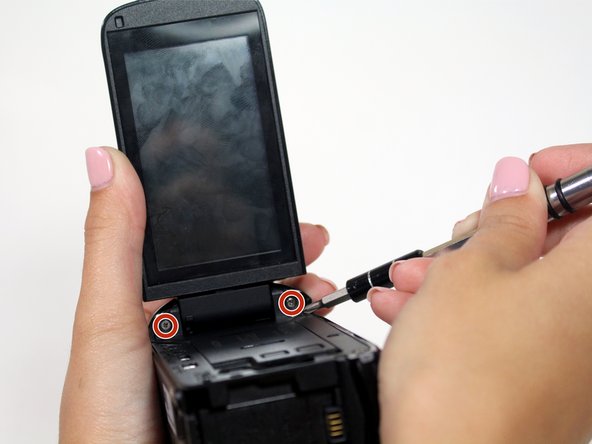
    • Start by removing the two 6mm Phillips #00 screws located on the right side of the camera.

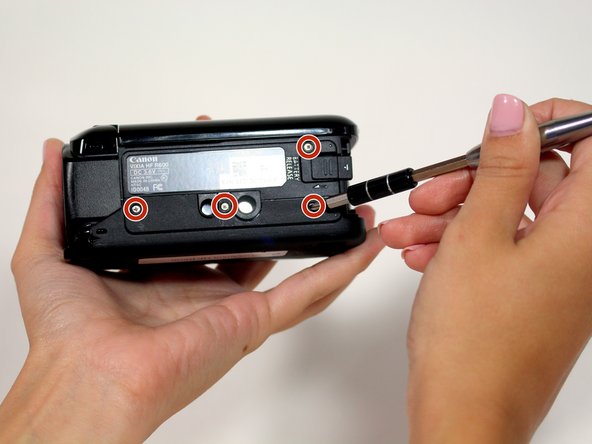
    • Remove four more 6mm Phillips #00 screws found on the bottom of the camera.

  5. Canon Vixia HF R600 Speaker Replacement: step 5, image 1 of 2 Canon Vixia HF R600 Speaker Replacement: step 5, image 2 of 2
    • Open the display screen and remove the three 5mm Phillips #00 screws.

    • Look to the swivel point for the screen to find the last two 5mm Phillips #00 screws that must be removed.

  6. Canon Vixia HF R600 Speaker Replacement: step 6, image 1 of 2 Canon Vixia HF R600 Speaker Replacement: step 6, image 2 of 2
    • Gently pull the plastic casing away from the camera.

  7. Canon Vixia HF R600 Speaker Replacement, Speaker: step 7, image 1 of 2 Canon Vixia HF R600 Speaker Replacement, Speaker: step 7, image 2 of 2
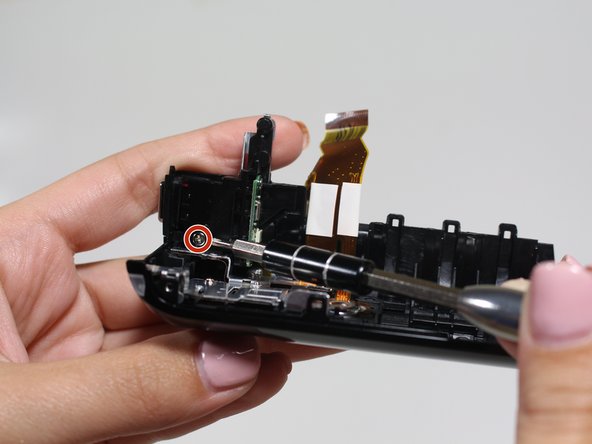
    • Remove one 4mm Phillips JIS#00 screw on the right side of the camera.

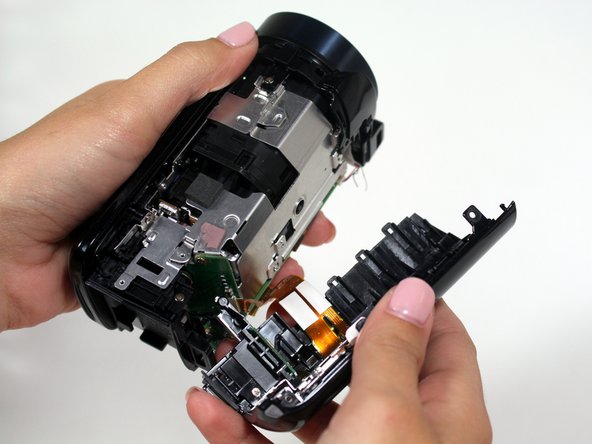
    • Use the plastic opening tool to undo the bronze ribbon connector.

  8. Canon Vixia HF R600 Speaker Replacement: step 8, image 1 of 2 Canon Vixia HF R600 Speaker Replacement: step 8, image 2 of 2
    • Remove one 4mm Phillips JIS#00 screw located on the top of the camera near the battery connection.

    • Pull the plastic casing away from the camera. The speaker and power button are housed in this casing.

  9. Canon Vixia HF R600 Speaker Replacement: step 9, image 1 of 2 Canon Vixia HF R600 Speaker Replacement: step 9, image 2 of 2
    • Remove four 5mm Phillips PH#00 screws holding the speaker bracket in place.

    • Remove one more 5mm screw below the power button.

  10. Canon Vixia HF R600 Speaker Replacement: step 10, image 1 of 2 Canon Vixia HF R600 Speaker Replacement: step 10, image 2 of 2
    • Carefully pull the speaker out of the casing.

Conclusion

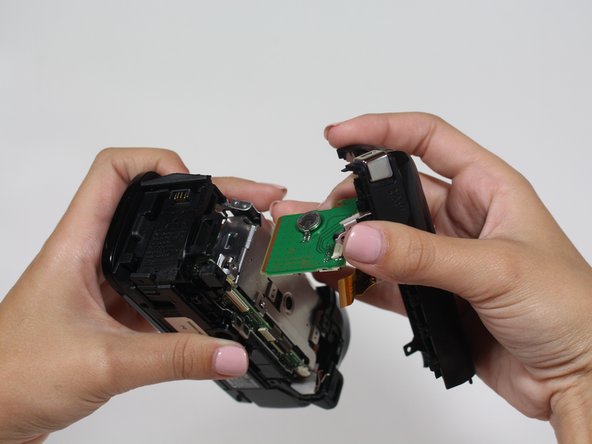
To reassemble your device, follow these instructions in reverse order.

Logan Coats

Member since: 02/10/16

522 Reputation

4 Guides authored

Team

USF Tampa, Team 14-4, Lacy Spring 2016 Member of USF Tampa, Team 14-4, Lacy Spring 2016

USFT-LACY-S16S14G4

3 Members

16 Guides authored

0 Comments

Add Comment

View Statistics:

Past 24 Hours: 0

Past 7 Days: 0

Past 30 Days: 1

All Time: 272