Introduction
The removal of the rear casing to access the screen along with the removal of the screen unit.
What you need
-
-
Before opening the camera, turn it off by sliding the power switch to the off position.
-
-
-
Open the battery compartment, and remove the battery before continuing to the next step.
-
-
-
-
Slide the plastic piece around the viewfinder vertically upwards.
-
Carefully remove the back panel with your fingers.
-
-
-
Remove these screws.
-
There are also 2 screws that hold the small metal piece at the bottom of the image on - remove those as well (not circled in picture). In the middle of the orange ribbon there is another screw that needs removing (below the top-right screw that is circled in the image). Remove that as well for a total of 7 screws.
-
-
-
Lift the broken screen and remove it. Then replace the new screen and attach the tabs that were removed in step 5. Replace the battery and turn on the camera to make sure it works.
-


This guide explains how to replace the LCD screen. To reassemble your device, follow these instructions in reverse order.
This guide explains how to replace the LCD screen. To reassemble your device, follow these instructions in reverse order.
Cancel: I did not complete this guide.
7 other people completed this guide.
Team

UMass Dartmouth, Team 1-4, Duarte Fall 2014 Member of UMass Dartmouth, Team 1-4, Duarte Fall 2014
UMASSD-DUARTE-F14S1G4
3 Members
4 Guides authored
4 Comments
On step 5, there is a screw in the bottom left that you haven't shown in the photo.
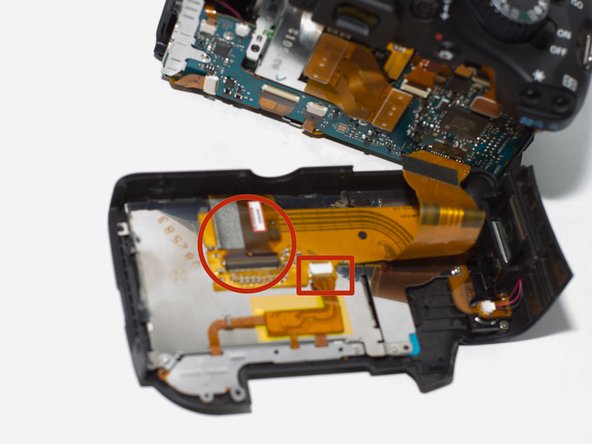
On step 6, there are 2 ribbons that you have to take out. The 1st ribbon on the RIGHT just pulls out of its white connector.
The 2nd ribbon on the LEFT is a bit trickier, but not hard. There is a grey slot that is locking the larger ribbon in place. You need to pry that grey slot/level open so that you can take out the ribbon. Important detail!
There also should be instructions regarding how to replace the screen. For example, if you have just an LCD (and not a backlight to go with it), then you need to remove the LCD from the backlight.
If your order came with a backlight, then you need to take the little silver case that all the screws screw into, and remove it from the backlight, and install it onto your new LCD/Backlight. Should have pictures for that.
Also, the battery cover (that you take off at the beginning) and the SD card cover need to be ON and CLOSED, otherwise the camera will not power up. I was trying to test it to make sure it powered on before I put all the screws on, but left that out, so it wouldn't power on! Good ol' Dad says to me: "Should you put the battery case on?"
Saved me from a big headache! Repaired a very very broken screen for only $30. I thought that the camera was toast!
Andrew -
Couple of steps are missing, but all the essential ones are there. Nice guide, I would rate it “easy“.
Some comments, in addition to Andrew’s:
- for the people who see those small connectors for the first time, it would be nice to explain that the part of the connector has to be pried open before disconnecting the cable.
- the top right screw from the step 6 was not there. Insead, I had to remove the screw that is seen on the image under the ribbon cable n the right side.
I fixed it in an easier way. I heated the LCD surface a bit with a hairdryer till the double-sided tape used beneath the LCD screen was less adhesive, and then pried the broken pieces away with a blade and a tweezer from the edge. 5 minutes work and nothing damaged.
Btw, the LCD screen cost 3CNY, shipping fee excluded.