What you need
-
-
-
The focusing mirror is clamped behind the rubberized housing. It can be levered out of the holder with a screwdriver.
-
-
-
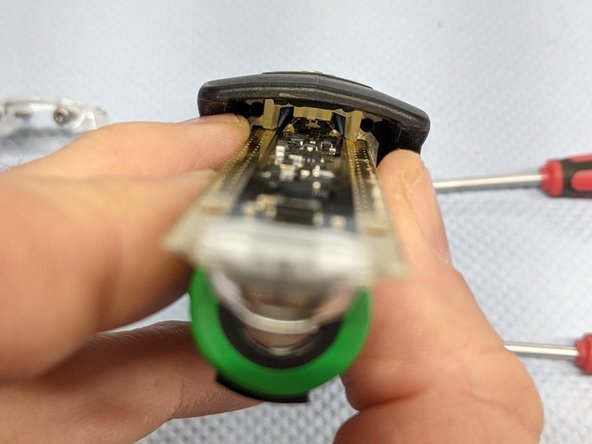
With a little bit of shaking, the circuit board should come out along with the battery pack. It may be necessary to push the inner part of the ON button a little to the side.
-
-
-
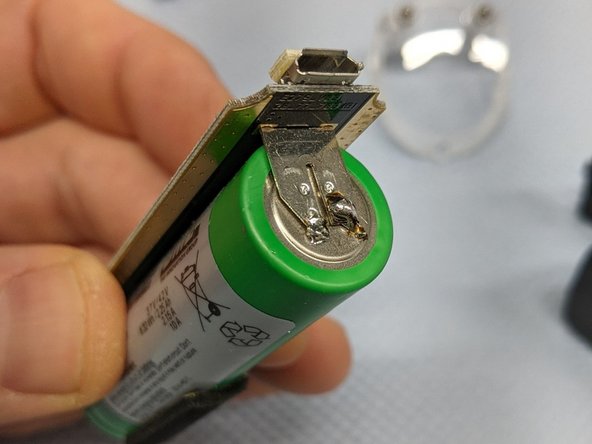
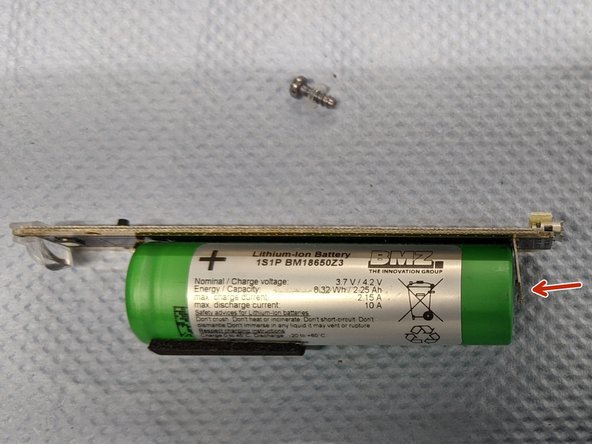
The contact arm must be bent slightly so that it presses against the battery. Then connect it to the battery it with some solder.
-
This work step should be carried out by a specialist, since the battery can be thermally damaged by temperatures of 180°C and this could be dangerous. During normal work with a soldering iron, the battery should never reach that temperature range.
-
-
-
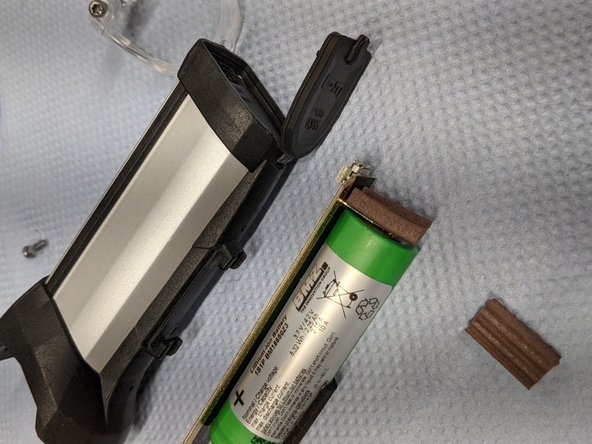
This step is optional. A little foam should be used to prevent the battery unit from moving in the housing.
-


Follow the steps in reverse order to reassemble your device
Follow the steps in reverse order to reassemble your device
Cancel: I did not complete this guide.
7 other people completed this guide.
Special thanks to these translators:
100%

These translators are helping us fix the world! Want to contribute?
Start translating ›
9 Comments
Super, da ich mich nicht traute, auf Verdacht an dem Plastikspiegel rumzudrücken, war diese Anleitung genau was mir fehlte, um Ärger und Geld zu sparen. Der Anschluss am -Pol des Akkus hatte ca 0.5mm Abstand (beim Ladeversuch ohne Kontakt blinkt die blaue LED ständig - natürlich nirgends beschrieben). Zum Aufschrauben hatte Ich nur einen TORX Größe 9, mit etwas Vorsicht ging das jedoch auch.
Der Akku sieht aus als hätte er eine Schutzschaltung integriert, bin mir da aber nicht sicher, da das üblicherweise die Elektronik des Lampenherstellers übernehmen sollte. Der Standardakku mit ca 2.3 Ah könnte wohl problemlos durch mittlerweile erhältliche 3,2-2,5 Ah ersetzt werden.
Alternative wäre gewesen, potentiell destruktiefe Zerlegung und ggf. das Nachfolgemodell mit 150 Lux zum 1,5 fachen Neupreis zu kaufen.
Danke für die Veröffentlichung der Reparaturanleitung!
Hallo Christian,
auch von mir vielen herzlichen Dank für die Anleitung - hatte genau das beschriebene Problem mit meiner IXON.
Löten am Lithium-Ionen-Akku scheint allerdings potentiell gefährlich zu sein ... wenn man im Netz mal nach "Lithium Akkus löten" googelt, hagelt es entsprechende Warnungen. (Überhitzung der Zelle, wenn's ganz blöd läuft brennt's oder das Ding kann einem um die Ohren fliegen ... siehe z.B hier: https://forum.electronicwerkstatt.de/php...). Wahrscheinlich mit ein Grund, dass es da "im Orginalzustand" kein Lötzinn hat, sondern nur diese anscheinend gerne mal versagende zarte Punktverschweißung.
Hallo Michael,
danke für den Hinweis. Daran habe ich gar nicht gedacht. Vielleicht sollte ich dazu schreiben, dass das Löten nur vom Fachmann durchgeführt werden sollte. Denn der Fachmann würde nicht so viel Energie in den Akku bringen, dass er durchgeht. Ein kurze Recherche führte mich zu der Temperatur bei der ein Lithium-Ionen-Akku durchgeht. Diese liegt bei rund 180°C. Normalerweise arbeiten Leute, die mit Weichlot arbeiten mit elektronischen Bauteilen. Diese werden schon durch wesentlich geringere Temperaturen zerstört. Das heißt in der Praxis, wenn ich einen Transistor in eine Schaltung einlöte, sollte ich möglichst wenig Temperatur in das Bauteil einbringen. Das ist einer der Grundsätze beim Weichlöten. Li-Ion-Akkus werden wohl eher durch zu schnelles Laden oder Entladen, mech. Beschädigung oder überschrittene Lebenszeit oder eine Kombination daraus zerstört.
Hallo Christian, danke für die nette Rückmeldung - die Ergänzung wär vielleicht nicht verkehrt. Mit 180° liegt man grade mal so im Bereich der Schmelztemperatur des Lots (und das auch nur bei einem leichtschmelzenden) - da ist es also schon "eng". Und anders als beim Transistor "brät" man direkt am Bauteil herum, nicht an einem zarten Drahtbeinchen, das nur begrenzt Hitze ins eigentliche Bauteil weiterleitet. Deshalb gibt's fürs Löten auch extra Akkus mit Lötfahnen - da bekommt dann nur die Fahne die volle Hitze ab, nicht gleich der Akku selbst. Hat der Akku in der Ixon halt leider nich :-/
HI Christian,
Thank you so much for your guide. I had excactly the same problem, the connector at the far end (further away from the led) had no contact with the battery. Took a little while to solder it again as I really wanted to be careful not to overheat the Li-ion battery. You are a star!