Introduction
In this guide you'll be opening the battery housing of your Blu Studio, this is the second step you'll take whenever you replace or add internal parts (excluding the SIMs and SD cards).
Either fingernails or plastic prying tools can be used for lifting once all the screws have been removed.
What you need
-
-
To begin the removal of your back panel, first locate the lift tab on the bottom-right corner.
-
-
-
-
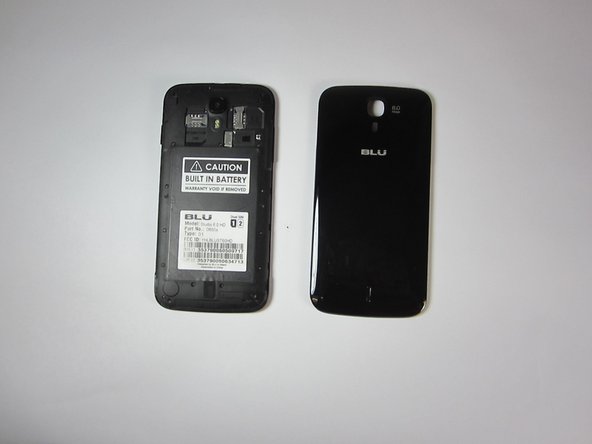
With your back panel already removed from the previous guide you'll need to acquire a Philips head screw driver size (PH00)
-
-
-
After removing all 16 screws you can begin the process of removing the battery housing panel.
-
You will need to use the thinner plastic prying tool to slowly outline the seem of the case starting from the top (near the camera).
-
Try to be careful around the side buttons as the plastic is weakest there.
-
After the top half of the case has been opened insert the thicker prying tool to keep the case open. This will help as the battery and battery housing have a suction cup like action that keeps them from separating.
-


To reassemble your device, follow these instructions in reverse order.
To reassemble your device, follow these instructions in reverse order.
Cancel: I did not complete this guide.
2 other people completed this guide.
Team

USF Tampa, Team 9-1, Blackwell Fall 2014 Member of USF Tampa, Team 9-1, Blackwell Fall 2014
USFT-BLACKWELL-F14S9G1
3 Members
8 Guides authored
One Comment
I have the same phone, This helps me fix the broken screen that i am trying to replace. I need complete screen replacement guide