Blu L120 Rear Facing Camera Replacement

What you need

  1. Blu L120 Rear Facing Camera Replacement, Remove back panel: step 1, image 1 of 3 Blu L120 Rear Facing Camera Replacement, Remove back panel: step 1, image 2 of 3 Blu L120 Rear Facing Camera Replacement, Remove back panel: step 1, image 3 of 3
    • Remove the cover by lifting the notch towards the bottom of the phone. Use your fingernail to lift it up.

  2. Blu L120 Rear Facing Camera Replacement, Screw Removal: step 2, image 1 of 3 Blu L120 Rear Facing Camera Replacement, Screw Removal: step 2, image 2 of 3 Blu L120 Rear Facing Camera Replacement, Screw Removal: step 2, image 3 of 3
    • Remove these nine screws with a small phillips screwdriver. They are all the same size.

    • There is a small screw hidden under the warranty sticker. You may either remove or poke through it .

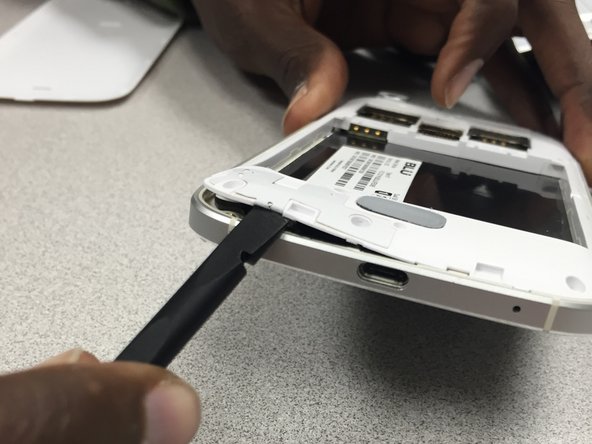
  3. Blu L120 Rear Facing Camera Replacement, Rear Panel  removal: step 3, image 1 of 3 Blu L120 Rear Facing Camera Replacement, Rear Panel  removal: step 3, image 2 of 3 Blu L120 Rear Facing Camera Replacement, Rear Panel  removal: step 3, image 3 of 3
    • Use the pry tool to gently separate the panel from the frame, starting from the bottom left corner and continue along the edge of the phone.

    • *WARNING* by doing this, you will void the manufacturers warranty.

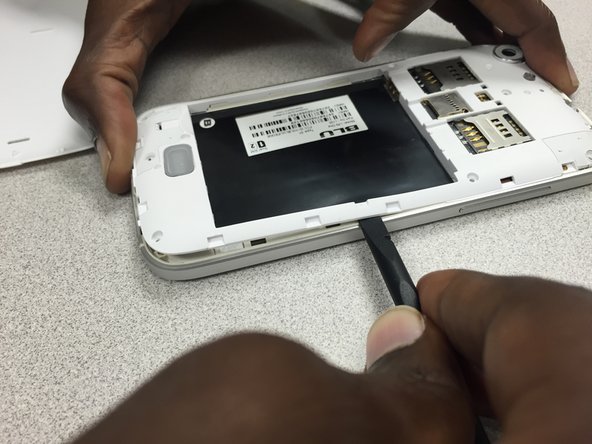
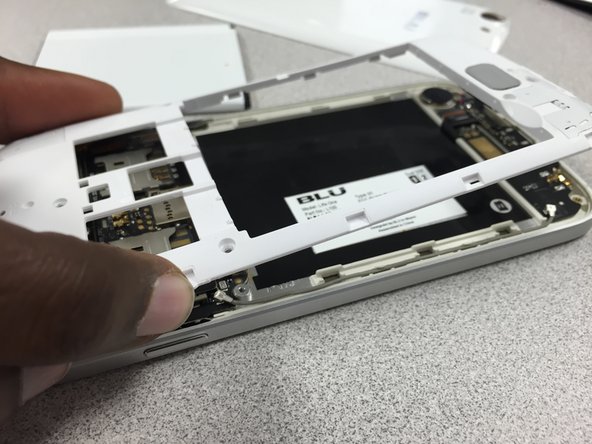
  4. Blu L120 Rear Facing Camera Replacement, Separate back panel from frame: step 4, image 1 of 3 Blu L120 Rear Facing Camera Replacement, Separate back panel from frame: step 4, image 2 of 3 Blu L120 Rear Facing Camera Replacement, Separate back panel from frame: step 4, image 3 of 3
    • Continue using the pry tool around the back panel of the phone to separate both pieces.

    • Once you have gone around the entire frame, use both hands to pull it apart.

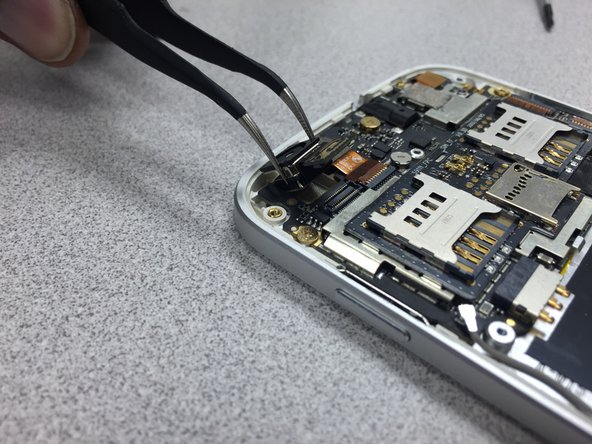
  5. Blu L120 Rear Facing Camera Replacement, Camera Removal: step 5, image 1 of 3 Blu L120 Rear Facing Camera Replacement, Camera Removal: step 5, image 2 of 3 Blu L120 Rear Facing Camera Replacement, Camera Removal: step 5, image 3 of 3
    • Use the pry tool to disconnect the camera from the device.

    • Gently lift the camera up and use the tweezers to remove it from the phone.

    • Reinstall the camera. Then follow the guide in reverse to put the phone back together.

Conclusion

To reassemble your device, follow these instructions in reverse order.

Julio

Member since: 10/25/14

695 Reputation

6 Guides authored

Team

Gateway, Team 1-5, Johnson Fall 2014 Member of Gateway, Team 1-5, Johnson Fall 2014

GCC-JOHNSON-F14S1G5

3 Members

6 Guides authored

0 Comments

Add Comment

View Statistics:

Past 24 Hours: 0

Past 7 Days: 0

Past 30 Days: 0

All Time: 199