
BlackMagic Hyperdeck Studio Mini Fan Replacement

What you need

Video Overview

  1. BlackMagic Hyperdeck Studio Mini Fan Replacement, Unscrew the Outer Case: step 1, image 1 of 1
    • 4 Screws on each side

  2. BlackMagic Hyperdeck Studio Mini Fan Replacement, Remove Fan: step 2, image 1 of 1
    • 2 - Screws

    • 1 - Pull cable

  3. BlackMagic Hyperdeck Studio Mini Fan Replacement, Cut Off Connector from both the old and new fan: step 3, image 1 of 1
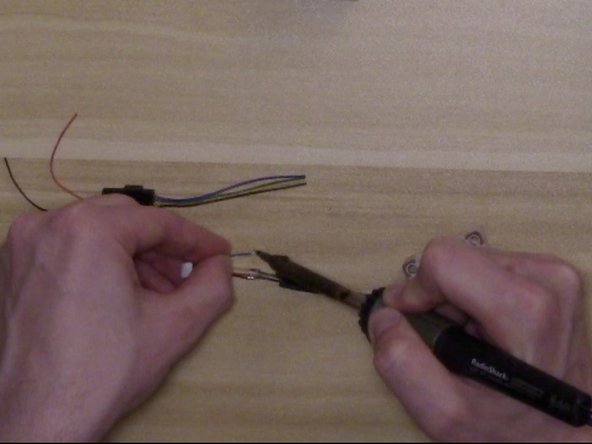
    • Leave some length to solder with and to reach connector on main board.

  4. BlackMagic Hyperdeck Studio Mini Fan Replacement, Prep Fan Wires and Connector Wires: step 4, image 1 of 1
    • Strip Wires, Tin Wires, and prep by adding heat shrink tubing on wires (before shrinking).

  5. BlackMagic Hyperdeck Studio Mini Fan Replacement, Solder Connecter to Fan: step 5, image 1 of 3 BlackMagic Hyperdeck Studio Mini Fan Replacement, Solder Connecter to Fan: step 5, image 2 of 3 BlackMagic Hyperdeck Studio Mini Fan Replacement, Solder Connecter to Fan: step 5, image 3 of 3
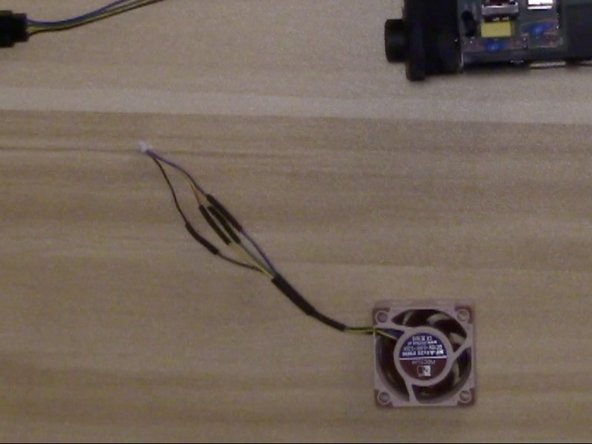
    • Solder the new fan to the old connector using the following pinout.

    • Adjust heat shrink tubing so it covers the solder joints and use heat gun to shrink tubing.

  6. BlackMagic Hyperdeck Studio Mini Fan Replacement, Re-assemble fan to device with fan label facing out: step 6, image 1 of 2 BlackMagic Hyperdeck Studio Mini Fan Replacement, Re-assemble fan to device with fan label facing out: step 6, image 2 of 2
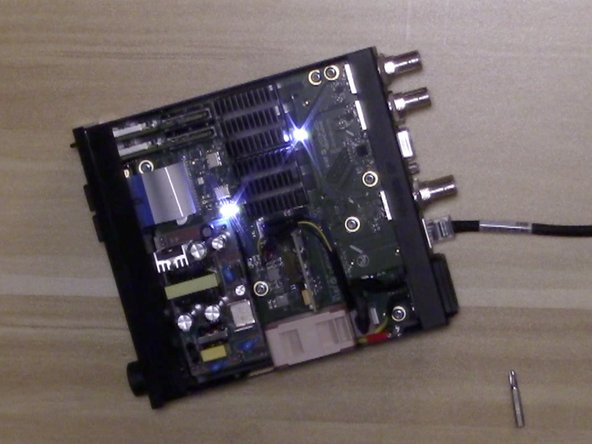
    • Re-assemble fan to device with fan label facing out.

    • OPTIONAL - Use Small Round Nose Pliers to break off case grill to make fan even quieter.

  7. BlackMagic Hyperdeck Studio Mini Fan Replacement, Re-Assemble Case: step 8, image 1 of 1
    • Re-Assemble case.

Kevin Krautle

Member since: 10/10/16

508 Reputation

2 Guides authored

View Statistics:

Past 24 Hours: 0

Past 7 Days: 13

Past 30 Days: 33

All Time: 4,115