
BlackBerry Bold 9700 Keyboard Membrane Replacement

What you need

  1. BlackBerry Bold 9700 Keyboard Membrane Replacement, Motherboard Housing: step 1, image 1 of 3 BlackBerry Bold 9700 Keyboard Membrane Replacement, Motherboard Housing: step 1, image 2 of 3 BlackBerry Bold 9700 Keyboard Membrane Replacement, Motherboard Housing: step 1, image 3 of 3
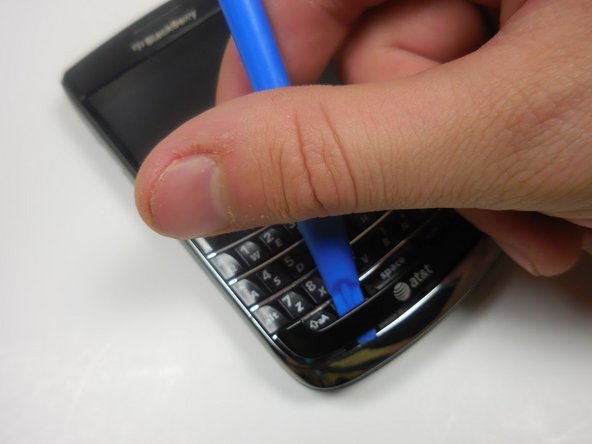
    • Remove the battery by prying the bottom of the battery upward.

    • Once the battery is angled up, pull it away from the top of the device.

    • Be sure to remove all power sources before working on electronic devices to avoid harming yourself or the device.

  2. BlackBerry Bold 9700 Keyboard Membrane Replacement: step 2, image 1 of 3 BlackBerry Bold 9700 Keyboard Membrane Replacement: step 2, image 2 of 3 BlackBerry Bold 9700 Keyboard Membrane Replacement: step 2, image 3 of 3
    • Slide the SIM card from underneath the holding bracket upward toward the battery connector pins.

    • You must remove the SIM card before you can fully disassemble the device. Failure to do so may cause damage to components later on in this process.

  3. BlackBerry Bold 9700 Keyboard Membrane Replacement: step 3, image 1 of 3 BlackBerry Bold 9700 Keyboard Membrane Replacement: step 3, image 2 of 3 BlackBerry Bold 9700 Keyboard Membrane Replacement: step 3, image 3 of 3
    • Pry off the AT&T logo panel with the plastic opening tool.

    • You will hear a snapping sound as the plastic tabs pop out.

  4. BlackBerry Bold 9700 Keyboard Membrane Replacement: step 4, image 1 of 3 BlackBerry Bold 9700 Keyboard Membrane Replacement: step 4, image 2 of 3 BlackBerry Bold 9700 Keyboard Membrane Replacement: step 4, image 3 of 3
    • Use your T5 Torx screwdriver to remove the two black 5.57mm Torx head screws underneath the keyboard.

  5. BlackBerry Bold 9700 Keyboard Membrane Replacement: step 5, image 1 of 3 BlackBerry Bold 9700 Keyboard Membrane Replacement: step 5, image 2 of 3 BlackBerry Bold 9700 Keyboard Membrane Replacement: step 5, image 3 of 3
    • Use the plastic opening tool to remove the frame of your device.

    • You will hear a snapping sound as the tabs pop out.

    • Once the case is loosened from the device, slide the case away from the top of the phone.

  6. BlackBerry Bold 9700 Keyboard Membrane Replacement: step 6, image 1 of 3 BlackBerry Bold 9700 Keyboard Membrane Replacement: step 6, image 2 of 3 BlackBerry Bold 9700 Keyboard Membrane Replacement: step 6, image 3 of 3
    • Gently lift the bottom of the keyboard upward.

    • Pull the keyboard away from the bottom of the LCD display and lift upward.

  7. BlackBerry Bold 9700 Keyboard Membrane Replacement: step 7, image 1 of 2 BlackBerry Bold 9700 Keyboard Membrane Replacement: step 7, image 2 of 2
    • Remove the two Torx head 4.13mm steel screws with your T5 Torx screwdriver.

  8. BlackBerry Bold 9700 Keyboard Membrane Replacement: step 8, image 1 of 3 BlackBerry Bold 9700 Keyboard Membrane Replacement: step 8, image 2 of 3 BlackBerry Bold 9700 Keyboard Membrane Replacement: step 8, image 3 of 3
    • Gently pry up the ribbon connector at the top of the phone with a plastic opening tool.

    • Ribbon connectors are fragile. Too much force in the wrong place will damage the ribbon and may force you to replace an entire assembly.

  9. BlackBerry Bold 9700 Keyboard Membrane Replacement: step 9, image 1 of 3 BlackBerry Bold 9700 Keyboard Membrane Replacement: step 9, image 2 of 3 BlackBerry Bold 9700 Keyboard Membrane Replacement: step 9, image 3 of 3
    • Remove the top two Torx head 4.13mm steel screws with your T5 Torx screwdriver.

    • You should now have two 5.57mm black torx head screws and four 4.13mm steel Torx head screws off to the side. Do not lose them.

    • Lift the clear plastic cover directly upward.

  10. BlackBerry Bold 9700 Keyboard Membrane Replacement: step 10, image 1 of 3 BlackBerry Bold 9700 Keyboard Membrane Replacement: step 10, image 2 of 3 BlackBerry Bold 9700 Keyboard Membrane Replacement: step 10, image 3 of 3
    • Grip the motherboard by the screen

    • Lift the board away from the base of the housing and vertically up.

  11. BlackBerry Bold 9700 Keyboard Membrane Replacement, Keyboard Membrane: step 11, image 1 of 2 BlackBerry Bold 9700 Keyboard Membrane Replacement, Keyboard Membrane: step 11, image 2 of 2
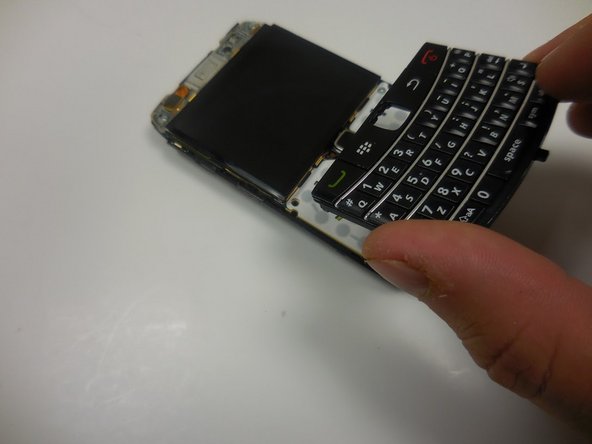
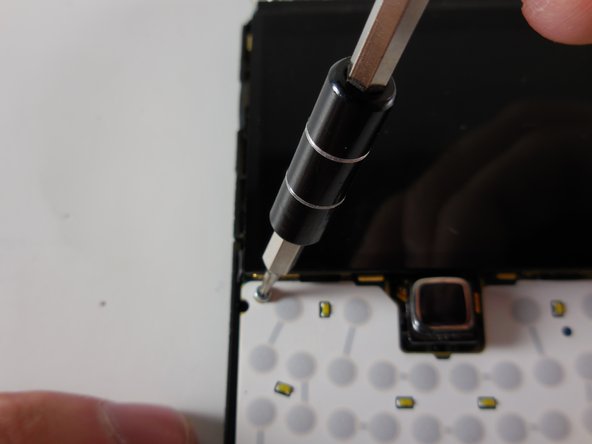
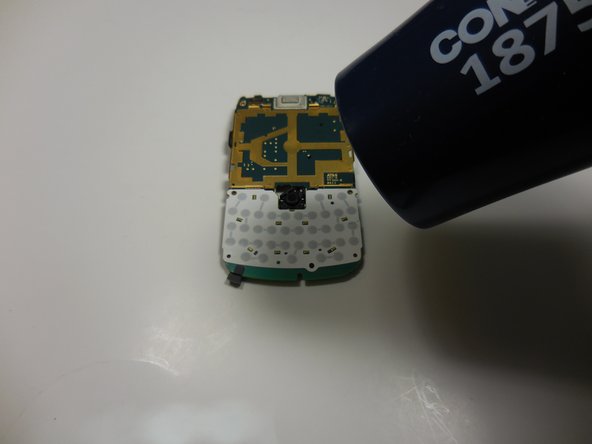
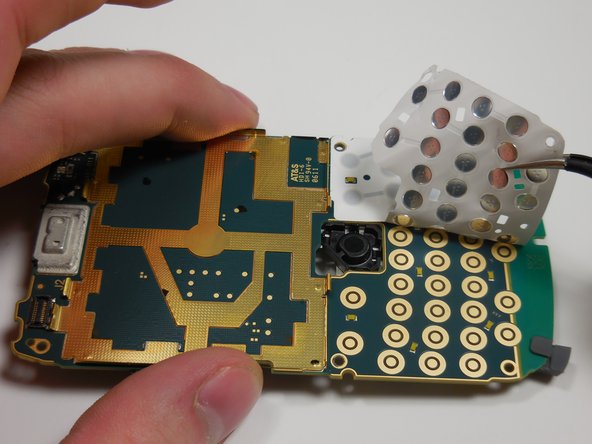
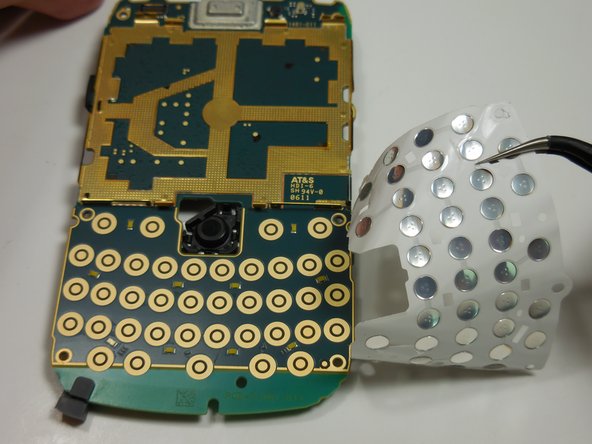
    • Use a conventional hair dryer to heat up the keyboard membrane.

    • On medium or low heat evenly heat up the membrane in the range of 5 to 10 minutes

    • Do not over heat the keyboard membrane. It should become soft to the touch when ready.

    • Removing the trackpad and LCD display prior to this repair is optional. Follow this guide to remove the trackpad, and this guide to remove the LCD display.

  12. BlackBerry Bold 9700 Keyboard Membrane Replacement: step 12, image 1 of 3 BlackBerry Bold 9700 Keyboard Membrane Replacement: step 12, image 2 of 3 BlackBerry Bold 9700 Keyboard Membrane Replacement: step 12, image 3 of 3
    • Use a pair of tweezers to gently peal away the keyboard membrane.

    • Start from one of the top corners and regrip membrane in the center to completly remove the membrane.

  13. BlackBerry Bold 9700 Keyboard Membrane Replacement: step 13, image 1 of 2 BlackBerry Bold 9700 Keyboard Membrane Replacement: step 13, image 2 of 2
    • Align the new keyboard membrane with gold conduits and press down onto circuit board.

Conclusion

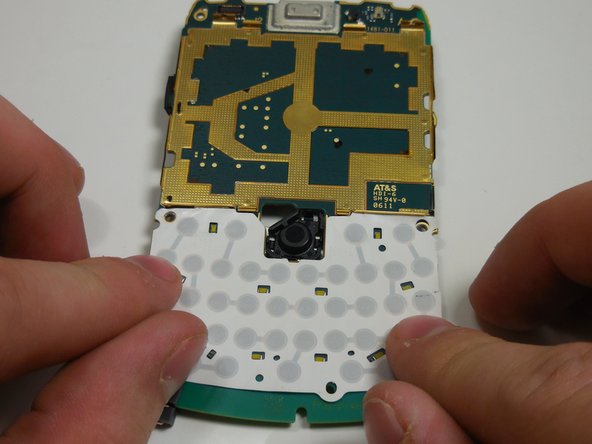
To reassemble your device, follow these instructions in reverse order.

One other person completed this guide.

Danny

Member since: 03/11/15

365 Reputation

3 Guides authored

Team

0 Comments

Add Comment

View Statistics:

Past 24 Hours: 1

Past 7 Days: 1

Past 30 Days: 3

All Time: 1,005