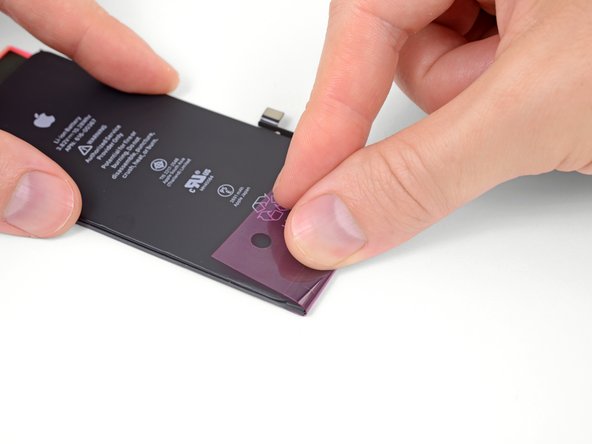
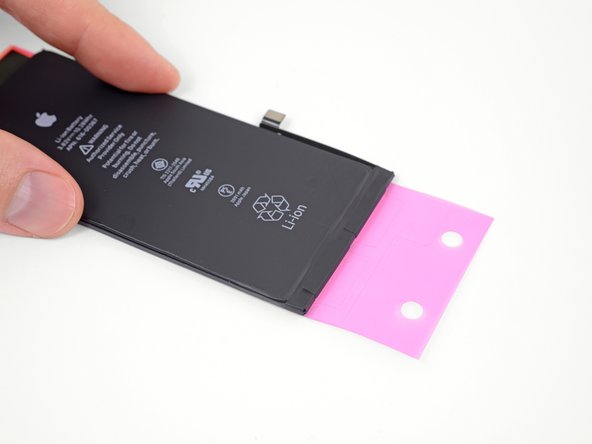
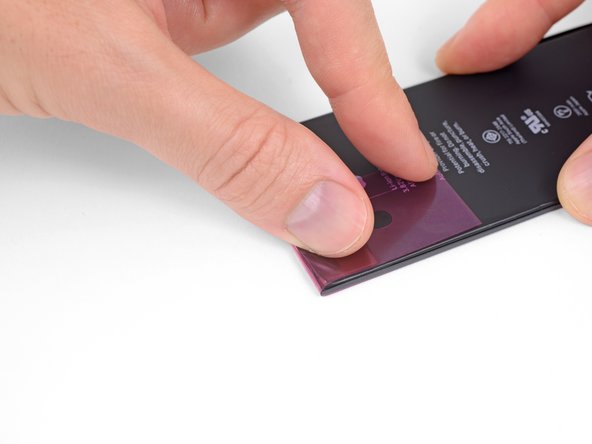
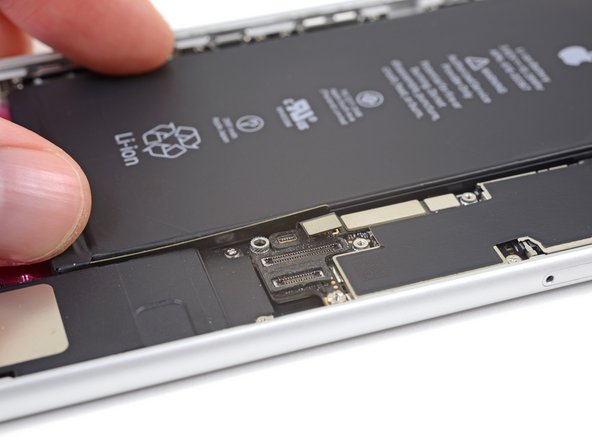
Battery Adhesive Strips Replacement for iPhone 8, 8 Plus, XR

What you need

  1. Battery Adhesive Strips Replacement for iPhone 8, 8 Plus, XR, iPhone 8, 8 Plus, and XR Battery Adhesive Strips: step 1, image 1 of 3 Battery Adhesive Strips Replacement for iPhone 8, 8 Plus, XR, iPhone 8, 8 Plus, and XR Battery Adhesive Strips: step 1, image 2 of 3 Battery Adhesive Strips Replacement for iPhone 8, 8 Plus, XR, iPhone 8, 8 Plus, and XR Battery Adhesive Strips: step 1, image 3 of 3
    • If your new battery came with adhesive strips already installed, skip to Step 8.

    • Otherwise, peel off the large blue plastic liner from your new set of adhesive strips, and discard it.

    • Once the adhesive is exposed, be careful not to touch it.

  2. Battery Adhesive Strips Replacement for iPhone 8, 8 Plus, XR: step 2, image 1 of 2 Battery Adhesive Strips Replacement for iPhone 8, 8 Plus, XR: step 2, image 2 of 2
    • Once the adhesive sticks to the battery, you can't peel it off or reposition it—if you make a mistake, you'll have to start over with fresh adhesive strips.

    • Double-check the orientation of the adhesive strips, and then stick them to the back side of your new battery.

    • Make sure the two shorter strips are nearest the battery cable connector.

    • Center the strips so that the two pairs of black tabs protrude evenly from each side of the battery.

  3. Battery Adhesive Strips Replacement for iPhone 8, 8 Plus, XR: step 3, image 1 of 3 Battery Adhesive Strips Replacement for iPhone 8, 8 Plus, XR: step 3, image 2 of 3 Battery Adhesive Strips Replacement for iPhone 8, 8 Plus, XR: step 3, image 3 of 3
    • Use your fingers or a cloth to press the strips firmly into place on the battery.

  4. Battery Adhesive Strips Replacement for iPhone 8, 8 Plus, XR: step 4, image 1 of 3 Battery Adhesive Strips Replacement for iPhone 8, 8 Plus, XR: step 4, image 2 of 3 Battery Adhesive Strips Replacement for iPhone 8, 8 Plus, XR: step 4, image 3 of 3
    • Flip the battery over, then peel away and discard the two blue plastic liners covering the ends of the adhesive strips.

  5. Battery Adhesive Strips Replacement for iPhone 8, 8 Plus, XR: step 5, image 1 of 3 Battery Adhesive Strips Replacement for iPhone 8, 8 Plus, XR: step 5, image 2 of 3 Battery Adhesive Strips Replacement for iPhone 8, 8 Plus, XR: step 5, image 3 of 3
    • Grab the pink plastic liner at the bottom edge of the battery, and gently pull it taut.

    • Fold the liner over onto the battery and press down.

    • Let go of the liner, and the two black ends of the adhesive strips should remain stuck to the bottom edge of the battery.

  6. Battery Adhesive Strips Replacement for iPhone 8, 8 Plus, XR: step 6, image 1 of 3 Battery Adhesive Strips Replacement for iPhone 8, 8 Plus, XR: step 6, image 2 of 3 Battery Adhesive Strips Replacement for iPhone 8, 8 Plus, XR: step 6, image 3 of 3
    • Repeat the previous step to adhere the ends of the two remaining strips at the top edge of the battery.

  7. Battery Adhesive Strips Replacement for iPhone 8, 8 Plus, XR: step 7, image 1 of 2 Battery Adhesive Strips Replacement for iPhone 8, 8 Plus, XR: step 7, image 2 of 2
    • Peel away and discard the small orange release liner covering the ends of the adhesive strips at the top of the battery.

  8. Battery Adhesive Strips Replacement for iPhone 8, 8 Plus, XR: step 8, image 1 of 1
    • With the large pink release liner still in place, set the battery into your iPhone.

  9. Battery Adhesive Strips Replacement for iPhone 8, 8 Plus, XR: step 9, image 1 of 3 Battery Adhesive Strips Replacement for iPhone 8, 8 Plus, XR: step 9, image 2 of 3 Battery Adhesive Strips Replacement for iPhone 8, 8 Plus, XR: step 9, image 3 of 3
    • Line up the battery connector and press it into place.

  10. Battery Adhesive Strips Replacement for iPhone 8, 8 Plus, XR: step 10, image 1 of 2 Battery Adhesive Strips Replacement for iPhone 8, 8 Plus, XR: step 10, image 2 of 2
    • Lifting from the outside edge, tilt the battery onto its side so you can access the final release liner.

    • Leave the battery connected to the logic board to help keep it positioned correctly.

  11. Battery Adhesive Strips Replacement for iPhone 8, 8 Plus, XR: step 11, image 1 of 3 Battery Adhesive Strips Replacement for iPhone 8, 8 Plus, XR: step 11, image 2 of 3 Battery Adhesive Strips Replacement for iPhone 8, 8 Plus, XR: step 11, image 3 of 3
    • Peel away the final, large, pink release liner and discard it.

  12. Battery Adhesive Strips Replacement for iPhone 8, 8 Plus, XR: step 12, image 1 of 2 Battery Adhesive Strips Replacement for iPhone 8, 8 Plus, XR: step 12, image 2 of 2
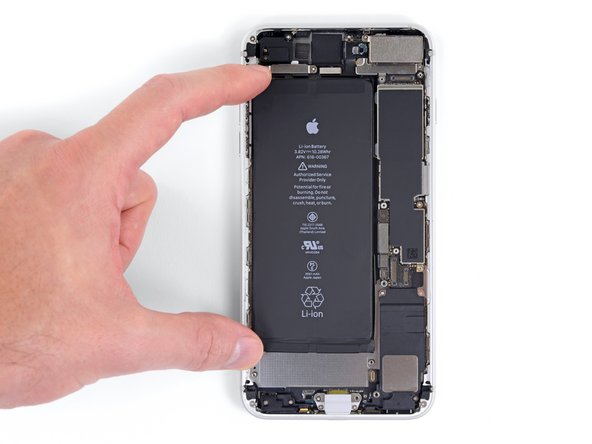
    • Carefully position the battery and set it into the iPhone.

  13. Battery Adhesive Strips Replacement for iPhone 8, 8 Plus, XR: step 13, image 1 of 2 Battery Adhesive Strips Replacement for iPhone 8, 8 Plus, XR: step 13, image 2 of 2
    • Press the top and bottom areas of the battery firmly into place, allowing the adhesive strips to stick to the rear case.

  14. Battery Adhesive Strips Replacement for iPhone 8, 8 Plus, XR: step 14, image 1 of 1
    • Be sure to disconnect the battery again before reassembling your iPhone.

    • Working on your phone with the battery connected can destroy sensitive components.

Jeff Suovanen

Member since: 08/06/13

427,853 Reputation

259 Guides authored

Team

iFixit Member of iFixit

Staff

135 Members

16,732 Guides authored

View Statistics:

Past 24 Hours: 36

Past 7 Days: 181

Past 30 Days: 1,018

All Time: 39,959