
Backbone One Left Mainboard Replacement

What you need

  1. Backbone One Left Mainboard Replacement, Unfasten the screws: step 1, image 1 of 1
    • Use a Phillips screwdriver to remove the four 5.9 mm-long screws.

  2. Backbone One Left Mainboard Replacement, Rotate the upper cover: step 2, image 1 of 3 Backbone One Left Mainboard Replacement, Rotate the upper cover: step 2, image 2 of 3 Backbone One Left Mainboard Replacement, Rotate the upper cover: step 2, image 3 of 3
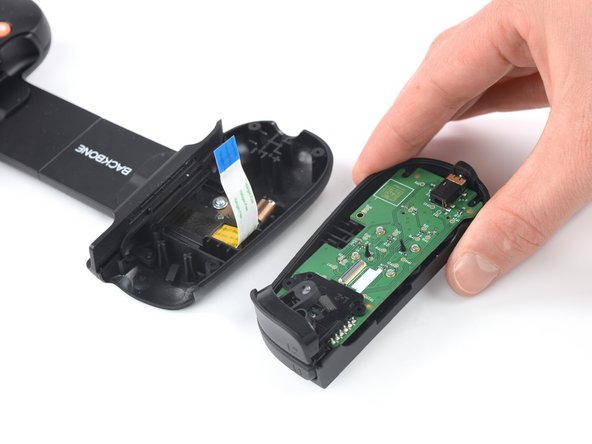
    • Lift up the upper part of the controller.

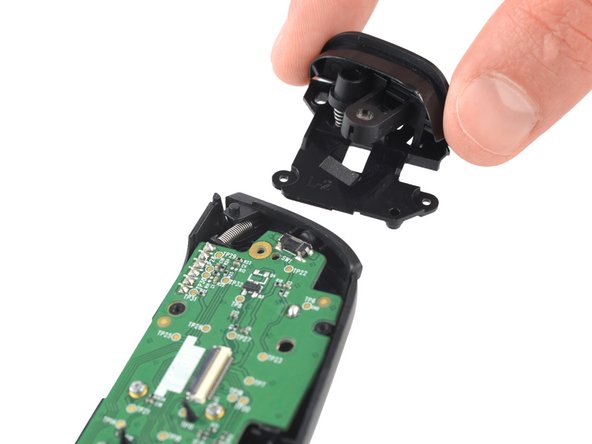
    • Swing over the upper cover and place it on the controller case.

    • Take care that the interconnecting cable has no tension.

  3. Backbone One Left Mainboard Replacement, Remove the protective tape: step 3, image 1 of 3 Backbone One Left Mainboard Replacement, Remove the protective tape: step 3, image 2 of 3 Backbone One Left Mainboard Replacement, Remove the protective tape: step 3, image 3 of 3
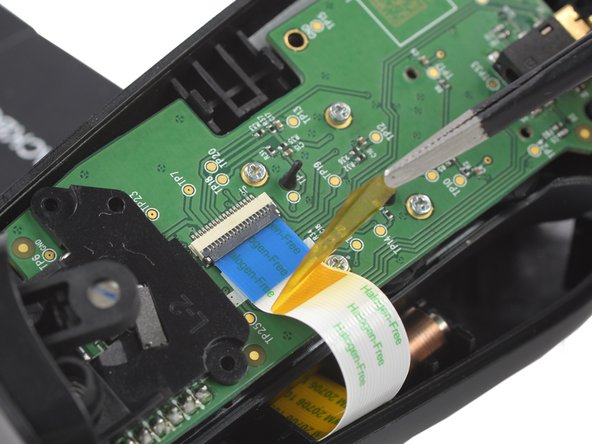
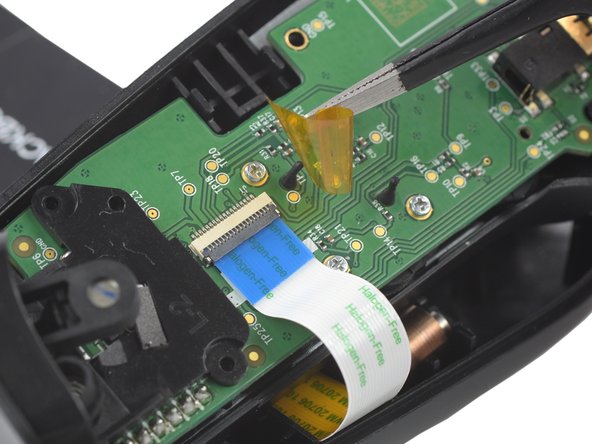
    • Use a pair of tweezers to remove the yellow protective tape which is placed over the interconnect cable connector.

  4. Backbone One Left Mainboard Replacement, Open the ZIF connector: step 4, image 1 of 2 Backbone One Left Mainboard Replacement, Open the ZIF connector: step 4, image 2 of 2
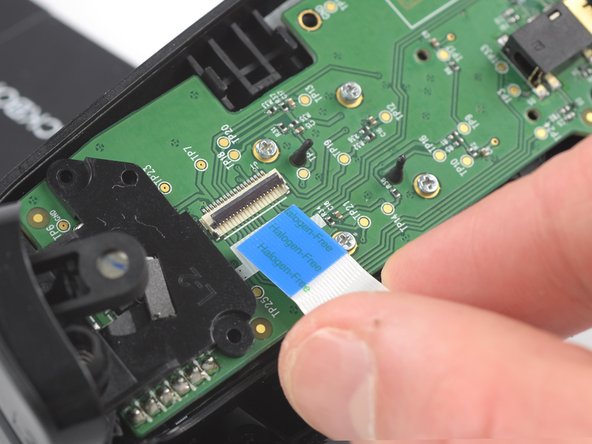
    • Use the tip of an opening pick to open the gray flap of the ZIF connector by pushing it upwards.

  5. Backbone One Left Mainboard Replacement, Disconnect the interconnect cable: step 5, image 1 of 2 Backbone One Left Mainboard Replacement, Disconnect the interconnect cable: step 5, image 2 of 2
    • Use your fingers to disconnect the interconnect cable from its connector.

  6. Backbone One Left Mainboard Replacement: step 6, image 1 of 2 Backbone One Left Mainboard Replacement: step 6, image 2 of 2
    • Remove the upper half of the left controller assembly.

  7. Backbone One Left Mainboard Replacement, Remove the screw: step 7, image 1 of 2 Backbone One Left Mainboard Replacement, Remove the screw: step 7, image 2 of 2
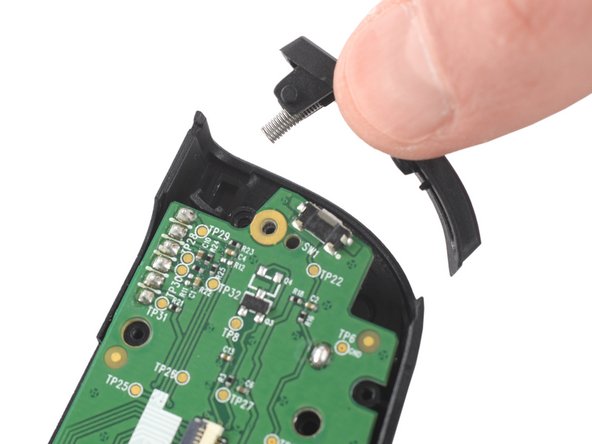
    • Use a Phillips screwdriver to remove the 5.9 mm-long screw which is securing the trigger.

    • The screw is difficult to reach. Insert the screwdriver at an angle of 45 degrees.

  8. Backbone One Left Mainboard Replacement, Remove the trigger: step 8, image 1 of 2 Backbone One Left Mainboard Replacement, Remove the trigger: step 8, image 2 of 2
    • Remove the left trigger.

  9. Backbone One Left Mainboard Replacement, Remove the bumper: step 9, image 1 of 2 Backbone One Left Mainboard Replacement, Remove the bumper: step 9, image 2 of 2
    • Use your fingers to remove the left bumper.

  10. Backbone One Left Mainboard Replacement, Remove the screws: step 10, image 1 of 1
    • Use a Phillips screwdriver to remove the four 3.9 mm-long screws.

  11. Backbone One Left Mainboard Replacement, Remove the mainboard: step 11, image 1 of 2 Backbone One Left Mainboard Replacement, Remove the mainboard: step 11, image 2 of 2
    • Remove the mainboard.

Adriana Zwink

Member since: 12/18/19

48,076 Reputation

167 Guides authored

Team

iFixit Member of iFixit

Staff

135 Members

16,732 Guides authored

View Statistics:

Past 24 Hours: 3

Past 7 Days: 13

Past 30 Days: 63

All Time: 1,427