Introduction
Should you find yourself without Wifi connectivity, a faulty Wifi card could be the problem. Wifi cards enable your computer to connect to outside internet sources, and if it is faulty, it will be difficult for the user to use Wifi. Using this guide will help so that you won’t encounter this problem!
What you need
-
-
Flip the laptop over to the back panel, with the serial numbers facing up.
-
Using a Phillips #1 screwdriver, remove the ten 12 mm screws from the back panel.
-
-
-
Wedge the sharp edge of the plastic opening tool into the seam between the back panel and the rest of the laptop, then gently pry the panel up.
-
Continue breaking the seals by sliding the plastic opening tool around the entire laptop under the seam until the back panel is free.
-
Once you have broken all the seals, carefully lift the panel off.
-
-
-
-
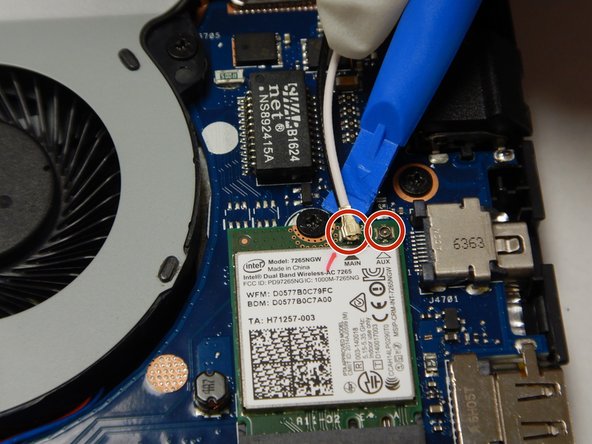
Using the iFixit Opening Tool, disconnect the black and white coaxial cables from the wifi card.
-
Using a Phillips #1 screwdriver, remove the 4mm retaining screw.
-
Gently slide the wifi card out from the connection slot.
-


To reassemble your device, follow these instructions in reverse order.
To reassemble your device, follow these instructions in reverse order.
Team

The Citadel Military College of South Carolina, Team S1-G3, Eggleston Fall 2020 Member of The Citadel Military College of South Carolina, Team S1-G3, Eggleston Fall 2020
CMCSC-EGGLESTON-F20S1G3
3 Members
3 Guides authored