
Asus ROG G751JL-BB17T29 Speaker Replacement

What you need

  1. Asus ROG G751JL-BB17T29 Speaker Replacement, Speaker: step 1, image 1 of 1
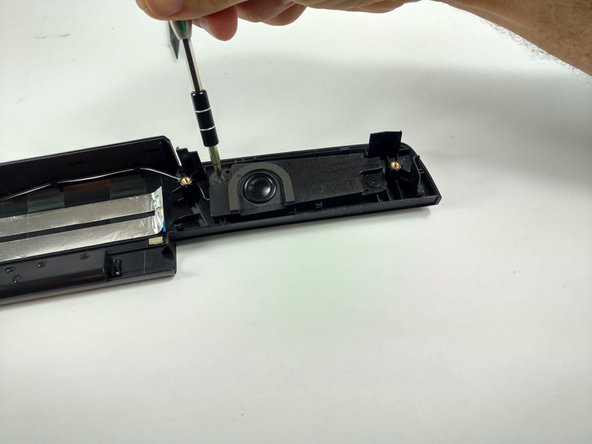
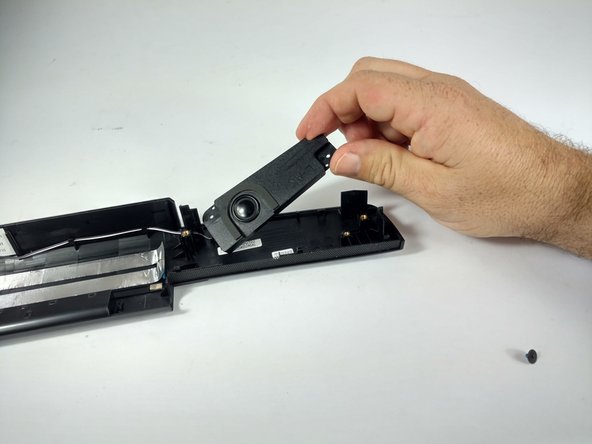
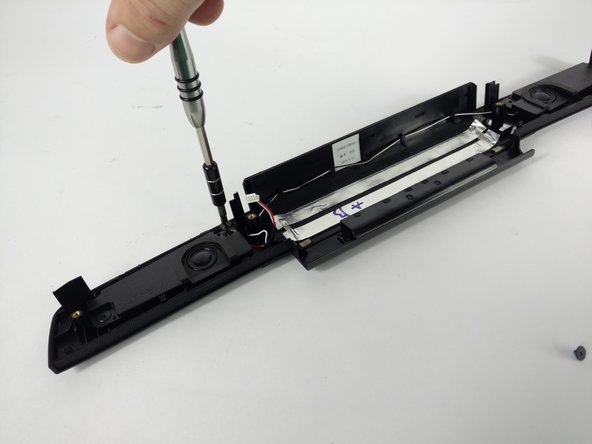
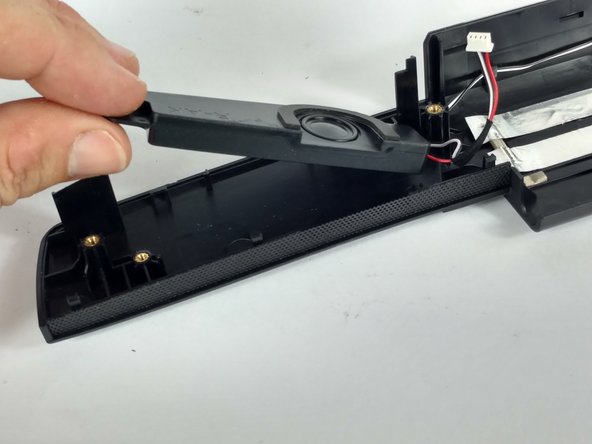
    • Use the point of a spudger to pry out four rubber plugs covering the screws on the bottom of the laptop.

    • Some plugs have a hole or notch into which you can insert the point of a spudger to more easily pry out the plugs.

    • Although the RAM access door and the optical drive have been removed in the following pictures, it is not necessary to remove either for this procedure.

  2. Asus ROG G751JL-BB17T29 Speaker Replacement: step 2, image 1 of 1
    • Remove four 8.8 mm Phillips #00 screws.

  3. Asus ROG G751JL-BB17T29 Speaker Replacement: step 3, image 1 of 3 Asus ROG G751JL-BB17T29 Speaker Replacement: step 3, image 2 of 3 Asus ROG G751JL-BB17T29 Speaker Replacement: step 3, image 3 of 3
    • Flip the laptop right-side up.

    • Use an opening pick to pry the left and right edges of the battery cover away from the laptop enough that you can grip the cover with your fingers.

  4. Asus ROG G751JL-BB17T29 Speaker Replacement: step 4, image 1 of 2 Asus ROG G751JL-BB17T29 Speaker Replacement: step 4, image 2 of 2
    • Lift the battery cover straight up from the laptop.

    • Do not try to completely remove the cover yet, it is still tethered by a speaker cable.

  5. Asus ROG G751JL-BB17T29 Speaker Replacement: step 5, image 1 of 2 Asus ROG G751JL-BB17T29 Speaker Replacement: step 5, image 2 of 2
    • Pull the speaker connectors straight away from each other to disconnect the speaker cable.

    • Make sure the speaker cable is out of the way before you reinstall the battery cover.

  6. Asus ROG G751JL-BB17T29 Speaker Replacement: step 6, image 1 of 3 Asus ROG G751JL-BB17T29 Speaker Replacement: step 6, image 2 of 3 Asus ROG G751JL-BB17T29 Speaker Replacement: step 6, image 3 of 3
    • Remove the two 2.8mm screws on the left speaker housing using a Phillips screwdriver.

    • Be careful not to fully remove the speakers at this point as you may tear the four-pin connector.

  7. Asus ROG G751JL-BB17T29 Speaker Replacement: step 7, image 1 of 3 Asus ROG G751JL-BB17T29 Speaker Replacement: step 7, image 2 of 3 Asus ROG G751JL-BB17T29 Speaker Replacement: step 7, image 3 of 3
    • Remove the two 2.8mm screws on the right speaker housing using a Phillips screwdriver.

    • Be careful not to fully remove the speakers at this point as you may tear the four-pin connector.

  8. Asus ROG G751JL-BB17T29 Speaker Replacement: step 8, image 1 of 3 Asus ROG G751JL-BB17T29 Speaker Replacement: step 8, image 2 of 3 Asus ROG G751JL-BB17T29 Speaker Replacement: step 8, image 3 of 3
    • Using the nylon spudger, pry back the four clips holding the speaker connection cable in place.

    • Your are now clear to remove the speakers from the housing.

    • Take extra care while using the spudger tool to pry back the clips. These clips are fragile and may snap if too much pressure is applied.

Conclusion

To reassemble your device, follow the above steps in reverse order.

Take your e-waste to an R2 or e-Stewards certified recycler.

Repair didn’t go as planned? Check out our Answers community for troubleshooting help.

Kristofer Cesaroni

Member since: 10/06/16

983 Reputation

8 Guides authored

Team

USF Tampa, Team 2-1, Sullivan Fall 2016 Member of USF Tampa, Team 2-1, Sullivan Fall 2016

USFT-SULLIVAN-F16S2G1

4 Members

20 Guides authored

0 Comments

Add Comment

View Statistics:

Past 24 Hours: 0

Past 7 Days: 0

Past 30 Days: 14

All Time: 2,045