Introduction
This guide will detail how to remove and replace the hard drive from your ASUS M51E-B2 laptop. This can be useful if you want to increase the memory capacity of your laptop, or if you're experiencing hard drive failure.
Before starting this guide, make sure you have all of your data from the laptop backed up.
What you need
-
-
Use a Phillips #0 screwdriver to remove the two 2.5 millimeter screws holding the section of the case together.
-
Slide the case off of the hard drive section.
-
-
-
-
Remove the four 2.5 millimeter screws on each cover of the hard drive cover. (Be sure to have a safe place to put them, as they are small and are easily lost.)
-
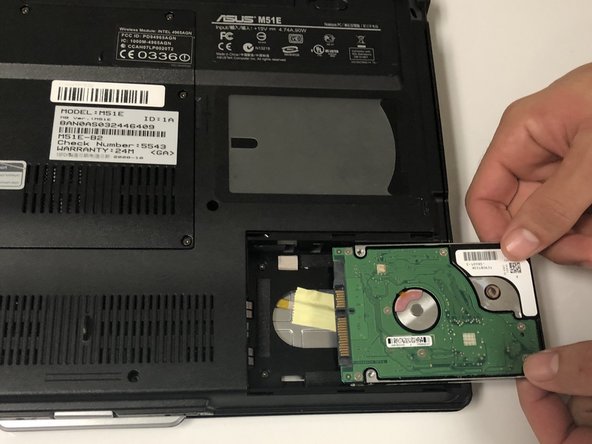
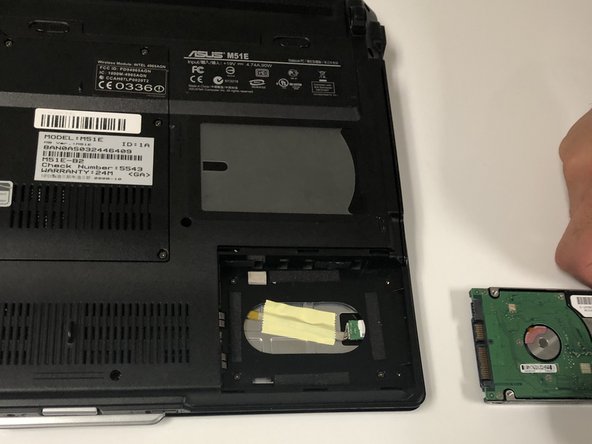
Once you have removed the screws holding the hard drive cover in place, pull on the plastic tab until the cover comes off. The cover is on tracks, so be sure to pull horizontally in order to avoid damaging your computer.
-


To reassemble your device, follow these instructions in reverse order.
To reassemble your device, follow these instructions in reverse order.
Team

University of North Texas, Team S8-G2, Riccardelli Fall 2018 Member of University of North Texas, Team S8-G2, Riccardelli Fall 2018
UNT-RICCARDELLI-F18S8G2
4 Members
4 Guides authored