
Aorus X7 v2 mSATA SSDs Replacement

What you need

  1. Aorus X7 v2 mSATA SSDs Replacement, Aorus x7: step 1, image 1 of 1
    • We'll be working with the x7v2 configuration 2

  2. Aorus X7 v2 mSATA SSDs Replacement, Open the Back Panel: step 2, image 1 of 3 Aorus X7 v2 mSATA SSDs Replacement, Open the Back Panel: step 2, image 2 of 3 Aorus X7 v2 mSATA SSDs Replacement, Open the Back Panel: step 2, image 3 of 3
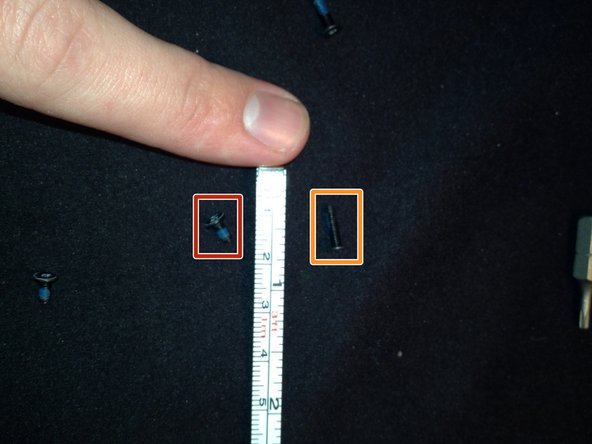
    • Take out the 12 T^ torx screws around the edge. No particular order is required.

    • Short ones

    • Longer ones

    • A small gap will appear after removing the bottom ones, this is acceptable.

    • The Panel has clips at the rear and slides out to the left.

    • the front and left side have no clips or extras

  3. Aorus X7 v2 mSATA SSDs Replacement, Replacing an mSATA card: step 3, image 1 of 3 Aorus X7 v2 mSATA SSDs Replacement, Replacing an mSATA card: step 3, image 2 of 3 Aorus X7 v2 mSATA SSDs Replacement, Replacing an mSATA card: step 3, image 3 of 3
    • An Overview of Parts

    • 4 Slots DDR3L - up to 32GB

    • 2x 860M NVIDIA GTX Graphics

    • intel i7-4860HQ

    • 3x mSATA half cards for SSD's. Replace or insert the appropriate card.

    • RF module

    • Speaker system of Aorus x7

Conclusion

To reassemble your device, follow these instructions in reverse order.

5 other people completed this guide.

Eric Holmes

Member since: 04/20/15

121 Reputation

1 Guide authored

0 Comments

Add Comment

View Statistics:

Past 24 Hours: 0

Past 7 Days: 0

Past 30 Days: 0

All Time: 1,965