Introduction
The motherboard is the key to making every other part of the Alexa function, so many mystery issues might be linked back to a fault with the motherboard. As always, make sure you have grounded yourself and removed any static electricity by touching a metal surface before touching any circuitry.
What you need
-
-
Carefully peel off the bottom pad to expose the fastening screws.
-
Remove three silver 1.4 T5 Torx screws on the top row.
-
Remove one green 1mm T5 Torx screw in the middle.
-
Remove a black 1.5mm T5 screw.
-
Remove three green 1mm T5 screws from the bottom row.
-
-
-
-
After the screws are removed, grip the front panel and separate the front from the back. This will expose the inside of the device.
-
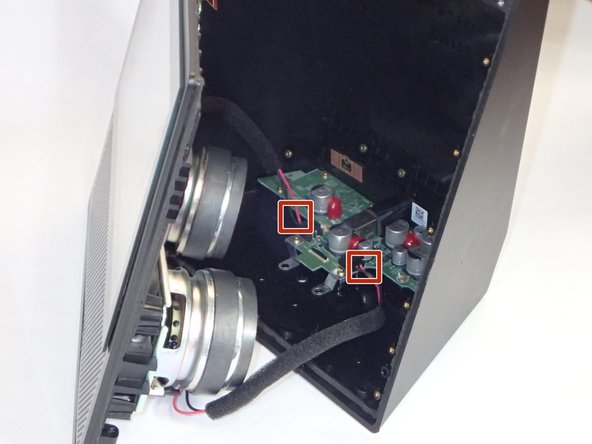
Use tweezers or your hands to carefully disconnect the red wires connecting the speakers to the power supply board.
-
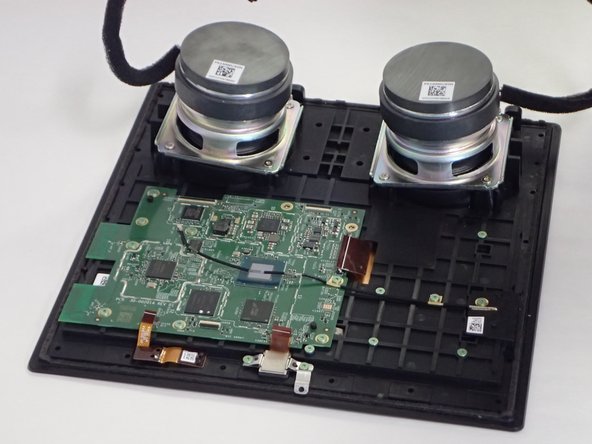
Visually locate the motherboard within the device. It is the large green panel right above the speakers.
-
-
-
Remove two 1mm T5 Torx screws holding down a wire connected to the motherboard.
-
Remove a small piece of black electrical tape attached to the wire.
-
-
-
Once all the screws have been removed, you should be able to gently lift the motherboard up and out of the device.
-


Team

University of South Florida St. Petersburg, Team S1-G3, Stowe Fall 2018 Member of University of South Florida St. Petersburg, Team S1-G3, Stowe Fall 2018
USFSP-STOWE-F18S1G3
4 Members
6 Guides authored