
Air Hog Smash Bots External Casing Replacement

Prerequisite Only
This guide is only intended to be used as a prerequisite for other guides. It's incomplete by itself.

What you need

  1. Air Hog Smash Bots External Casing Replacement, External Casing: step 1, image 1 of 2 Air Hog Smash Bots External Casing Replacement, External Casing: step 1, image 2 of 2
    • Using a Phillip #0 screwdriver to remove the eight 8 mm screws.

  2. Air Hog Smash Bots External Casing Replacement: step 2, image 1 of 2 Air Hog Smash Bots External Casing Replacement: step 2, image 2 of 2
    • Remove the upper armor of the Smash Bot.

  3. Air Hog Smash Bots External Casing Replacement: step 3, image 1 of 1
    • Hold the upper body and slide out the bottom half of the Smash Bot.

    • The motor extends from the lower-body into the upper-body. Be careful to not damage the motor.

  4. Air Hog Smash Bots External Casing Replacement: step 4, image 1 of 1
    • Peel back the four decal stickers that hold the front and back of the bot together.

  5. Air Hog Smash Bots External Casing Replacement: step 5, image 1 of 2 Air Hog Smash Bots External Casing Replacement: step 5, image 2 of 2
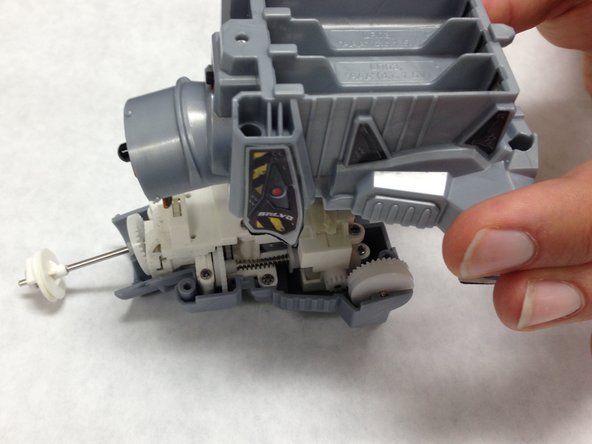
    • Use the plastic opening tool to pry the front and back of the lower body apart.

    • Carefully remove the back of the bot from the front.

Nick Ciulla

Member since: 02/08/16

240 Reputation

2 Guides authored

Team

IUPUI, Team 1-1, Baechle Spring 2016 Member of IUPUI, Team 1-1, Baechle Spring 2016

IUPUI-BAECHLE-S16S1G1

4 Members

14 Guides authored

View Statistics:

Past 24 Hours: 0

Past 7 Days: 0

Past 30 Days: 0

All Time: 47