
Acer Aspire R7-371T-72CF USB Chip Replacement

What you need

  1. Acer Aspire R7-371T-72CF USB Chip Replacement, USB Chip: step 1, image 1 of 2 Acer Aspire R7-371T-72CF USB Chip Replacement, USB Chip: step 1, image 2 of 2
    • Turn off your laptop and disconnect the power adapter.

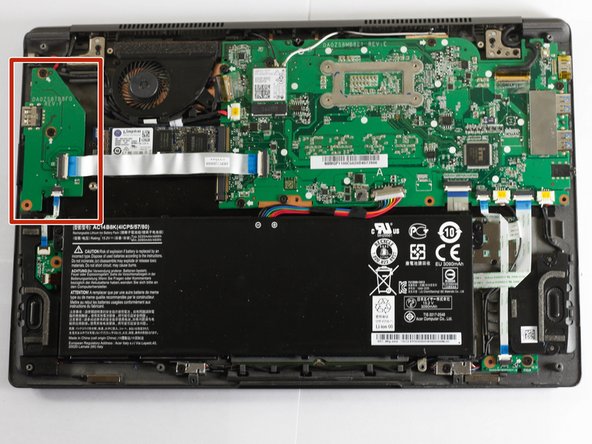
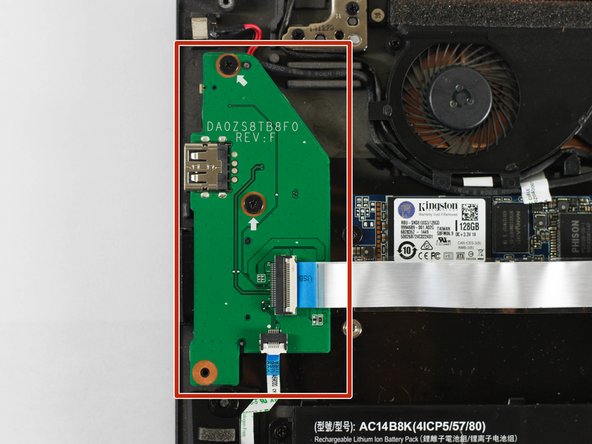
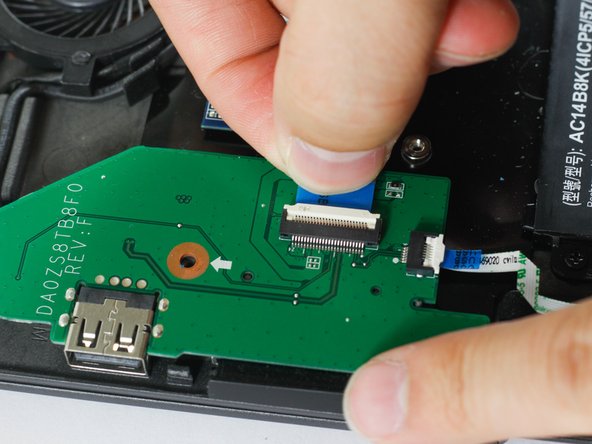
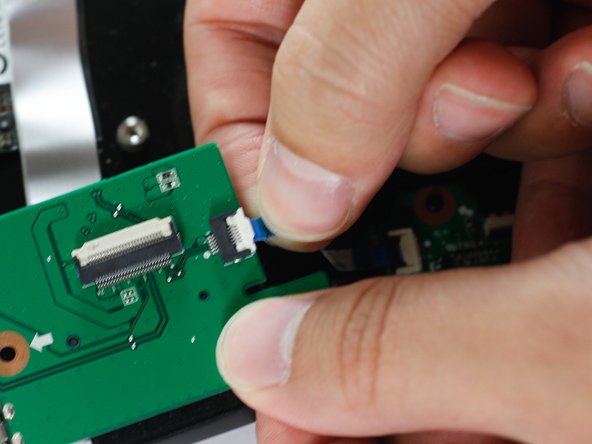
    • Locate and remove all 12 Phillips #00 6mm screws on the backside of the laptop.

  2. Acer Aspire R7-371T-72CF USB Chip Replacement: step 2, image 1 of 1
    • Using your prying tool, carefully remove the back panel.

  3. Acer Aspire R7-371T-72CF USB Chip Replacement: step 3, image 1 of 3 Acer Aspire R7-371T-72CF USB Chip Replacement: step 3, image 2 of 3 Acer Aspire R7-371T-72CF USB Chip Replacement: step 3, image 3 of 3
    • Locate the USB chip, as shown to the left.

    • This can be identified by its location to the left of the cooling fan and above the battery to the left.

  4. Acer Aspire R7-371T-72CF USB Chip Replacement: step 4, image 1 of 3 Acer Aspire R7-371T-72CF USB Chip Replacement: step 4, image 2 of 3 Acer Aspire R7-371T-72CF USB Chip Replacement: step 4, image 3 of 3
    • Unscrew the two Phillips #00 4mm screws located on the USB chip.

  5. Acer Aspire R7-371T-72CF USB Chip Replacement: step 5, image 1 of 3 Acer Aspire R7-371T-72CF USB Chip Replacement: step 5, image 2 of 3 Acer Aspire R7-371T-72CF USB Chip Replacement: step 5, image 3 of 3
    • Push the white panel upwards to unlock the cable and then remove the cable.

    • Repeat for the second cable.

Conclusion

To reassemble your device, follow these instructions in reverse order.

One other person completed this guide.

Dylan Meintser

Member since: 09/27/17

476 Reputation

4 Guides authored

Team

Cal Poly, Team S8-G5, Banghart Fall 2017 Member of Cal Poly, Team S8-G5, Banghart Fall 2017

CPSU-BANGHART-F17S8G5

5 Members

5 Guides authored

0 Comments

Add Comment

View Statistics:

Past 24 Hours: 0

Past 7 Days: 0

Past 30 Days: 1

All Time: 491