
ASUS X533SA-BHCLN10 LCD Screen Replacement

What you need

  1. ASUS X533SA-BHCLN10 LCD Screen Replacement, LCD Screen: step 1, image 1 of 2 ASUS X533SA-BHCLN10 LCD Screen Replacement, LCD Screen: step 1, image 2 of 2
    • Power off laptop.

    • Flip over the laptop so the model stickers are pointing towards the ceiling, and the back of the laptop is facing you.

  2. ASUS X533SA-BHCLN10 LCD Screen Replacement: step 2, image 1 of 3 ASUS X533SA-BHCLN10 LCD Screen Replacement: step 2, image 2 of 3 ASUS X533SA-BHCLN10 LCD Screen Replacement: step 2, image 3 of 3
    • Carefully insert a plastic opening tool into the top edge of the plastic cover. Slowly run the tool along the top edge to allow several small plastic clips to release.

    • Lift the plastic cover off and set it aside.

  3. ASUS X533SA-BHCLN10 LCD Screen Replacement: step 3, image 1 of 3 ASUS X533SA-BHCLN10 LCD Screen Replacement: step 3, image 2 of 3 ASUS X533SA-BHCLN10 LCD Screen Replacement: step 3, image 3 of 3
    • Using tweezers, remove the (2) two magnetic tabs covering the screws on the screen.

  4. ASUS X533SA-BHCLN10 LCD Screen Replacement: step 4, image 1 of 3 ASUS X533SA-BHCLN10 LCD Screen Replacement: step 4, image 2 of 3 ASUS X533SA-BHCLN10 LCD Screen Replacement: step 4, image 3 of 3
    • Use a JIS #0 screwdriver to remove the two 4.5mm screws.

  5. ASUS X533SA-BHCLN10 LCD Screen Replacement: step 5, image 1 of 2 ASUS X533SA-BHCLN10 LCD Screen Replacement: step 5, image 2 of 2
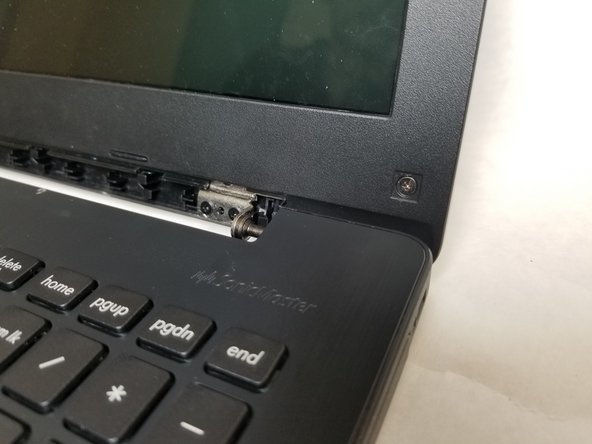
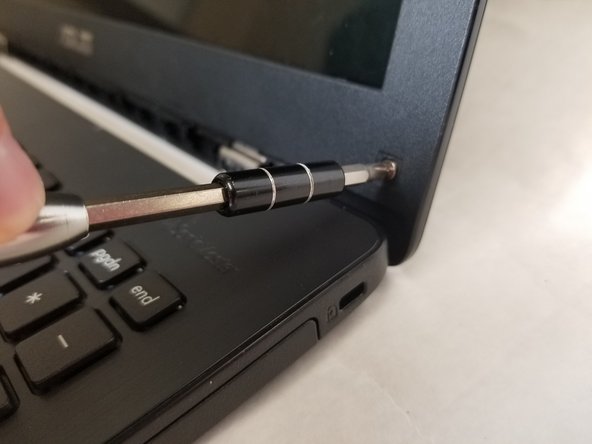
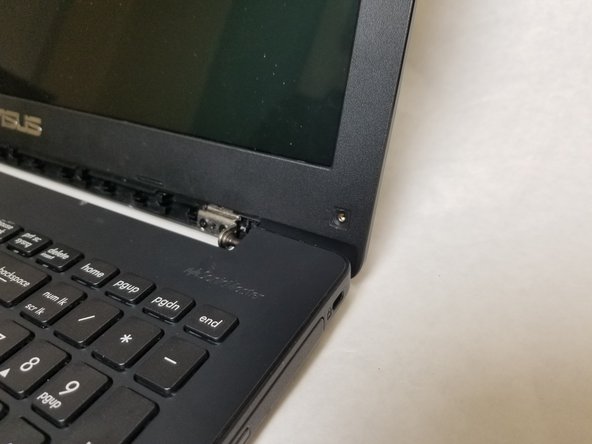
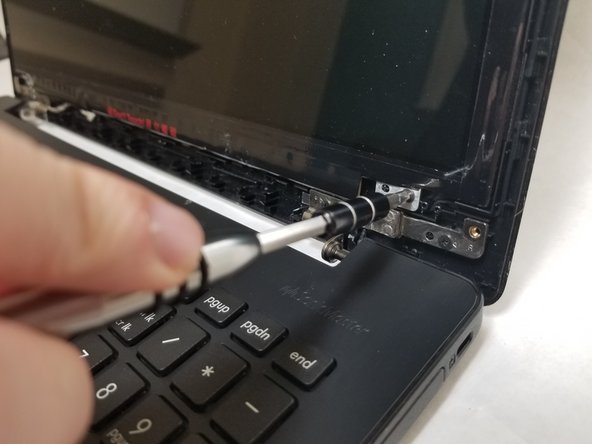
    • Insert a plastic opening tool under the edge of the laptop lid.

    • Carefully pop out the sides of the laptop by running the plastic opening tool along the edge.

  6. ASUS X533SA-BHCLN10 LCD Screen Replacement: step 6, image 1 of 2 ASUS X533SA-BHCLN10 LCD Screen Replacement: step 6, image 2 of 2
    • Use a JIS #0 screwdriver to unscrew the four 3.5mm screws.

  7. ASUS X533SA-BHCLN10 LCD Screen Replacement: step 7, image 1 of 3 ASUS X533SA-BHCLN10 LCD Screen Replacement: step 7, image 2 of 3 ASUS X533SA-BHCLN10 LCD Screen Replacement: step 7, image 3 of 3
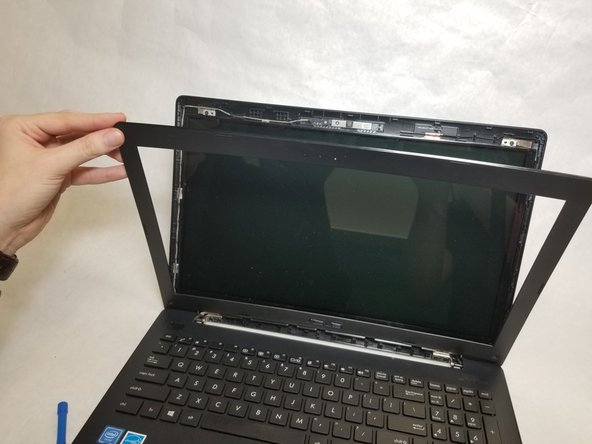
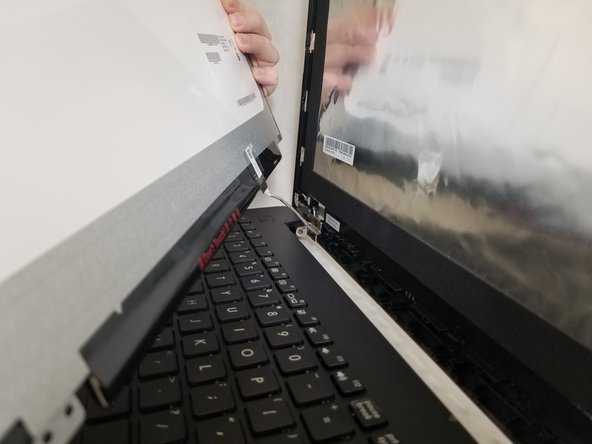
    • Carefully lift up the LCD screen.

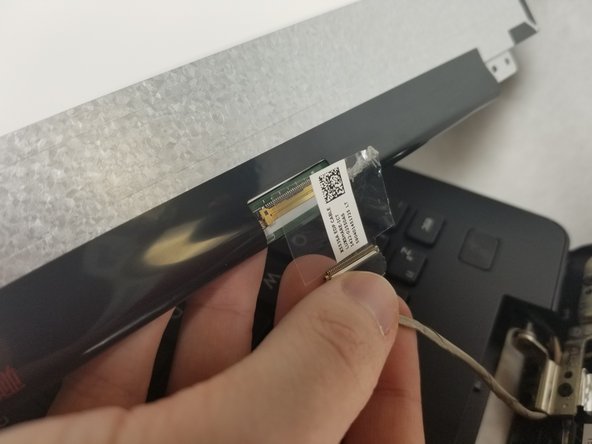
    • Carefully remove the cable connecting the LCD to the laptop by popping up the white clip on the laptop and sliding the connector out.

Spencer Lee

Member since: 11/01/18

268 Reputation

2 Guides authored

Team

IUPUI, Team S2-G4, Harley Fall 2018 Member of IUPUI, Team S2-G4, Harley Fall 2018

IUPUI-HARLEY-F18S2G4

3 Members

2 Guides authored

View Statistics:

Past 24 Hours: 0

Past 7 Days: 2

Past 30 Days: 4

All Time: 520