
ASUS U57A-BBL4 Motherboard Replacement

What you need

  1. ASUS U57A-BBL4 Motherboard Replacement, Battery: step 1, image 1 of 1
    • Make sure the laptop is completely shut down to avoid data complications.

    • Hold the left lock switch towards the left to the unlock option.

  2. ASUS U57A-BBL4 Motherboard Replacement: step 2, image 1 of 1
    • Toggle the right lock switch to the unlock option.

  3. ASUS U57A-BBL4 Motherboard Replacement: step 3, image 1 of 1
    • Gently slide the battery out while still holding the left unlock switch.

  4. ASUS U57A-BBL4 Motherboard Replacement, Front Panel Assembly: step 4, image 1 of 2 ASUS U57A-BBL4 Motherboard Replacement, Front Panel Assembly: step 4, image 2 of 2
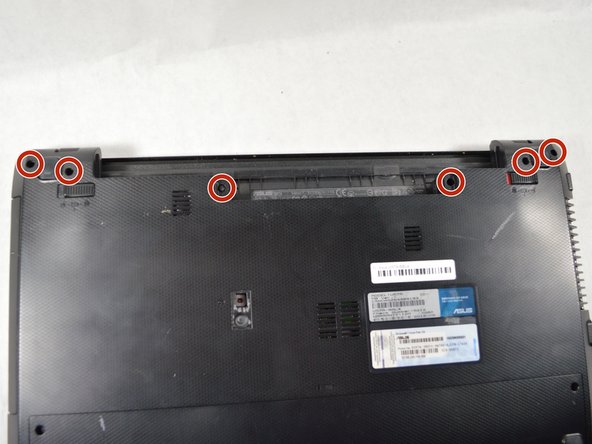
    • Remove the two 2 mm Phillips head screws on each side on the bottom using PH00 screw driver.

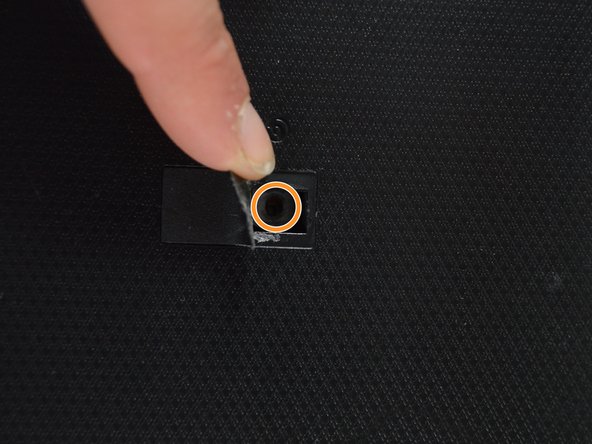
    • Remove the one 2 mm screw underneath the black cover in the middle using the same screw driver.

  5. ASUS U57A-BBL4 Motherboard Replacement: step 5, image 1 of 1
    • Remove the RAM by lifting up with your fingers and sliding it out towards you.

  6. ASUS U57A-BBL4 Motherboard Replacement: step 6, image 1 of 1
    • Remove the three 2 mm Phillips head screws on the hard drive using PH00 screw driver.

    • Remove the remaining seven 1.8 mm Phillips head screws using the same screw driver.

  7. ASUS U57A-BBL4 Motherboard Replacement: step 7, image 1 of 2 ASUS U57A-BBL4 Motherboard Replacement: step 7, image 2 of 2
    • Remove the hard drive by sliding it to the left and lifting up.

  8. ASUS U57A-BBL4 Motherboard Replacement: step 8, image 1 of 2 ASUS U57A-BBL4 Motherboard Replacement: step 8, image 2 of 2
    • Remove the six 2 mm Phillips head screws on the top edge of the laptop using PH00 screw driver.

    • Flip the laptop right-side up and open the screen.

  9. ASUS U57A-BBL4 Motherboard Replacement: step 9, image 1 of 3 ASUS U57A-BBL4 Motherboard Replacement: step 9, image 2 of 3 ASUS U57A-BBL4 Motherboard Replacement: step 9, image 3 of 3
    • Starting in a corner of the keyboard, pry the keyboard from the laptop using a plastic opening tool.

    • Remove the ribbon cable on the bottom of the keyboard by lifting up on the tape and pulling up.

    • The front panel is now loose from the laptop.

  10. ASUS U57A-BBL4 Motherboard Replacement, Optical Drive: step 10, image 1 of 1
    • Slide the optical drive out. It should easily come out.

    What kind of connection links the dvd with the laptop? sata? Something else?

    Thomas Seiffert - Reply

  11. ASUS U57A-BBL4 Motherboard Replacement, Motherboard: step 11, image 1 of 1
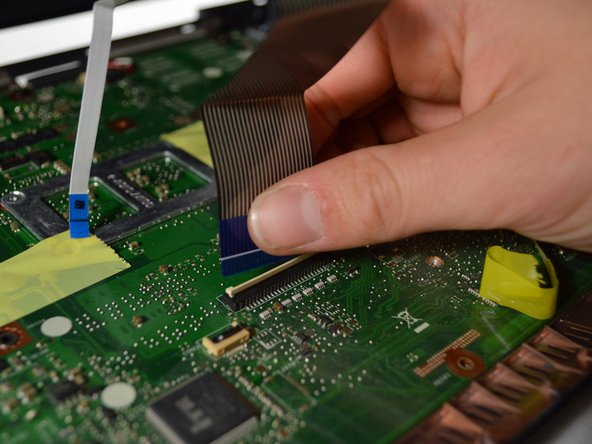
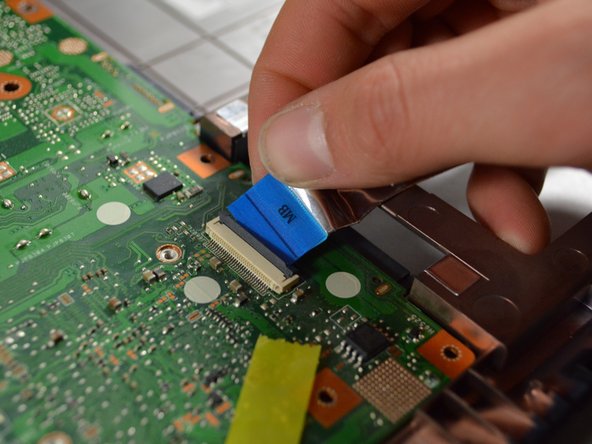
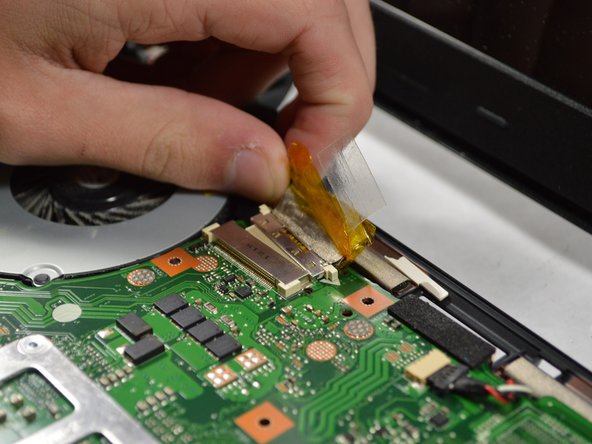
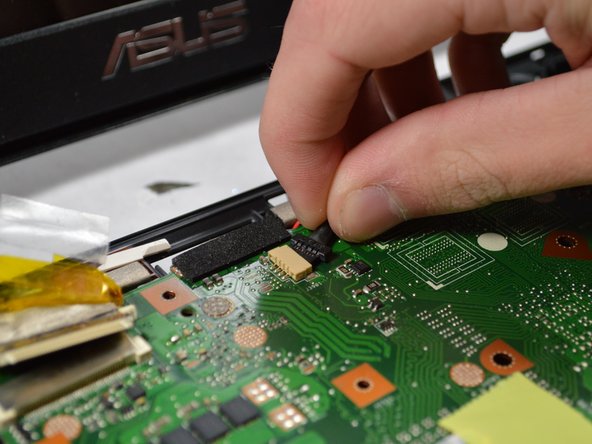
    • Remove the four 2 mm Phillips head screws from the top of the motherboard and fan using PH #1 screwdriver.

  12. ASUS U57A-BBL4 Motherboard Replacement: step 12, image 1 of 2 ASUS U57A-BBL4 Motherboard Replacement: step 12, image 2 of 2
    • Remove the blue cable on the bottom right by lifting up on the tab and pulling the cable out.

  13. ASUS U57A-BBL4 Motherboard Replacement: step 13, image 1 of 3 ASUS U57A-BBL4 Motherboard Replacement: step 13, image 2 of 3 ASUS U57A-BBL4 Motherboard Replacement: step 13, image 3 of 3
    • Peel off the black and yellow tape attaching the fan to the base.

    • Peel the tape off the yellow cable and pull out to remove the cable.

    • Remove the small black, white and red cable next to the yellow cable at the top.

  14. ASUS U57A-BBL4 Motherboard Replacement: step 14, image 1 of 1
    • Carefully and slowly lift up the motherboard from the base and remove the red and black cable underneath the motherboard in the top left corner near the fan.

    • The motherboard and fan are still attached to each other, but are loose from the base.

  15. ASUS U57A-BBL4 Motherboard Replacement: step 15, image 1 of 1
    • Remove the four 2 mm Phillips head screws surrounding the copper rod using PH1 screw driver.

  16. ASUS U57A-BBL4 Motherboard Replacement: step 16, image 1 of 1
    • Remove the red, blue, black and yellow cable attaching the fan and motherboard together with your fingers.

    • Now the motherboard and fan are completely separate from each other.

Conclusion

To reassemble your device, follow these instructions in reverse order.

One other person completed this guide.

Isabella Bernardi

Member since: 10/18/17

671 Reputation

6 Guides authored

Team

2 Comments

Awesome! I have this exact computer mentioned (u57a bbL4) and am having the same problems you've mentioned, so I'm considering buying and replacing the motherboard. I noticed that there is a U57A k554 motherboard, not sure but is this an upgrade? Is there a motherboard that is an upgrade all the while fitting all of the other specifications for the elements? cpu, ram, hd etc? I am going to get a motherboard and a ssd .

Thanks for the info!

Dave C - Reply

I am not sure about the U57A K554 being the upgrade to the previous one but since it has the same series it should not be a problem.

Welcome

Brijesh Patel - Reply

Add Comment

View Statistics:

Past 24 Hours: 0

Past 7 Days: 4

Past 30 Days: 9

All Time: 1,123