Introduction
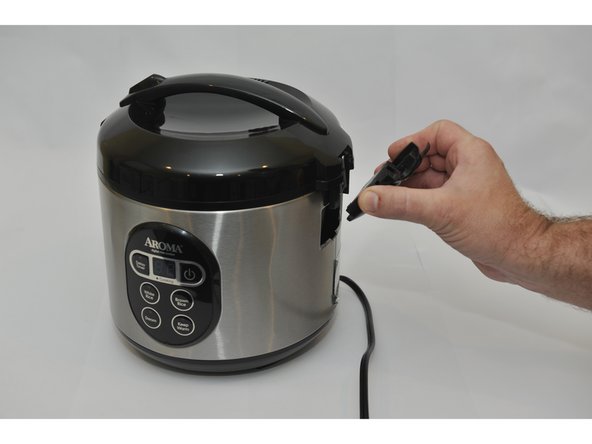
Right in the middle of making rice for dinner, the rice cooker goes out. There is no need to throw it out; this guide will walk you through how to remove your Aroma ARC-914SBD Control Module to find the problem. In 12 steps, we will walk through how to disassemble the control board in about an hour. The control panel can be reassembled using these steps in reverse order.
What you need
-
-
The first step is removing the condensation catcher in order to reach the control panel. We do this by pinching the condensation catcher as shown, on both sides and pull the condensation catcher away from the cooker.
-
-
-
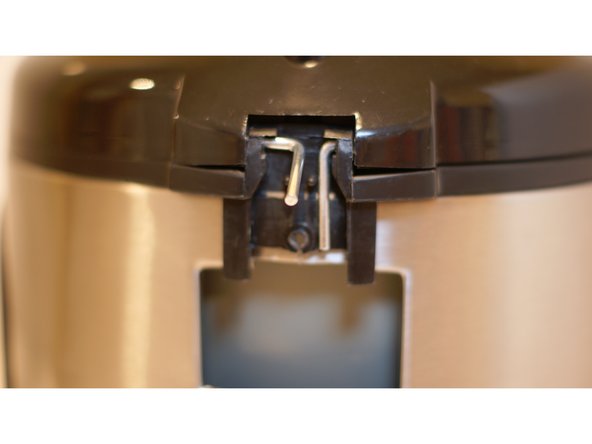
Locate the piece on the black plastic trim that is opposite from where the hinges were. Carefully, pry this piece from the bottom to get the tab from behind the stainless steel to in front of the steel as shown.
-
-
-
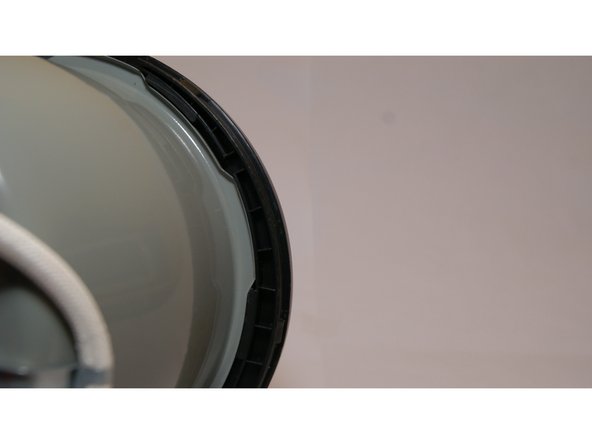
Next, you must remove the upper black trim which is connected to the inside liner with tabs. To do this you must hold the interior walls still, while rotating the trim so that the tabs line up with the slots. (tabs cannot be seen at this point, pics are to give you an idea of what you cannot see inside the device)
-


To reassemble your device, follow these instructions in reverse order.
To reassemble your device, follow these instructions in reverse order.
Cancel: I did not complete this guide.
4 other people completed this guide.
Team

USF Tampa, Team 2-3, Sullivan Fall 2015 Member of USF Tampa, Team 2-3, Sullivan Fall 2015
USFT-SULLIVAN-F15S2G3
3 Members
8 Guides authored
8 Comments
I found the problem inside the unit, a blown thermal fuse on the neutral side of the power. The inside of this unit is nothing like the pictures, but the part up to removing the black rim was accurate. This unit is an SB and apparently a lesser model of the above.
Thanks for this, very helpful. I only needed to remove the loud, horrible beeper (mission accomplished, woohoo!) although the really hard part for some reason was rotating the tabbed black ring independently of the inside liner. Coudn't get it to budge AT ALL, as if they were glued together. I could only rotate them as a unit inside the housing. After way too long working at this, I ended up wedging a flathead into the crevice between the ring and liner, from the inside, at the two points where I could see the tabs through the hole on the outside, then just twisted the screwdriver and snapped off the tabs one at a time. There are two more tabs on the other side of the ring, but these just slide out once the first two are gone, and the liner can be easily removed. When reassembling, the black trim fits quite snugly back onto the liner, so the unit feels as solid as it did before the operation. Thanks again!
Dave,
I also plan to remove beeper, did you just cut it out or un-solder it? any issues?
thanks
jdelabar@gmail.com
I’m not Dave, but I used a vacuum desoldering tool to remove the beeper, which was easy. I think there would have been enough room to cut it out also. The only hard part was getting the black ring off and then back on.
I want one trolley module for ARC 3000SB. Where can I get. How much I have to. Pay for it approximately.
Email id pantulu.chinta@gmail.com