Introduction
The Wipac ignition system fitted to Lightweights can be improved with a bit of modern technology. While the standard system is OK when in perfect working order, the advance/retard mechanism is prone to wear, replacement points are expensive and the timing seems to flutter all over the place. This leads to erratic idle and poor high-speed performance. The solution is to fit an electronic ignition system that eliminates the points and mechanical advance/retard.
Boyer Bransden make a very neat electronic ignition system for classic motorcycles. This guide describes first how convert an AJS/Matchless Lightweight to 12V and then fit a Boyer Bransden ignition system.
What you need
-
Step 1 12V conversion parts
Careful: steps 1-6 are sourced from a guide that's marked as in-progress.
-
You will need the following parts to convert your bike to 12V:
-
12V 4Ah battery (e.g. YTX5L-BS)
-
Rubber battery strap
-
10A in-line fuse and a selection of crimp or solder terminals
-
A single-phase (2 wire) or 3-phase (3 wire) 12V regulator rated at 150W or more. A-Reg, Wassell or Podtronics all fine)
-
12V 4 ohm ignition coil
-
12V bulbs
-
12V horn (optional)
-
-
-
So, check the stator windings are free of earth with a resistance check.
-
Disconnect the three alternator wires and check the resistance from any wire to earth. You should see a reading over 10k ohms.
-
-
-
Disconnect and remove the 6V battery. Note the brown wire that went to the negative terminal; we'll be connecting the 12V battery positive terminal to it later (via a 10A fuse).
-
Disconnect and remove the rectifier, noting the brown wire that went to the rectifier negative terminal (you'll be connecting the 12V regulator to this wire later...)
-
Remove the orange, light green and white wires, as well as the resistance wire, from the main loom
-
Remove the 6V ignition coil
-
Remove the headlamp bulb, sidelight bulb, stop/tail bulb (and any other 6V bulbs)
-
-
-
Fit the regulator somewhere convenient (above or below the coil is a good option)
-
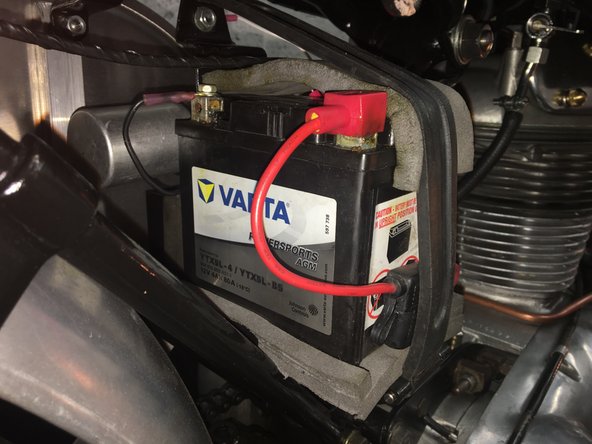
Fit the new 12V battery. The widely-available 4Ah YTX5L-BS fits in the existing tray just fine. Use a bit of foam to isolate the battery from the engine vibration and a rubber strap to hold it in place.
-
Connect a 10A inline fuse to the battery positive lead and connect the other side to the brown wire that previously went to the 6V battery negative terminal (for negative earth)
-
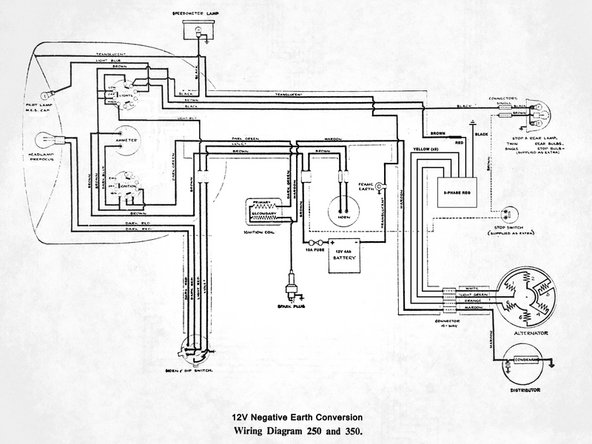
To use a single-phase regulator, you need to join the orange and light green alternator wires and connect them to one of the yellow regulator wires. The white alternator wire goes to the other yellow regulator wire. To use a 3-phase regulator, connect the yellow wires to the three alternator wires. It doesn't matter which one goes to which.
-
Connect the black wire from the regulator to earth (for negative earth)
-
Connect the red wire from the regulator to the brown wire that previously went to the rectifier (for negative earth)
-
Connect the battery negative terminal to earth (for negative earth)
-
-
-
The lights, coil and horn should all be changed for 12V items. Make sure the new coil is connected the right way round: the "-" terminal should be connected to the maroon wire that goes to the points (assuming negative earth)
-
If you wire the system for negative earth, then you can use widely-available LED bulbs
-
-
-
-
Switch the headlight on. The ammeter should show discharge. If it shows positive charge, you need to reverse the ammeter connections.
-
Switch the headlight off, put the ignition switch to "IGN" and start the engine as usual
-
The ammeter should show positive charge
-
Switch on the headlight. The ammeter should still show positive charge.
-
Check the horn and brake lights. Everything should work as normal.
-
-
-
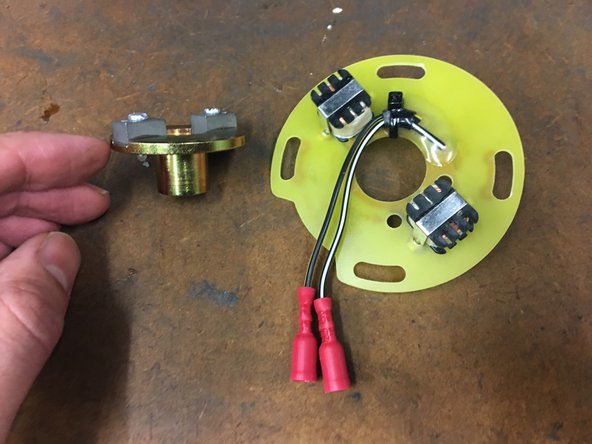
ROT00111 Rotor AJS/Matchless single
-
STA00156 NT1a 3" stator AJS/Matchless/Jubilee
-
A suitable 12V igniter box (I used a Micro Mk IV for Triumph/BSA singles)
-
In addition to the electronic ignition bits, I'd recommend fitting a new spark plug and suppressor cap (5000 ohms)
-
-
-
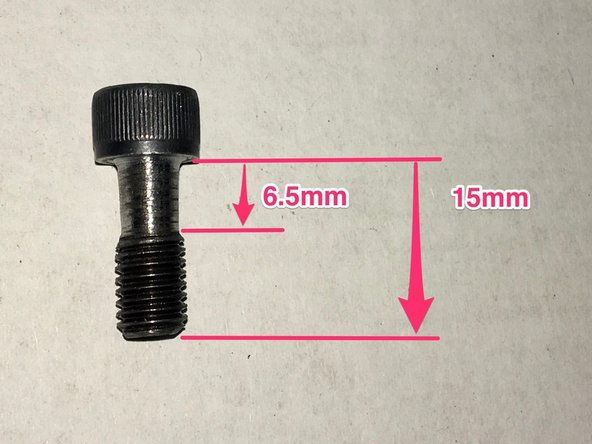
The Boyer comes with two different rotor fixing bolts
-
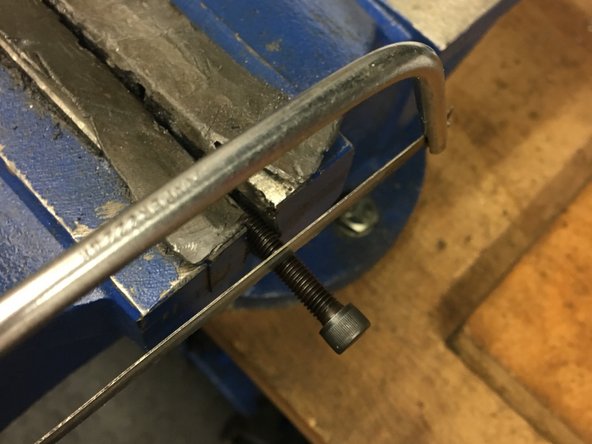
The problem here is that both the end of the camshaft and the rotor have the same thread - so the rotor won't tighten up properly onto the taper (and also makes it difficult set the timing)
-
The solution is to grind away the first 6.5mm of thread of the retaining bolt to clear the thread in the rotor so it can be tightened up properly onto the taper
-
Cut the bolt to 15mm
-
The thread in the rotor is retained so you can still use a puller to get it off the camshaft
-
-
-
Find a suitable place to fit the igniter box and connect the wires according to the instructions
-
Fix the box in place with a tie-wrap
-
-
-
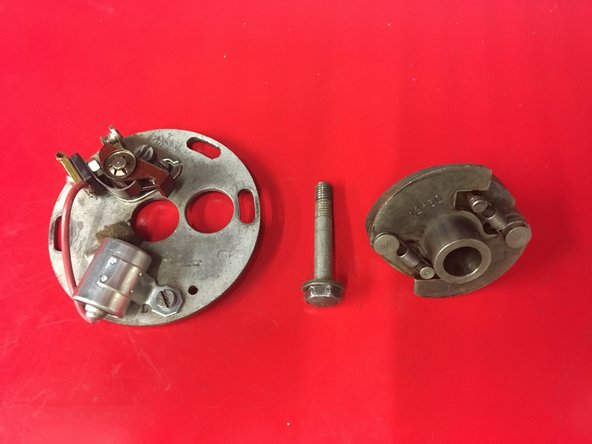
Take off the points cover
-
Remove the points plate screws and lift the plate away
-
Remove the advance/retard mechanism retaining bolt
-
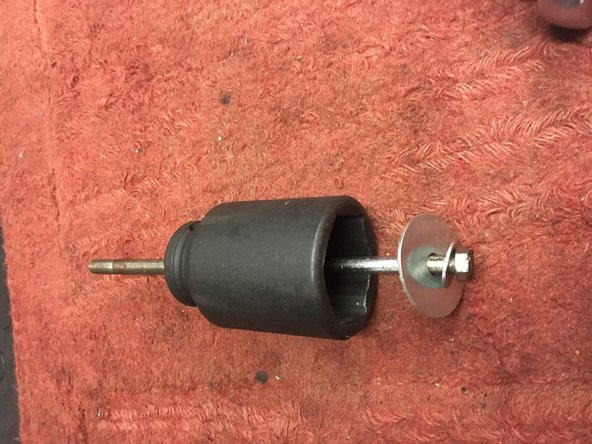
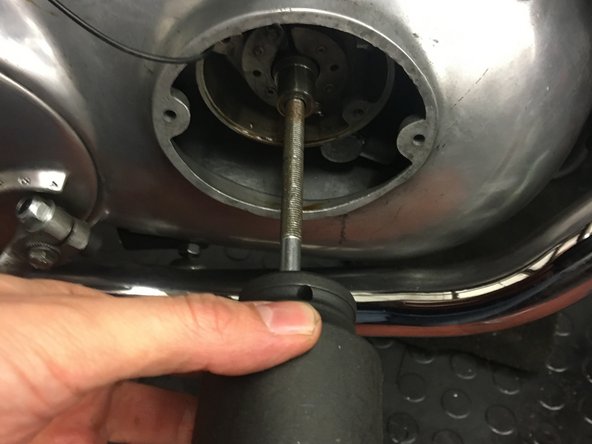
To remove the advance/retard mechanism from its taper, you will need a suitable puller
-
Screw the puller bolt into the end of the advance/retard mechanism and use the slide hammer to shock the mechanism off its taper
-
-
-
Fit the rotor and retaining bolt. Finger tight is enough, as you will be moving the rotor to set the timing
-
Now is a good time to run the Boyer trigger wires. To make life easier, solder the ends of the trigger wires to the old points wire and pull them through the hole in the crankcase. This is much quicker than taking the outer cover off...
-
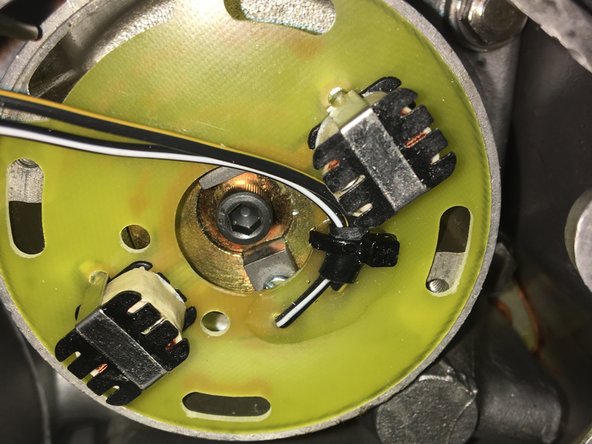
The stator plate should fit snugly into the points plate recess
-
Fasten the stator plate with the two retaining screws - just set it to the middle of the long mounting holes for now.
-
-
-
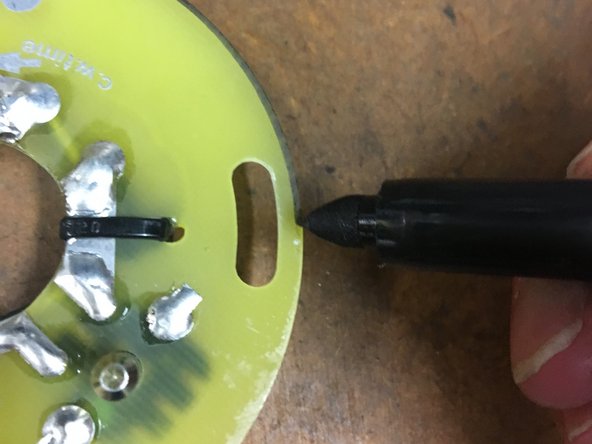
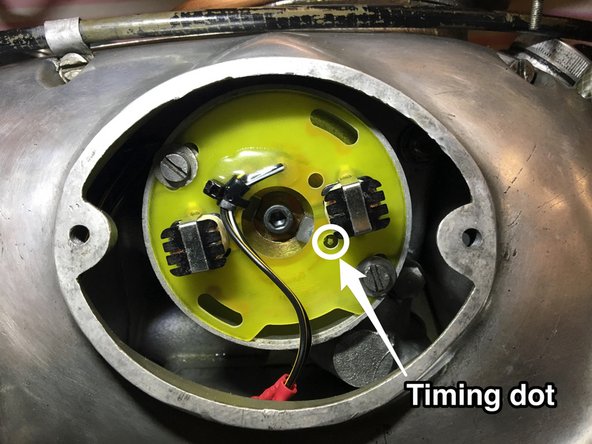
Turn the engine to exactly 1/4" BTDC (or 3/16" BTDC for a late-model CSR with a 9.5:1 piston) on the firing stroke
-
Without turning the engine, make sure the rotor fixing bolt is loose and rotate the rotor until a white timing dot appears exactly under the hole that is clockwise from the pickup coil
-
Tighten the rotor bolt, making sure the crank doesn't move. The timing is now set.
-
-
-
Fit a new spark plug
-
Switch the ignition on. You should see ~3A on the ammeter for about five seconds, before the igniter shuts off the current to the coil.
-
Start her up and go for a ride!
-
All being well, the engine should pull cleanly and run well... If it feels fine, give it a good thrashing ;-)
-
After your ride, pull the spark plug and look carefully at the earth electrode. You're looking for the heat "telltale" mark to be close to the bend. Closer to the plug body = too advanced. Closer to the tip = too retarded. The plug shown in the picture is about right.
-
You now have a spare Wipac points plate and advance/retard mechanism. These are almost impossible to find second-hand. Hopefully you won't need them again!
-