This translation may not reflect the most recent updates from the source guide. Help update the translation or view the source guide.
Introduction
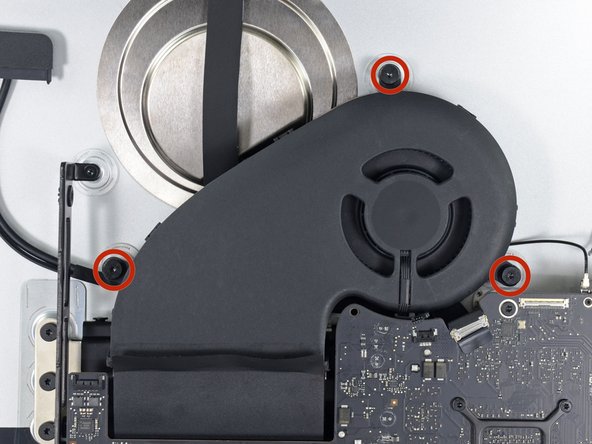
按照这个指南移除SATA连接线
“在开始做工作之前,先拔掉电脑和按下电源按钮,用10秒钟的时间来释放电源的电容器。”
“要非常小心”,不要触碰电容器的引线或电源后面的任何暴露的焊接接头。只能拿着逻辑板的边缘
What you need
-
-
如果铰链可以自由移动,iMac就会失去平衡,难以开展工作。修理时可以让iMac躺下,但使用iMac维修楔子会更快更容易。
-
如果你使用的是 iFixit纸板服务楔子,请按照 装配说明将其组装起来。
-
-


为了重新组装你的设备,请按照指示进行反向操作,并安装我们的[指南|15624|Adhesive Strips Guide]来重新连接显示器玻璃。
为了重新组装你的设备,请按照指示进行反向操作,并安装我们的[指南|15624|Adhesive Strips Guide]来重新连接显示器玻璃。
Cancel: I did not complete this guide.
7 other people completed this guide.
Special thanks to these translators:
60%
Hong is helping us fix the world! Want to contribute?
Start translating ›


5 Comments
Did you ever find it? I agree with the "!@#$ "
Hi Rovipq,
I found out that the part number for the cable is: Apple No. 923-00092 for an iMac 5k late 2014 with internal SSD Drive only (No Fusion Drive!).
The cable was a while available at iFixit but I actually it's out of stock. This is really a !&&* of a work and I don't know if I can manage it so easily... Maybe I will go for the external SSD via USB :-)