
1987-1993 Kawasaki Ninja 500 Oil Change

What you need

  1. 1987-1993 Kawasaki Ninja 500 Oil Change, 1987-1993 Kawasaki Ninja 500 Oil Change: step 1, image 1 of 3 1987-1993 Kawasaki Ninja 500 Oil Change, 1987-1993 Kawasaki Ninja 500 Oil Change: step 1, image 2 of 3 1987-1993 Kawasaki Ninja 500 Oil Change, 1987-1993 Kawasaki Ninja 500 Oil Change: step 1, image 3 of 3
    • If your bike has a front lower cowling, you must remove it to perform the oil change.

    • Begin by locating the center stand peg. It is located behind the the left foot peg and just below the exhaust pipe.

    • Mount the bike and raise the kickstand.

    • Use your left foot to apply pressure to the center stand peg and rock the bike backwards onto the center stand.

    • If you have a fork and swing arm stand, you may use these to raise your bike instead of the center stand.

  2. 1987-1993 Kawasaki Ninja 500 Oil Change: step 2, image 1 of 2 1987-1993 Kawasaki Ninja 500 Oil Change: step 2, image 2 of 2
    • Locate the oil filter and 17 mm hex oil drain plug. The oil filter is facing forward off the front of the engine, along its center line. The oil drain plug is on the bottom of the engine, below the oil filter.

    • Place the oil drain pan under the oil drain plug and oil filter.

    • Be sure to position the drain pan so that it will catch the oil when it is streaming out of the pan.

  3. 1987-1993 Kawasaki Ninja 500 Oil Change: step 3, image 1 of 3 1987-1993 Kawasaki Ninja 500 Oil Change: step 3, image 2 of 3 1987-1993 Kawasaki Ninja 500 Oil Change: step 3, image 3 of 3
    • Always wear protective gloves and eyewear when working with motor oil. Be careful if your bike has been running recently as the engine and exhaust may be very hot. Keep rags or towels nearby to wipe up any spills.

    • Use a 17 mm box end wrench or socket to turn the oil drain plug counter-clockwise until you can turn it by hand.

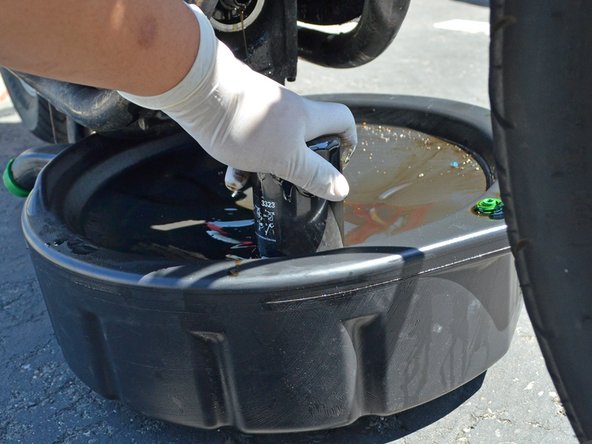
    • Finish removing the oil drain plug by hand and allow the oil to drain. Loosening the oil fill cap either before or after removing the drain plug will help drain the oil faster.

    • Watch the draining oil for shiny specks. These specks may be metal flakes which could indicate a serious problem with your engine.

  4. 1987-1993 Kawasaki Ninja 500 Oil Change: step 4, image 1 of 2 1987-1993 Kawasaki Ninja 500 Oil Change: step 4, image 2 of 2
    • Remove the oil filter by turning it counter-clockwise by hand.

    • If the filter is too tight to loosen by hand, use an oil filter wrench. A wrench that fits over the top of the oil filter is ideal, as there is very little space on the sides of the oil filter.

    • Place the oil filter in the oil drain pan with the threads facing down.

  5. 1987-1993 Kawasaki Ninja 500 Oil Change: step 5, image 1 of 2 1987-1993 Kawasaki Ninja 500 Oil Change: step 5, image 2 of 2
    • Once the draining oil has slowed to a drip, clean the area around the drain plug hole with a clean towel or rag and replace the oil drain plug.

    • Screw in the oil drain plug by hand, turning it clockwise as far as possible. Finish tightening the drain plug by using a 17 mm box end wrench or socket.

    • Only tighten the drain plug until it is snug. Over-tightening the oil drain plug can strip the threads or crack the oil pan.

  6. 1987-1993 Kawasaki Ninja 500 Oil Change: step 6, image 1 of 3 1987-1993 Kawasaki Ninja 500 Oil Change: step 6, image 2 of 3 1987-1993 Kawasaki Ninja 500 Oil Change: step 6, image 3 of 3
    • Wipe off all the oil from the engine's oil filter gasket face and threads using a clean rag or towel.

    • Put on a clean glove and dip your finger in a new bottle of oil.

    • Spread clean oil around the entire gasket of the new oil filter.

    • Wipe off any excess oil from your hands/fingers when you are done as the oil may make handling the filter or tools difficult.

  7. 1987-1993 Kawasaki Ninja 500 Oil Change: step 7, image 1 of 2 1987-1993 Kawasaki Ninja 500 Oil Change: step 7, image 2 of 2
    • Place the threaded end of the oil filter onto the engine's oil filter threads, then turn the filter clockwise by hand until it is snug. Tightening the filter should require a moderate amount of your strength, but not all of it.

    • If the filter is difficult to turn at the beginning of its threads, stop! You may be cross threading the oil filter. Re-align the oil filter and try again.

    • Do not over-tighten your oil filter by using a wrench. Doing so may cause the oil filter seal to leak and will make removing the oil filter very difficult in the future.

    • Remove the oil drain pan from under the bike.

  8. 1987-1993 Kawasaki Ninja 500 Oil Change: step 8, image 1 of 3 1987-1993 Kawasaki Ninja 500 Oil Change: step 8, image 2 of 3 1987-1993 Kawasaki Ninja 500 Oil Change: step 8, image 3 of 3
    • Locate the oil filler cap. It is on the right side of the bike, on top of the clutch cover.

    • Remove the oil filler cap by turning it counter-clockwise until you can pull it away from the clutch cover.

  9. 1987-1993 Kawasaki Ninja 500 Oil Change: step 9, image 1 of 3 1987-1993 Kawasaki Ninja 500 Oil Change: step 9, image 2 of 3 1987-1993 Kawasaki Ninja 500 Oil Change: step 9, image 3 of 3
    • Place a funnel in the oil filler hole.

    • Pour 3.6 quarts of 10W-40 motorcycle oil into the engine. Use one hand to stabilize the funnel to prevent spills.

    • Be sure to use motorcycle specific oil. There are special additives in these oils, that car oils don't have, for maintaining the bike's clutch and transmission.

    • Consult your owner's manual if you think your operating conditions call for a different oil viscosity.

    • Remove the funnel and place the oil filler cap back over the oil filler hole. Turn the cap clockwise until it is snug.

  10. 1987-1993 Kawasaki Ninja 500 Oil Change: step 10, image 1 of 2 1987-1993 Kawasaki Ninja 500 Oil Change: step 10, image 2 of 2
    • Rock the bike forward off of its center stand and hold it straight up and down.

    • Look at the oil level view port, located at the bottom of the clutch cover. The oil level should be between the two notches or completely full.

    • Be sure that you are not on an incline such as a drive way. The incline will give false oil level readings.

    • This is not your actual oil level, but a pre-check to make sure the engine will not run dry when you first start it. The oil level will drop slightly after the first run when oil fills the new oil filter.

    • Add oil if the oil level is below the bottom notch.

    • Place the bike back on its kickstand.

  11. 1987-1993 Kawasaki Ninja 500 Oil Change: step 11, image 1 of 1
    • Start the bike and check it for leaks. If there are leaks, shut the bike off and determine if the drain plug or filter need to be tightened, or if a part has been damaged.

    • After running the engine for a few minutes, let it cool down for at least an hour and re-check the oil level. If the oil level completely fills the oil level view port you will need to drain some of the oil. If the oil level is below the bottom notch you will need to add oil.

    • Allow 12-24 hours for all the oil to drain out of your old oil filter.

    • Take your old oil and filter to a recycling facility. Most auto parts stores and repair shops accept these at no charge. In addition, some cities and/or counties have a service where they will collect used oil and filters from your home. For more information, see the American Petroleum Institute's web page on used motor oil collection and recycling.

Finish Line

3 other people completed this guide.

Phillip Takahashi

Member since: 08/22/11

86,617 Reputation

87 Guides authored

One Comment

After filling the oil, determining an accurate oil level, the oil should be warm as it expands. Let the bike run for 2 or 3 min, then check the level and oil from there.

Kc Baxter - Reply

Add Comment

View Statistics:

Past 24 Hours: 0

Past 7 Days: 2

Past 30 Days: 17

All Time: 8,668