Introduction
本教程指南描述了如何拆解三星盖乐世S6。
What you need
-
-
加热三星盖乐世S6的电池盖。
-
用一个屏幕吸盘工具拉起电池盖。(注意:电池盖用强力粘合胶粘附在机身后部,在本步骤不要急于求成。)
-
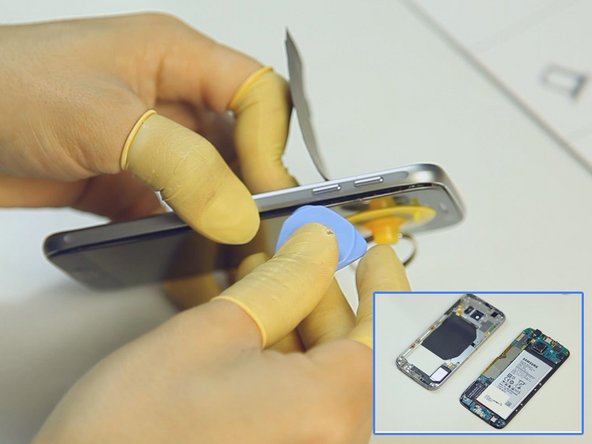
用塑料撬片将电池盖与机身分离。
-
-
-
卸下固定后壳的13颗螺丝。
-
加热LCD组件。
-
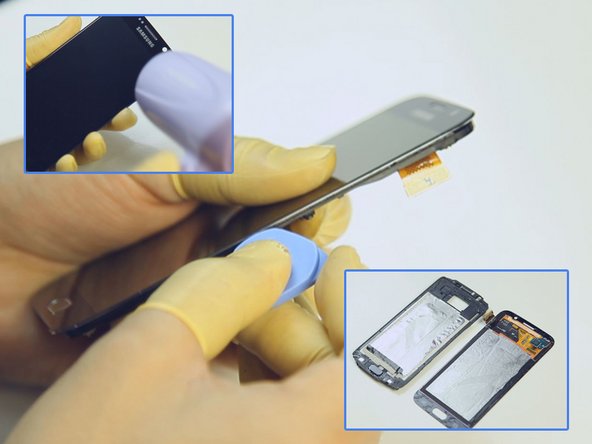
使用吸盘工具及塑料撬片从LCD组件上分离下后壳。(注意:请务必小心不要损伤粘附在电池上的无线充电薄膜。)
It’s often a PIN on your bootup screen unlock security will face a brand new SIM card with the owner of a brand new handset. Packaging materials http://dailycome.com/how-to-change-or-di...
-
-
-
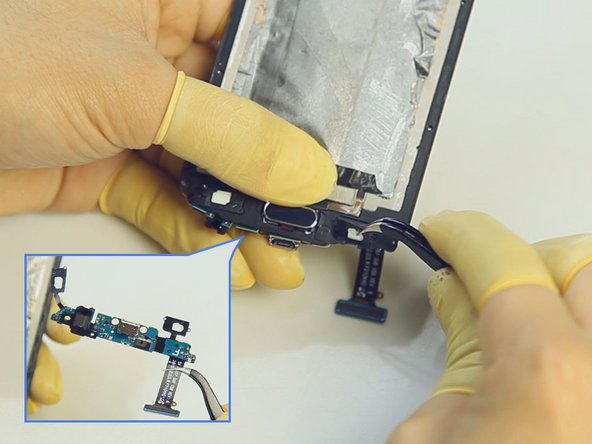
卸下电源键扁平线。
-
卸下音量键扁平线。
-
卸下侧边按键。(注意:盖乐世S6电源键和音量键是相互兼容的。)
Excellent! !
I’m attempting to replace the battery but the rear cover is not releasing. I’ve heated the back repeatedly but the glue is holding. Not sure how much heat can be used?
Any suggestions?
Thank you.
Charles
-
-
-
-
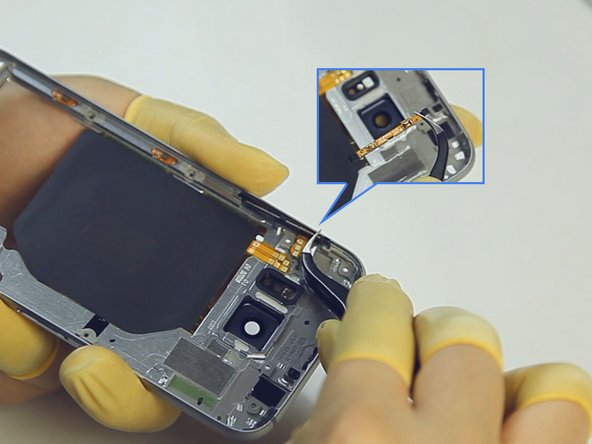
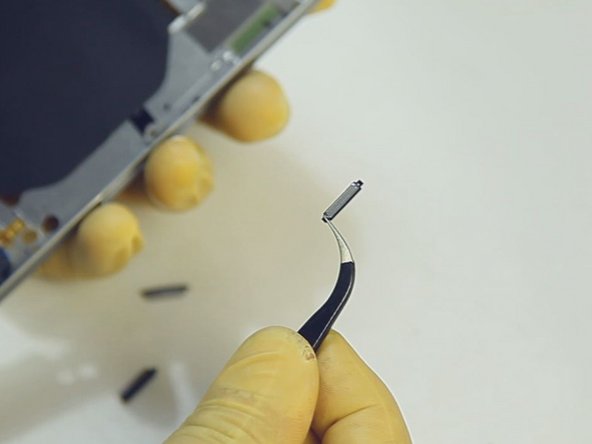
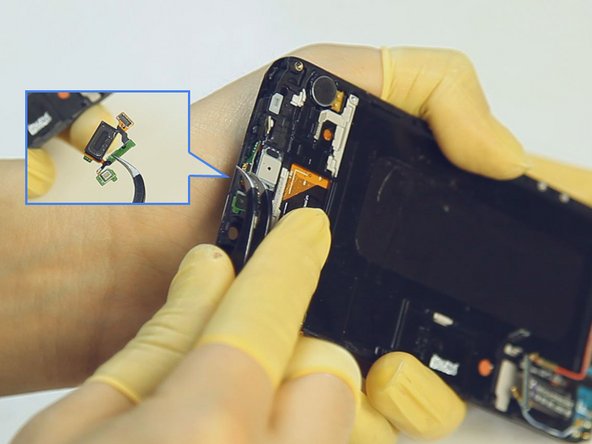
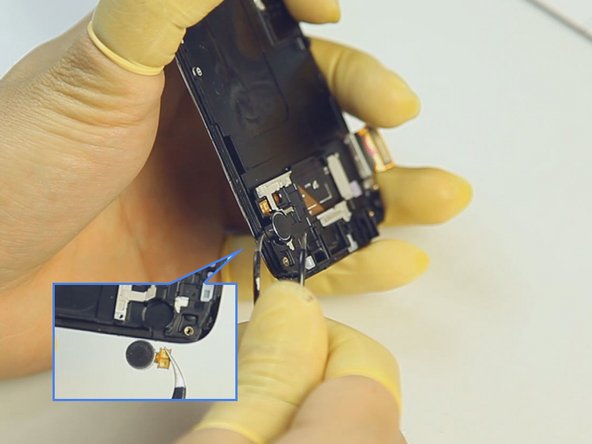
撬起并断开LCD组件连接器,前置摄像头连接器,电池连接器,听筒连接器以及home键扁平线缆连接器。
-
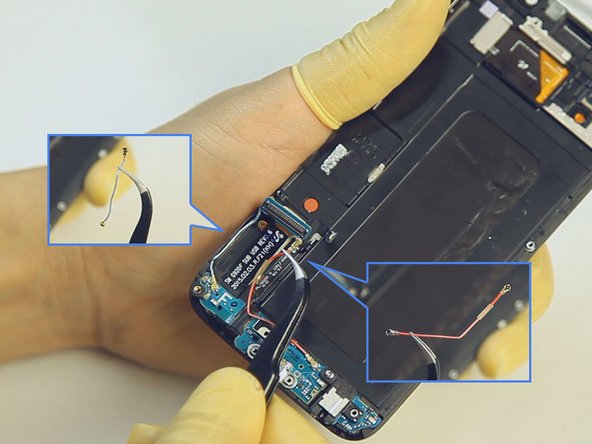
翻转主板,断开连接器。
I am more curious about the main board. Is there any in-depth description of component in main board?
-
-
-
三星盖乐世S6拆卸步骤已完成。来个全家福。
This, looks intense.
It looked quite easy to me. BTW i don't think there was any glue on the front. It looks like it is built like say the galaxy s2 with the front lcd assembly snapped in to the back. Meaning calling it a mid frame is not all that accurate. The mid frame would be the bezel of a s3 s4 etc. Where as on this you have back/battery cover and the outer back glass. Which seems to basically be only edged glued. I know what they did to break the glass on the front. They tried to pull it apart s5 style not thinking there was screws holding it in can we say a oh crap moment :p
-


Special thanks to these translators:
84%
Z.Heng is helping us fix the world! Want to contribute?
Start translating ›

20 Comments
I'm curious, what is the DAC on this phone? I know Cirrus Logic partnered with Wolfson so it could be interesting to find out.
The original author of this guide is ETrade Supply (as noted by the video itself). The video, images, and writeup were all produced and watermarked by them, though the image watermarks have since been removed via liberal cropping.
For the full and un-doctored photo set, please see:
I am trying to locate the JTAG connections - any ideas? Thanks!
Can the SIM card reader slot be removed from the logic board? Cuz my Galaxy 6 it's not reading my SIM card, thank you for the video
Hello! on the back at middle frame. without NFC ribbon are 3 more ribbons one top left side...right side one...and bottom left side one.. its says ZF-E4 on them. What are them FOR? it's a problme if a broke one?
And i have a problem. Please help me...i changed the display on my galaxy s6...everything works ok..but when i assembly on the middle frame...and i charge..it's says it's charging but not charge..the battery ramins the same.? do you know what is the problem?
My phone fell face down, it has a protective screen on it, however, the impact from the fall knocked it out. It has a previous crack on the left bottom side. But since the fall, the screen went out. I can see it light up, it rings and all, but the screen is black. Is this something that I can repair myself?
Thanks
Thanks for the video. I dropped S6 in the water sink and now battery gets hot very fast when I turn on. But I will NEVER going to buy another Samsung products again.
You dropped it in water and you blame the product . wow is all i can say
David -
¡Excelente aporte muy bien realizado!
Excellent! I may attempt to fix my GS6 now. After the Nougat OTA, my GS6 went black, would boot loop, go dead or not charge and was useless. I tried cache wipe, total reset, etc. but nothing worked. I discovered that if the phone were twisted slightly, that it would operate properly. Attached (twisted) to a board, it has been powered up now for eight hours and is still working perfectly with NO MALFUNCTIONS and is on the latest OS, Nougat 7.0 It has a poor connection internally!