This translation may not reflect the most recent updates from the source guide. Help update the translation or view the source guide.
Introduction
Меняем дисплей iPhone 4S.
What you need
-
-
Удалите следующие винты, крепящие шлейф аккумулятора к материнской плате:
-
Один 1,7 мм Phillips(крестовой)
-
Один 1,5 мм Phillips(крестовой)
-
Используйте пластиковый инструмент, чтобы отключить шлейф аккумулятора от устройства.
-
-
-
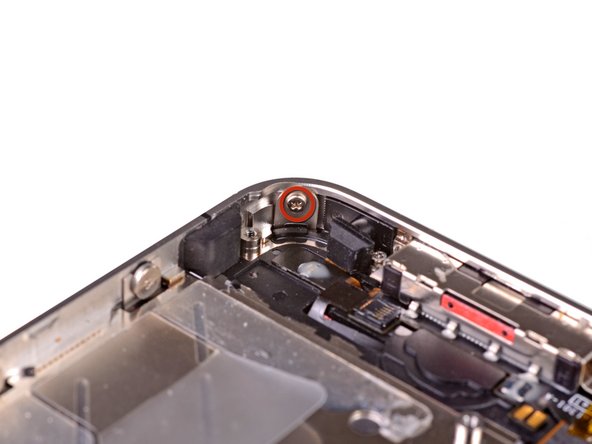
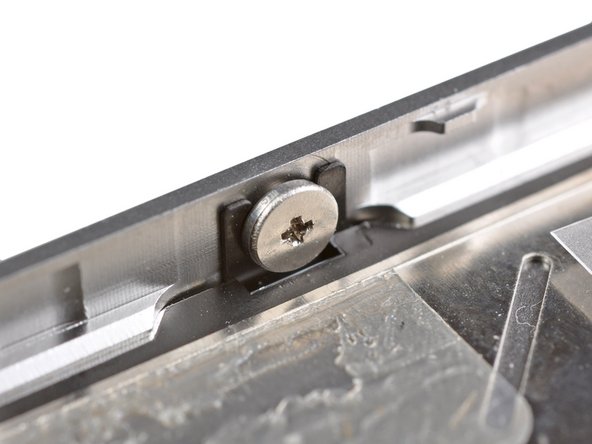
Выкрутите винты крепления шлейфа разъёма док-станции к материнской плате:
-
Один 1.5 мм Phillips(крестовой) винт
-
Один 1.2 мм Phillips(крестовой) винт
-
Удалите металлическое крепление шлейфа разъёма док-станции.
-
-
-
-
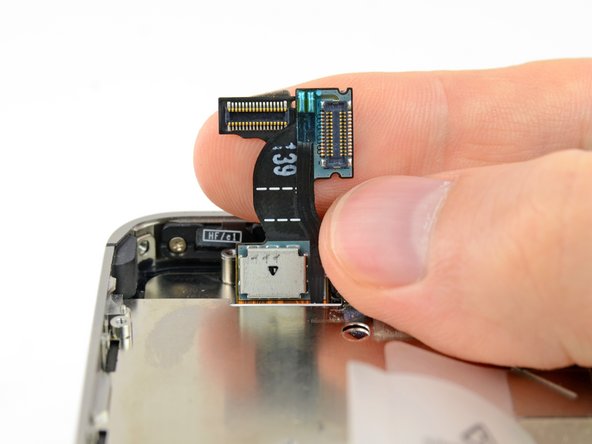
Используйте инструмент для извлечения SIM-карты или скрепку для бумаги для того чтобы открыть лоток.
-
Удалите SIM-карту и лоток.
-
-
-
Отключите 5 шлейфов в верхней части материнской платы в следующем порядке:
-
Шлейф наушников и кнопок громкости
-
Шлейф фронтальной камеры
-
Шлейф сенсора
-
Шлейф дисплея
-
Шлейф кнопки питания(расположен под шлейвом наушников и кнопок громкости, как показано на втором изображении).
-
-
-
Используйте пластиковую лопатку для удаления вибромотора.
-
Подденьте вибромотор вверх чтобы отклеить.
-
Удалите вибромотор.
-
-
-
Открутите 1.5 мм Phillips(крестовой) винт рядом с разъёмом наушников.
-
Removing the headphone jack makes it easier to access this screw, particularly during reassembly. If you're having trouble, refer to this section of the iPhone 4S Headphone Jack Cable guide to remove the headphone jack.
-
-
-
Remember to switch the home button from your old display to the new display (in most cases, this is not provided). The home button gasket is thin rubber, so care must be taken not to tear it. Also, check that the mesh for the speaker hole is present in the replacement; if not, move it over from the old display.
-
Be sure to peel off the protective backing (usually blue or pink) from the new panel before installing it.
-
If your replacement display does not come with a 7 mm clear plastic ring surrounding the front-facing camera, be sure to transfer it between the old and new display.
-
-
-
Carefully straighten the digitizer and LCD data cables, and feed them through the slot cut in the outer case. This photo shows the display assembly being installed incorrectly, with a fold in the digitizer cable.
-
-
-
During reassembly, do not touch the metallic area at the base of the LCD data cable, as this can cause problems with the LCD. If you do touch it accidentally, clean it gently with an alcohol wipe before continuing.
-
After reassembly, protect your new display from any scratches by installing a new screen protector.
-


To reassemble your device, follow these instructions in reverse order.
To reassemble your device, follow these instructions in reverse order.
Cancel: I did not complete this guide.
2740 other people completed this guide.
Special thanks to these translators:
84%


These translators are helping us fix the world! Want to contribute?
Start translating ›

162 Comments
Helpfull tip... I printed these instructions and then taped each screw to the spot in the instructions with scotch tape.
AWESOME guide - very impressed. All works but I did wind up with an extra part so I must've improved upon Apple's design. The part is a small, rectangular grounding clip (black and gold) with a single brass finger and a hole through the black part... this is NOT the one mentioned in Step 26. Not sure from where it came off & not inclined to dig back into it - but would love to know where it was from. It's 1:30 am here and I may be overlooking something idiotic... any help would be much appreciated. Thanks again, Jim
Turns out my "extra" part was the one that James Molyneux mentioned, which comes out as part of Step 5. (The clip provides a bit of extra ground contact between the back of the WiFi antenna and the rear case.) Again, totally awesome instructions - thanks!