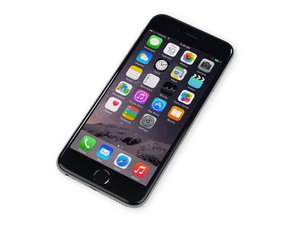
Repair information and guides for the iPhone 6 that was released on September 19, 2014. Model Numbers: A1549, A1586, and A1589

4994 Questions View all

Tips on replacing my lightning port and head phone jack!

I am receiving my part from ifixit on Monday and I am going to replace the charging port assembly because my phone was dropped in water and i put it in a damp-rid/rice mixture and left it for 5 days, when i took it out and tried to charge it the phone came on and worked beautifully but when i took the charger out it was corroded. The damp-rid has gotten in the charging port and i have tried everything to get it out, so i am replacing it. I just need some tips on what to do to not mess up the signal and the phone itself as this seems to be a difficult repair.

Answer this question I have this problem too

Is this a good question?

Score 0
Add a comment

2 Answers

Most Helpful Answer

@troyailes95 " damp-rid/rice mixture and left it for 5 days" one more testament to prove that rice does not work. It is not a tool to be used for electronic repair. It does not work! It only provides a false sense of accomplishing something. As you have seen for yourself, it did not fix your phone and had you waste valuable time in which corrosion took over. I am glad you are going to replace the corroded part. Please do keep in mind that all this corrosion will continue to work against you unless you clean the complete phone.

The major issue with your phone will be failure by corrosion damage. The very first thing I would do is to disassemble it by following these guides. Take a careful and close look at all components and connectors. Truly assess the damage. Look for major corrosion, evaluate the pins in the connectors etc,. Take a look at all connectors as well as cable ends. After that I would suggest that you clean it a couple of times in sterile water, not drinking water. Use a soft brush and clean it very, very thoroughly with the sterile water. To properly clean the board you will have to remove all the EMI shields. Once you got the gross contamination cleaned, use 90%+ isopropyl alcohol and clean your parts some more. For a proper cleaning, use this guide. It was written for a Apple iPhone 3G but it is still pertinent to your phone as well. I can not stress the importance of a good cleaning enough, so do it over and over while replacing the alcohol after each cleaning. Do not use compressed air for the cleaning since that can drive liquid as well as corrosion particles into areas that will cause trouble later on. Do not use drinking water, if you need to use water, use sterile water. Also, you do not need to leave it to dry for a day. Isopropyl alcohol in the higher concentration will evaporate quickly and dissipate the water. The importance here is the cleaning. Do not forget to replace the battery. This is a must and not an option. It will fail if you do not take care of it now. To replace the lightning connector use this guide. Study it before you work on your phone. Read through it a couple of times to make sure that you understand the steps. Always keep in mind that water damage is the hardest to troubleshoot and to repair.

iPhone Image

Guide

Repairing iPhone Liquid Damage

Difficulty:

Difficult

1 - 2 hours

iPhone 6 Lightning Connector Assembly Image

Guide

iPhone 6 Lightning Connector Assembly Replacement

Difficulty:

Difficult

1 - 2 hours

Was this answer helpful?

Score 1
Add a comment

Just disassemble it and follow the guide carefully. Go slow and be very careful.

Was this answer helpful?

Score 0
Add a comment

Add your answer

Troy Ailes will be eternally grateful.
View Statistics:

Past 24 Hours: 0

Past 7 Days: 0

Past 30 Days: 0

All Time: 122